Posted on

Kitchen Gadgets That Are Actually Worth the Space

Top kitchen gadgets worth buying.

We’ve all been there: staring at a cluttered kitchen drawer filled with “as-seen-on-TV” contraptions that have more dust on them than actual seasoning. It’s easy to fall into the trap of impulse buying, treating your kitchen budget like a high-risk speculative stock without doing any of the due diligence first. But here’s the thing—just like a well-diversified portfolio, your kitchen needs a strategy. You don’t need everything under the sun; you just need the right assets that actually move the needle on your cooking efficiency. Finding the few kitchen gadgets worth buying is less about mindless consumption and more about making high-impact investments that yield a delicious return on your time and effort.

In this guide, I’m cutting through the marketing fluff to bring you my curated list of five essential tools. I’ve applied the same analytical rigor I used on Wall Street to these picks, ensuring each one offers maximum utility for your culinary lifestyle. We’re going to dive into the heavy hitters that act as the bedrock of a functional kitchen, helping you streamline your meal prep and elevate your flavors without breaking the bank. Get ready to stop wasting capital on clutter and start investing in tools that truly pay dividends every single time you preheat the oven.

Table of Contents

The High-Yield Chef's Knife
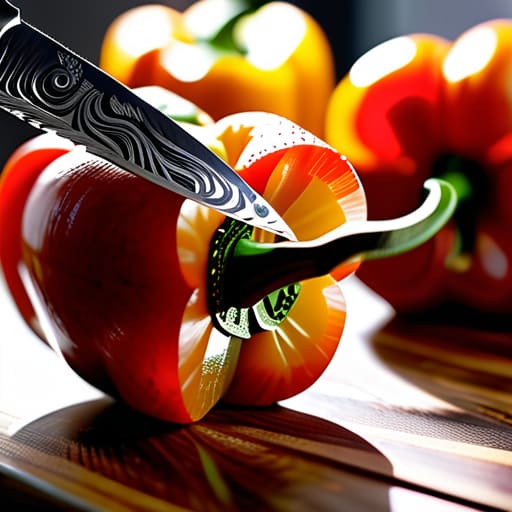
The High-Yield Chef's Knife for efficient cutting.

If you’re still hacking away at your vegetables with a dull, serrated multipurpose blade, we need to have a serious talk about your return on investment. In the financial world, we talk about efficiency and minimizing friction, and that is exactly what a high-quality, forged chef’s knife does for your kitchen workflow. It’s not just a tool; it’s your most reliable asset, the one piece of equipment that works harder for you than any other.

The Cast Iron Workhorse

The Cast Iron Workhorse seasoned skillet.

I like to think of a seasoned cast iron skillet as the compound interest of the culinary world. It starts off simple, maybe even a little rough around the edges, but as you continue to use it, it actually gets better with age. Every time you sear a steak or bake a cornbread, you’re adding a layer of “interest” to that non-stick seasoning, making it more valuable over time rather than depreciating like your cheap Teflon pans.

The Digital Instant-Read Thermometer

The Digital Instant-Read Thermometer for steak.

We’ve all been there: you’ve spent forty dollars on a beautiful ribeye, only to realize you overcooked it by ten degrees because you were “eyeballing it.” In my old life on Wall Street, we called that unnecessary risk exposure. Relying on guesswork when you’re dealing with high-quality ingredients is a recipe for a net loss, and quite frankly, your taste buds deserve better than a gamble.

The Versatile Dutch Oven

If I were building a diversified portfolio, the Dutch oven would be my heavyweight index fund. It’s incredibly versatile, capable of handling everything from slow-simmered stews to crusty sourdough bread and even deep-frying. It isn’t a niche tool meant for one specific task; rather, it’s a broad-market powerhouse that covers a wide range of culinary “sectors” with ease.

The Reliable Immersion Blender

Sometimes, you don’t need a massive, expensive kitchen overhaul to see massive gains in productivity; sometimes, you just need a strategic tactical move. An immersion blender is exactly that—a compact, high-efficiency tool that eliminates the messy, time-consuming step of transferring hot liquids into a traditional blender. It streamlines your workflow, allowing you to pivot from cooking to serving with much higher operational efficiency.

The Bottom Line: Cooking Up a Smart Kitchen Budget

Treat your kitchen gear like a diversified portfolio; focus on high-quality “blue chip” tools that offer long-term durability rather than chasing every trendy, single-use gadget that’ll end up gathering dust.

Always calculate your “cost per use” before hitting the checkout button—a pricey chef’s knife is a high-yield investment if you use it daily, but a fancy bread maker is a liability if it just sits on your counter.

Prioritize versatility to maximize your ROI, opting for multi-functional tools that expand your culinary repertoire without cluttering your financial or physical space.

The ROI of Your Kitchen

“Don’t let your kitchen drawer become a graveyard of impulse buys; instead, treat every gadget like a strategic investment—if it isn’t going to increase your culinary efficiency or provide a high daily dividend of joy, it’s just overhead you don’t need.”

Madeline Thompson

Investing in Your Culinary Future

At the end of the day, choosing the right kitchen tools is a lot like building a diversified investment portfolio. You don’t need every shiny new gadget on the market to see a return; instead, you need a few high-quality assets that do the heavy lifting. Whether it’s that precision chef’s knife that saves you time every single morning or a versatile Dutch oven that acts as your culinary cornerstone, the goal is to prioritize long-term utility over fleeting trends. By focusing on items that offer both durability and efficiency, you aren’t just spending money—you are strategically allocating your capital to improve your daily quality of life.

Remember, the most important ingredient in any kitchen—and any successful financial plan—is the confidence to take action. Don’t let the fear of a “bad purchase” keep you from upgrading your lifestyle or your skills. Start small, invest in the essentials, and watch how those incremental improvements compound over time. Just like a well-managed savings account, a well-equipped kitchen provides a sense of security and creative freedom that grows richer with every meal you prepare. Now, go grab that spatula, whip up something incredible, and remember that you are the chef of your own destiny.

Frequently Asked Questions

Is it actually more cost-effective to invest in premium gadgets upfront, or am I better off sticking to budget options and upgrading later?

Think of it like building a diversified portfolio. Buying a bunch of cheap, “budget” gadgets is like scattering pennies across low-yield savings accounts; you’ll constantly be replacing them, which drains your capital through frequent “transaction costs.” I’m a firm believer in the “Buy Once, Cry Once” philosophy. Investing in premium tools upfront is like buying a high-quality index fund—it’s a higher initial outlay, but the long-term dividends in durability and performance are massive.

How do I distinguish between a "must-have" tool that adds real value and a trendy gadget that's just going to gather dust in my pantry?

Think of it like evaluating a stock: you want to look at the utility versus the hype. Before you swipe that card, ask yourself if the tool solves a recurring problem or just looks pretty on a countertop. A “must-have” is like a high-yield savings account—it works for you every single day. If it only performs one niche trick you’ll use once a year, it’s just a speculative bubble. Don’t let your pantry become a graveyard of bad investments!

Are there any specific high-quality items that offer the best "return on investment" for someone trying to meal prep on a tight budget?

If you’re meal prepping on a budget, think of your kitchen tools as your capital expenditures. The absolute best ROI comes from a high-capacity slow cooker or an Instant Pot. They turn “cheap” cuts of meat into gourmet meals with minimal oversight, saving you both time and money. Pair that with a set of durable, airtight glass containers. It prevents “food waste leakage”—which, in financial terms, is basically just throwing your hard-earned cash in the trash.
Posted on

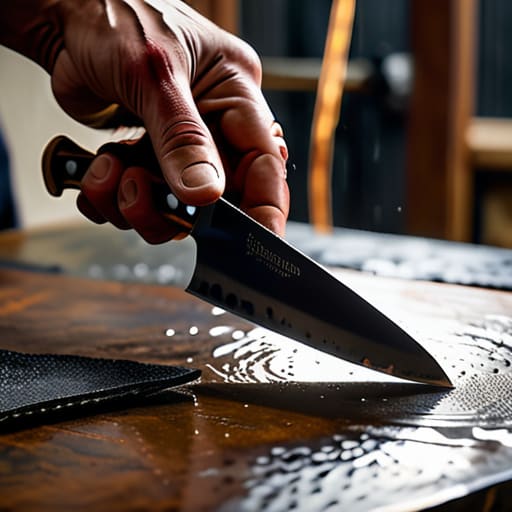
How to Sharpen Your Tools and Keep Them Working

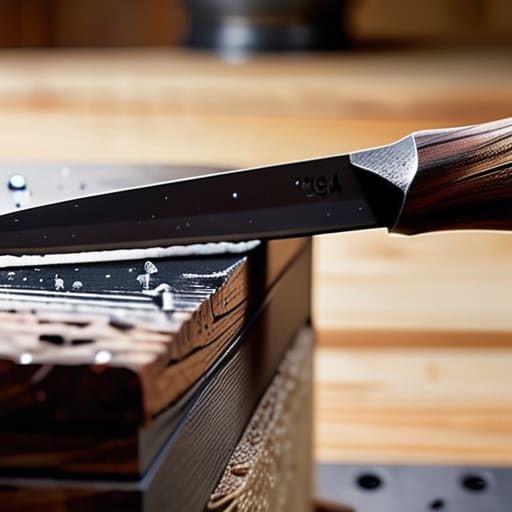
Guide on how to sharpen tools.

I was halfway through prepping a batch of mirepoix for my food truck’s signature stew when my chef’s knife decided to quit on me, hacking away at a carrot like it was trying to saw through a piece of old lumber. It was frustrating, messy, and—honestly—a total waste of expensive ingredients. Most people think that when your equipment gets dull, you just need to buy a newer, flashier model, but that’s just throwing money down the drain. The truth is, learning how to sharpen tools isn’t about spending more; it’s about protecting the assets you already have. Much like managing a high-yield portfolio, maintaining your gear is the secret to long-term efficiency and avoiding those costly, last-minute replacements.

In this guide, I’m stripping away the complicated jargon to give you a straightforward, no-nonsense blueprint for getting your edges back. We’re going to walk through the essential techniques and the right equipment so you can stop struggling with blunt blades and start working with precision and ease. Whether you’re in the kitchen or tackling a DIY project, I promise you’ll walk away with the confidence to keep your tools performing at their absolute peak.

Table of Contents

Guide Overview

Total Time: 30-60 minutes per tool
Estimated Cost: $30-80
Difficulty: Beginner

Tools & Supplies

  • Chisel (flat edge metal tool)
  • Utility Knife (replaceable blade tool)
  • Combination Whetstone (1 unit)
  • Honing Oil or Water (1 bottle)
  • Leather Strop (1 unit)
  • Microfiber Cloth (1 unit)

Step-by-Step Instructions

  • 1. First things first, you need to gather your equipment, which is basically your financial toolkit. You can’t expect a smooth result if you’re trying to sharpen a high-end chef’s knife on a piece of sidewalk concrete. Grab a high-quality whetstone, a honing steel, and a damp cloth to keep things steady. Think of this like setting up your workstation before a big market day; if your setup is messy, your execution will be too.
  • 2. Once you’ve got your gear, it’s time to prep your stone. Most whetstones need to be soaked in water for about 10 to 15 minutes until the bubbles stop rising. I like to think of this as building your liquidity; you need that water to act as a lubricant so you aren’t creating unnecessary friction and heat. If you skip this, you’re essentially trying to run a business without a cash reserve, and things are going to get messy fast.
  • 3. Now, let’s get into the actual angle. This is where most people trip up, but it’s the most crucial part of the process. Hold your knife at a consistent angle—usually about 15 to 20 degrees—against the stone. It’s all about consistency and discipline. If your angle is wobbling all over the place, you’re just wasting your energy and your resources, much like diversifying into bad investments without a clear strategy.
  • 4. Start with the coarse side of the stone to do the heavy lifting. Use gentle, sweeping motions, moving the blade from the heel to the tip, making sure you’re covering the entire edge. You’ll feel a slight “burr” forming on the opposite side of the blade; that’s your signal that you’re actually making progress. Don’t get discouraged by the resistance; just like tackling a complex tax return, it takes a little elbow grease to get it right.
  • 5. Once you feel that burr, flip the knife over and repeat the process on the other side. You want to refine that edge using the finer side of the whetstone. This is the “polishing” phase, where we turn a rough draft into a finalized masterpiece. It’s a lot like fine-tuning your monthly budget—you’ve done the big cuts, and now you’re just smoothing out the edges to ensure everything runs perfectly.
  • 6. After you’ve finished sharpening, give your blade a quick test. A simple way to do this is to see if it can cleanly slice through a piece of paper or a ripe tomato without tearing. If it catches or drags, you might need to go back and spend a little more time on that refinement stage. Remember, a dull tool is a liability, both in the kitchen and in your career.
  • 7. Finally, clean your knife thoroughly and dry it immediately to prevent any rust. Wipe down your whetstone as well so it’s ready for your next session. Keeping your tools in top shape is just smart asset management. If you take care of your tools today, they’ll take care of you when the dinner rush—or a big career opportunity—hits.

Mastering Whetstone Sharpening Techniques for a Flawless Edge

Mastering Whetstone Sharpening Techniques for a Flawless Edge

Now, if you really want to level up from a hobbyist to a pro, we need to talk about the heavy lifting: whetstone sharpening techniques. Think of a whetstone like a high-yield savings account; it requires a bit more patience and consistent “deposits” of effort, but the compound interest on your blade’s performance is massive. When you’re working the stone, the most critical factor is finding that perfect sharpening angle for different tools. If you’re working on a delicate paring knife, you want a shallower angle, whereas a heavy cleaver needs a bit more grit to bite into.

Don’t mistake this for your daily maintenance, either. I often get asked about honing steel vs sharpening stone, and here’s the breakdown: a honing steel is like a quick daily check of your budget to keep things aligned, while the whetstone is the deep-dive audit that actually fixes the structural issues. Mastering the stone is what truly ensures maintaining blade edge longevity, preventing that dreaded “dullness fatigue” that makes cooking feel like a chore rather than a joy.

Honing Steel vs Sharpening Stone Choosing Your Perfect Ingredient

Honing Steel vs Sharpening Stone Choosing Your Perfect Ingredient

Now, I see a lot of people get caught up in the debate of honing steel vs sharpening stone, and honestly, it’s a bit like choosing between a quick snack and a slow-cooked reduction. They aren’t actually the same thing! Using a honing steel isn’t about removing metal to create a new edge; it’s more about realigning the microscopic teeth of the blade that have folded over during use. Think of it as a quick “rebalancing” of your budget—it doesn’t add new funds, but it keeps everything organized and ready for action.

On the other hand, if your blade has truly lost its bite, you need to go back to the fundamentals with a stone. This is where you’re actually grinding away tiny amounts of metal to reshape the edge entirely. While a steel is great for daily maintenance, a stone is your heavy hitter for maintaining blade edge longevity over the long haul. If you try to rely solely on a steel for a dull knife, you’re essentially trying to fix a massive deficit with nothing but loose change; eventually, you’re going to need to sit down and do the real work.

Pro-Tips for a Sharp Edge (And a Sharp Mind)

  • Don’t skimp on the quality of your stone. Just like you wouldn’t try to build a high-growth portfolio using penny stocks, using a low-grade, uneven whetstone will only frustrate you and potentially ruin your blades. Invest in a solid medium-grit stone; it’s the “diversified index fund” of sharpening tools—reliable and effective for almost everything.
  • Consistency is your best friend, whether you’re maintaining a steady angle on a knife or staying consistent with your monthly savings contributions. If your angle wobbles, your edge will too. Find that sweet spot—usually around 15 to 20 degrees—and hold it like your life depends on it.
  • Always keep your tools lubricated during the process. Whether you’re using water for a whetstone or oil for a specialized stone, skipping this step is like trying to run a business without any cash flow—everything just grinds to a halt and creates unnecessary friction.
  • Respect the “Mise en Place” of sharpening. Before you even touch the stone, clear your workspace, prep your water, and ensure your knife is clean. You wouldn’t start a complex reduction sauce in a cluttered, messy kitchen, so don’t attempt precision sharpening in a chaotic environment.
  • Listen to the feedback from your tools. A good sharpening session has a rhythm, much like the predictable patterns in a market cycle. If you feel the blade “catching” or skipping, you need to adjust your pressure or your angle. Tuning in to these subtle cues is what separates a hobbyist from a pro.

The Secret Sauce to a Sharp Edge

Treat your tools like your capital—invest in high-quality sharpening equipment now to prevent the “costly” headache of replacing dull, damaged blades later.

Think of sharpening as your essential mise en place; taking the time to prep your tools properly ensures that your actual “cooking” (or working!) is efficient, precise, and stress-free.

Don’t confuse honing with sharpening; one is like a quick daily budget check to keep things tidy, while the other is the deep-dive financial audit that actually rebuilds your edge from the ground up.

The ROI of a Sharp Blade

“Think of sharpening your tools like managing your overhead: it might feel like a distraction from the actual work, but if you don’t invest that time in your foundation, you’re just going to end up with a lot of wasted effort and a very dull bottom line.”

Madeline Thompson

The Final Prep: Investing in Your Edge

The Final Prep: Investing in Your Edge

At the end of the day, whether you’re choosing between a honing steel for quick maintenance or committing to the deep work of a whetstone, you’re essentially performing essential capital expenditure for your kitchen. We’ve covered how to select your tools, the nuances of different stones, and the precise techniques required to achieve that razor-sharp finish. Just like managing a diversified investment portfolio, you can’t just set it and forget it; you need consistent, mindful maintenance to ensure your tools don’t lose their value over time. If you treat your knives with the same respect you treat your financial budget, you’ll find that they serve you reliably through every high-pressure service and home-cooked feast.

Mastering your tools is about more than just clean cuts; it’s about building the confidence to execute your vision without friction. I’ve learned from both the trading floor and the food truck that the best results come when you have the right foundation in place. Don’t be intimidated by the learning curve—think of it as investing in your future self. Once you nail this technique, you aren’t just sharpening steel; you’re sharpening your ability to perform at your peak. Now, grab those blades, get to work, and go create something absolutely delicious.

Frequently Asked Questions

How often should I actually be sharpening my knives, or am I over-investing my time in maintenance?

Think of sharpening like your monthly budget: you don’t need to overhaul everything every single day, but you can’t ignore it until you’re broke. For most, honing with a steel should be a daily ritual to maintain the edge, while actual stone sharpening usually happens every few months. Don’t over-invest your time and wear down your “capital” too fast, but don’t wait until your knife is useless to take action!

Is it worth spending the extra capital on high-end professional sharpening services, or can I master this at home with a decent budget?

Think of this like choosing between a high-yield savings account and a quick cash grab. If you’re working with heirloom knives—your “blue chip” assets—investing in a professional service is worth the capital to protect that value. However, for your daily drivers, mastering it at home is a massive ROI. Learning the skill yourself is like building an emergency fund; it gives you long-term independence and saves you serious overhead in the long run.

I’ve noticed my blades feel "off" even after sharpening—could I be using the wrong angle, similar to how a bad recipe balance ruins a dish?

Spot on! You’ve hit the nail on the head. Think of your sharpening angle like the seasoning in a delicate sauce—if you overdo it or get the ratio wrong, the whole thing falls apart. If your angle is inconsistent, you’re essentially adding too much salt; you might be hitting the edge, but you’re ruining the “flavor” of the cut. Precision is everything, whether you’re balancing a budget or maintaining a perfect 15-degree bevel.

Posted on

How to Clean Up Your Digital Life in a Weekend

Guide on how to clean up your digital life.

Ever feel like your laptop is less of a tool and more like a kitchen pantry that hasn’t been organized since the mid-nineties? I’m talking about that overwhelming, sinking feeling when you open a folder and find a chaotic mess of half-finished spreadsheets, blurry food photos, and “Final_Version_v4” documents that are definitely not final. Most productivity gurus will try to sell you some expensive, high-tech software to automate your way out of the chaos, but let’s be real: you don’t need a fancy subscription to learn how to clean up your digital life. You just need a solid system and a little bit of discipline, much like prepping your mise en place before the lunch rush hits.

I’m not here to give you a lecture or a list of complicated apps that will just become more clutter. Instead, I’m going to share the exact, no-nonsense framework I used to transition from a cluttered Wall Street workstation to running a streamlined gourmet food truck. We’re going to tackle your digital mess with the same precision I use to balance a budget or season a risotto. By the end of this, you’ll have a clear, manageable plan to reclaim your focus and optimize your digital workspace for actual success.

Table of Contents

Mastering Email Inbox Zero Strategy With Chef Like Precision

Mastering Email Inbox Zero Strategy With Chef Like Precision

If your inbox looks like a kitchen after a chaotic dinner rush—counters covered in scraps, dishes piled high, and no clear workspace left—it’s time to implement an email inbox zero strategy. Think of your unread messages like unwashed prep bowls; if you let them sit, they just get harder to clean. Instead of letting them accumulate, try the “one-touch” rule. When you open an email, you must immediately decide: delete it, archive it, or turn it into a task. This prevents that heavy sense of managing digital overwhelm that hits you every time you glance at your phone.

To keep things running smoothly, I like to treat my folders like a well-organized spice rack. You wouldn’t throw salt, cumin, and cinnamon into one giant, unlabeled jar, right? Categorize your emails by project or urgency so you can find exactly what you need without digging through the junk. By treating your inbox with this kind of culinary discipline, you aren’t just clearing space; you’re reclaiming your mental bandwidth for the things that actually taste good—like your career goals and your actual life.

Cleaning Up Smartphone Clutter to Savor Your Daily Moments

Cleaning Up Smartphone Clutter to Savor Your Daily Moments

Think of your smartphone like a crowded prep station during a dinner rush. If your counter is covered in half-used spices, wilted herbs, and random utensils, you’re going to burn the main course. The same goes for your phone; if every swipe leads to a notification from an app you haven’t used since 2021, you aren’t just losing storage, you’re losing mental bandwidth. Cleaning up smartphone clutter starts with a ruthless audit. If an app doesn’t serve a purpose or bring you genuine joy, delete it. It’s much like trimming the fat off a prime cut of steak—it might feel wasteful at first, but it leaves you with something much higher in quality.

Once you’ve cleared the physical space, focus on minimizing screen time by curating your digital environment. Turn off those non-essential pings that act like unwanted interruptions in a recipe. When your phone only speaks to you when it truly matters, you regain the ability to be present. This isn’t just about organization; it’s about protecting your most valuable asset: your attention.

Prepping Your Digital Pantry: 5 Steps to a Leaner, Meaner Online Workflow

  • Audit Your Subscription “Ingredients”: Just like you wouldn’t keep a jar of expired spices in the back of your pantry, stop paying for digital subscriptions you no longer use. Go through your bank statement—think of it as a recipe audit—and cut out those monthly streaming services or app memberships that are just draining your capital without adding any flavor to your life.
  • Organize Your Cloud Storage with Mise en Place: In a professional kitchen, everything has a specific place so you aren’t hunting for a whisk mid-service. Apply that same logic to your Google Drive or iCloud. Create a clear folder hierarchy so you aren’t wasting precious mental bandwidth (and time, which is money!) digging through a mountain of unsorted files.
  • Curate Your Social Media Feed Like a Tasting Menu: If your social media feed is full of negativity or noise, it’s like eating a meal that’s way too salty—it just leaves a bad taste in your mouth. Unfollow accounts that don’t nourish your mind or career goals. You want a curated stream of content that actually adds value to your daily “diet.”
  • The Great Desktop Purge: A cluttered workspace leads to a cluttered mind, and a cluttered digital desktop is the ultimate productivity killer. At the end of every week, treat your desktop like a prep station; clear away the stray files, empty the trash, and make sure you’re starting Monday morning with a clean, professional surface ready for high-stakes work.
  • Secure Your Digital Vault: Think of your passwords as the secret recipes of your business—you wouldn’t leave them lying around on a counter for anyone to see. Invest in a reputable password manager to consolidate your security. It’s the ultimate way to protect your digital assets and ensure your “financial kitchen” stays locked down and secure.

The Secret Sauce to a Streamlined Digital Life

Think of your digital files like a pantry; if you don’t organize your ingredients and toss the expired stuff, you’ll spend more time searching than actually cooking up your best work.

Just like you wouldn’t serve a dish with a cluttered presentation, don’t let notification overload ruin your focus—curate your digital environment so you can savor the moments that actually matter.

Treat your digital cleanup like a slow-simmered reduction; it takes consistent, small efforts over time to boil away the excess and leave you with something rich, potent, and high-value.

The Secret Ingredient to Digital Clarity

“Think of your digital clutter like an overstuffed pantry full of expired ingredients; you can’t cook up a high-growth career or a balanced life if you’re constantly tripping over old files and useless notifications. Clean out the junk so you have the space to focus on the high-quality assets that actually nourish your goals.”

Madeline Thompson

Serving Up Your Digital Success

Serving Up Your Digital Success through organization.

At the end of the day, cleaning up your digital life isn’t about achieving some impossible standard of perfection; it’s about mise en place. Just like you wouldn’t try to sauté a complex reduction in a kitchen filled with dirty dishes and unorganized spice racks, you can’t expect to focus on your big career moves or manage your investments if your digital workspace is a chaotic mess. We’ve looked at how tackling your inbox and streamlining your smartphone can act as the essential prep work for a more productive, intentional life. By clearing out the digital noise, you’re effectively reclaiming the mental bandwidth you need to focus on what actually moves the needle in your bank account and your happiness.

I want you to remember that this process is a marathon, not a sprint. You don’t have to reorganize your entire digital existence in a single afternoon, just like you wouldn’t try to master a five-course tasting menu on your first try. Start small, be consistent, and treat your digital habits with the same care and attention you give to your favorite recipe. Once you’ve cleared away the clutter, you’ll find that you have so much more room to cook up something truly spectacular in your professional and personal life. You’ve got the tools, you’ve got the recipe, and now it’s time to get cooking.

Frequently Asked Questions

How do I decide which old files are "expired ingredients" that need to be tossed and which ones are worth saving for a rainy day?

Think of your digital files like a pantry full of spices. You wouldn’t keep a jar of paprika that’s been sitting open for three years, right? It’s just taking up space and won’t add flavor to your life. Ask yourself: “If I needed this for a ‘big recipe’—like a tax audit or a career pivot—would it actually be useful, or is it just stale data?” If it doesn’t serve your current goals, toss it.

Is there a way to automate my digital cleanup so it doesn't feel like I'm stuck doing dishes every single night?

Think of automation as your kitchen’s food processor—it does the heavy lifting so you don’t have to chop everything by hand. You can set up “rules” in your email to auto-sort newsletters into a “Read Later” folder, or use apps like IFTTT to automate file backups. It’s like setting a slow cooker; you prep it once, walk away, and let the system handle the tedious work while you focus on the big picture.

Once I've cleared out the clutter, how can I maintain this level of organization without it becoming a full-time job?

Think of it like mise en place. You wouldn’t wait until the dinner rush to start chopping your onions, right? To keep this momentum, you need a “maintenance recipe.” Set aside fifteen minutes every Friday—call it your weekly kitchen reset—to file away documents and prune your subscriptions. If you treat organization as a small, routine prep task rather than a massive deep-clean, you’ll keep your digital pantry stocked and ready without ever breaking a sweat.

Posted on

How to Organize Your Garage in a Single Weekend

Tips on how to organize your garage.

I remember standing in my driveway last summer, staring at a mountain of rusted garden tools and half-empty paint cans, feeling that familiar, sinking sensation in my gut. It wasn’t just the clutter; it was the sheer financial drain of knowing I’d bought replacements for things I couldn’t even find under the chaos. Most “experts” will try to sell you on those $500 custom-built modular shelving units or high-tech storage systems that look great in a catalog but bleed your bank account dry. But let’s be real: learning how to organize your garage shouldn’t require a Wall Street budget or a degree in interior design.

I’m not here to give you a superficial makeover that falls apart the moment you try to park the car. Instead, I’m going to show you how to approach your space with the same strategic precision I used when auditing spreadsheets or prepping a complex reduction sauce. We are going to implement a high-yield, low-cost system that treats your storage like a well-managed asset. By the end of this, you’ll have a streamlined, functional space that actually works for your life—without the unnecessary overhead.

Table of Contents

Mastering the Menu Your Essential Garage Decluttering Checklist

Mastering the Menu Your Essential Garage Decluttering Checklist

Before you start tossing things into heavy-duty bins, you need to treat this like a high-stakes kitchen prep session. You wouldn’t start sautéing without checking your pantry first, right? Grab a notepad and create your own personalized garage decluttering checklist to categorize everything into three piles: keep, donate, or toss. Think of this as your “audit phase”—just like reviewing your quarterly expenses, you need to see exactly what’s taking up space before you decide what’s actually worth the investment.

Once you’ve cleared the clutter, it’s time to talk about the layout. If you’re working with limited square footage, you really need to focus on maximizing small garage space by looking up. I’m a huge advocate for vertical wall storage ideas; think of it as utilizing your spice rack instead of letting everything pile up on the countertop. By installing sturdy garage shelving systems, you’re essentially creating a structured “mise en place” for your gear. This keeps your floor clear and ensures that your most important tools are always within arm’s reach, just like a chef’s favorite knife.

Savoring the Space Maximizing Small Garage Space With Elegance

Savoring the Space Maximizing Small Garage Space With Elegance

If your garage feels more like a cramped pantry than a functional workspace, don’t panic—we’ve all been there. When you’re working with limited square footage, you have to stop thinking about the floor and start thinking about the walls. I like to view maximizing small garage space much like optimizing a tiny commercial kitchen: if you don’t utilize your vertical real estate, you’re essentially leaving money (and precious room) on the table.

One of my absolute favorite garage storage solutions is investing in heavy-duty vertical wall storage ideas, such as slatwalls or pegboards. By getting your gear off the ground and up onto the walls, you clear the “floor traffic” and make the entire area feel more breathable. Think of it as plating a dish; when everything is neatly arranged and visible, the whole experience feels more premium and much less chaotic. Whether you’re hanging bikes or organizing garage tools, the goal is to create a streamlined system that works for you, rather than you constantly fighting against the clutter.

The Secret Sauce: 5 Pro-Tips for a High-Yield Garage

  • Categorize like a professional chef. Just like you wouldn’t store your vanilla extract next to the garlic powder, don’t mix your holiday decorations with your power tools. Group your items into “stations”—gardening, automotive, sports—so you aren’t hunting through a messy pantry every time you need a specific tool.
  • Invest in vertical shelving to boost your ROI. Think of floor space as your most expensive real estate; don’t let it go to waste on clutter! By utilizing heavy-duty wall racks and overhead storage, you’re essentially “leveraging your assets” to create more room for what actually matters.
  • Implement a “First In, First Out” (FIFO) system for your supplies. Whether it’s seasonal car wax or outdoor pesticides, keep your older stock toward the front. This prevents your supplies from “spoiling” or becoming obsolete, ensuring you’re always using your inventory efficiently.
  • Use clear bins for total transparency. In the financial world, we love a clear audit trail, and your garage is no different. Using transparent containers allows you to see exactly what’s inside at a glance, saving you the time and “transaction cost” of opening every single box to find that one specific wrench.
  • Schedule regular “financial audits” for your gear. Every few months, do a quick sweep to see what’s actually providing value. If you have tools or equipment that are just sitting there collecting dust, it’s time to liquidate them! Sell them online or donate them to keep your garage’s “cash flow” of space moving smoothly.

The Secret Sauce to a Stress-Free Garage

Treat your garage organization like a high-stakes budget; if you don’t account for every “ingredient” (or item) you own, you’ll end up with a messy deficit that costs you time and sanity.

Think of vertical storage as your kitchen’s spice rack—by utilizing wall space instead of letting everything pile up on the floor, you’re maximizing your square footage just like a pro chef in a tiny bistro.

Don’t let your garage become a “sunk cost” of forgotten junk; implement a regular audit to ensure you’re only investing space in the items that actually add value to your life.

The Secret to a Balanced Garage

“Think of your garage like a high-stakes kitchen: if you’re constantly digging through a cluttered pantry just to find the salt, you’re wasting more than just time—you’re wasting your most valuable asset. Organizing your space isn’t just about tidiness; it’s about prepping your environment so you can execute your life with precision and zero wasted overhead.”

Madeline Thompson

Serving Up Your Success

Serving Up Your Success with organized storage.

At the end of the day, organizing your garage is a lot like balancing a complex recipe; it requires the right ingredients, a bit of patience, and a solid plan. We’ve gone through the essential decluttering checklist to clear out the expired “ingredients” of your past, and we’ve looked at how to maximize your square footage with the same elegance I use when setting a small bistro table. By treating your storage like a well-oiled kitchen station, you aren’t just moving boxes around—you are actively reducing the mental overhead that comes with chaos. Remember, a streamlined space is the ultimate way to protect your most valuable asset: your time.

I know that looking at a mountain of clutter can feel as overwhelming as staring at a massive, unpaid credit card statement, but don’t let the scale of the task scare you off. Just like building a retirement fund or mastering a difficult soufflé, the secret is to take it one small, manageable step at a time. Once you’ve reclaimed this space, you’ll find that the sense of order spills over into your career and your finances, too. So, grab your metaphorical apron, roll up your sleeves, and start building a life that is as organized and delicious as it is financially sound. You’ve totally got this!

Frequently Asked Questions

How do I decide which "expired" items to toss and which ones are still worth keeping in my inventory?

Think of this like auditing your pantry before a big dinner service. You wouldn’t serve a sauce that’s gone sour, right? Apply that same logic here. If an item is broken, outdated, or hasn’t been touched in two years, it’s “spoiled” inventory—toss it. But if it’s just a bit dusty but still functional, it’s like a high-quality spice that just needs a new jar. Keep the essentials, cut the waste, and protect your bottom line!

What are some budget-friendly ways to build storage systems without breaking the bank like a high-end kitchen remodel?

Think of this like building a gourmet meal on a grocery-store budget; you don’t need truffle oil to make it delicious. Skip the expensive custom cabinetry and look toward “pantry staples” like heavy-duty plastic bins or pegboards from the hardware store. They’re incredibly versatile and much cheaper than built-ins. You can even upcycle old wooden crates for a rustic, organized look. It’s all about smart sourcing—maximizing your ROI without the luxury price tag.

How can I maintain this organization long-term so my garage doesn't end up in a state of "financial and physical clutter" again?

Think of long-term organization like maintaining a high-end kitchen: you can’t just prep once and walk away. To avoid that “clutter bankruptcy,” you need a routine. I swear by the “One In, One Out” rule—it’s like managing a strict food budget. If you bring in a new power tool, an old one has to go. Schedule a monthly “audit” to reset your systems, ensuring your physical space stays as balanced as a well-managed portfolio.

Posted on

How to Find the Hidden Expenses Draining Your Budget

Guide on how to find hidden expenses.

Ever feel like your bank account is a recipe where someone secretly swapped out the premium ingredients for cheap fillers? You’re working hard, your income is steady, yet at the end of the month, your savings feel as thin as a poorly made consommé. Most “experts” will tell you to download some complex, high-priced software to track every cent, but honestly, that’s just adding unnecessary overhead. Learning how to find hidden expenses isn’t about high-tech gadgets; it’s about having the discipline to audit your own pantry. It’s about spotting those tiny, recurring subscriptions and “convenience fees” that act like salt in a dish—you don’t notice them one by one, but suddenly, the whole thing is ruined.

I’m not here to give you a lecture or a complicated spreadsheet that requires a PhD to navigate. Instead, I’m going to show you how to audit your finances with the same precision I use to prep a gourmet menu. We are going to strip away the fluff and identify the financial leaks that are draining your hard-earned cash. By the end of this, you’ll have a clear, actionable plan to reclaim your budget and start cooking up the future you actually deserve.

Table of Contents

Uncovering Phantom Expenses Hiding in Your Monthly Menu

Uncovering Phantom Expenses Hiding in Your Monthly Menu

Think of your bank statement like a mystery basket of ingredients you didn’t actually order. You sit down to enjoy your hard-earned paycheck, only to realize some “phantom ingredients” have been sneaking into your kitchen for months. I’m talking about those tiny, automated withdrawals that feel insignificant in the moment but act like a slow leak in a pressurized sauce pan. Tracking monthly subscription costs is the first step to reclaiming your kitchen. Whether it’s that fitness app you haven’t opened since January or a streaming service you only use for one specific documentary, these recurring micro-transactions are the seasoning that’s accidentally overpowering your entire financial flavor profile.

To really get to the bottom of this, you need to start analyzing spending patterns with the precision of a pastry chef measuring flour. Grab your coffee, pull up your mobile banking app, and look for the outliers. Are you being nickeled and dimed by service charges? Are you paying for premium tiers you don’t actually need? Once you identify these leaks, you aren’t just cutting costs; you’re clearing the clutter so you can finally invest in the high-quality ingredients—like that dream vacation or a house down payment—that actually matter to you.

Tracking Monthly Subscription Costs Like a Master Chef

Tracking Monthly Subscription Costs Like a Master Chef

Think of your monthly subscriptions like those little garnishes on a plate that look pretty but end up making the dish way too expensive. We’ve all been there—you sign up for a streaming service for that one specific docuseries, and suddenly, three years later, you’re still paying for it every single month. Tracking monthly subscription costs is exactly like auditing your pantry; you wouldn’t keep buying expensive truffle oil if you realized it was just gathering dust in the back of the cupboard, right?

To get a handle on this, I recommend a mini personal finance audit every thirty days. Grab your banking app and scan for those recurring “micro-transactions” that seem harmless in isolation. It’s often these small, automated bites that lead to lifestyle creep, slowly bloating your budget without you even noticing. By analyzing spending patterns through the lens of a chef checking their inventory, you can prune away the digital clutter. Once you cut out the apps and services you no longer use, you’ll find you have much more “room on the plate” to fund the things that actually bring flavor to your life.

The Secret Sauce: 5 Ways to Clean Up Your Financial Kitchen

  • Audit Your “Pantry” of Small Transactions: You know those tiny, mindless swipes at the corner store or the extra coffee run? Individually, they’re just crumbs, but collectively, they’re a massive waste of ingredients. Treat your bank statement like a grocery receipt and look for those micro-expenses that are slowly depleting your capital.
  • Check for “Expired” Memberships: Just like a forgotten jar of spices in the back of the cupboard, we all have memberships or gym passes we haven’t touched in months. If you aren’t using the service, it’s time to toss it out—don’t let your hard-earned cash go stale.
  • Scrutinize Your Service Fees: Banks and utility companies love to add “seasoning” to your bills in the form of hidden convenience fees or maintenance charges. It’s time to call them out; negotiating these fees is like perfecting a recipe—it takes a little patience, but the payoff is much sweeter.
  • Watch Out for “Ghost” Auto-Renewals: These are the sneaky ingredients that appear in your budget without your permission. Set a calendar alert for any trial period ending, so you don’t get blindsided by a full-priced subscription you never actually intended to keep.
  • Review Your “Bulk” Spending Habits: Sometimes we buy in bulk to save, but if those items are sitting there unused, you’re actually just tying up your cash in inventory that’s losing value. Make sure your big-ticket purchases are actually serving your long-term financial recipe.

The Secret Sauce to a Leaner, Tastier Budget

Treat your bank statement like a pantry audit; if you haven’t used an ingredient (or a service) in months, it’s just taking up valuable shelf space and draining your resources.

Don’t let “micro-expenses” become the bitter spices that ruin your whole meal; those tiny, daily spends might seem small, but they can quickly overwhelm your financial flavor profile if left unchecked.

Once you’ve cleared out the clutter, redirect those reclaimed funds into your “investment kitchen”—because every dollar you save from a forgotten subscription is a dollar you can use to cook up your future goals.

The Secret Ingredient to a Leaner Budget

“Finding hidden expenses is a lot like tasting a sauce that’s just a little bit off; you have to sift through the small, repetitive bites to find that one bitter ingredient that’s throwing off your entire financial flavor profile.”

Madeline Thompson

Cleaning Up Your Financial Kitchen

Cleaning Up Your Financial Kitchen budget audit.

At the end of the day, finding those hidden expenses is a lot like cleaning out a cluttered pantry. We’ve looked at how those phantom costs can quietly drain your bank account and how to audit those sneaky monthly subscriptions that are basically the unwanted spices of your budget—adding cost without adding any real flavor. By auditing your statements and being intentional about where every dollar goes, you aren’t just cutting back; you are clearing the way for the ingredients that actually matter to your long-term goals.

Remember, managing your money doesn’t have to feel like a chore or a restrictive diet. Think of this process as refining your recipe so that your financial future tastes exactly how you want it to. You have the tools, the talent, and now the blueprint to take control of your kitchen. So, take a deep breath, grab your metaphorical chef’s knife, and start carving out a life that is as rich and rewarding as a perfectly executed five-course meal. You’ve got this!

Frequently Asked Questions

What’s the best way to distinguish between a "necessary ingredient" like a utility bill and a "luxury garnish" that I can actually afford to cut?

Think of it like this: your utility bill is the base stock—without it, the whole meal falls apart. It’s essential for survival and function. A luxury garnish, like that premium streaming service or daily artisanal latte, is meant to enhance the experience, not sustain it. If your “garnish” budget is making your “base stock” ingredients go stale, it’s time to trim the sprig of parsley and focus on the hearty stuff first.

If I find a recurring expense that I can't cancel immediately, how can I pivot my budget to make sure it doesn't ruin my overall financial recipe?

Think of it like discovering a spice in your pantry that’s way too potent for the dish you’re currently cooking. If you can’t toss it out yet, you have to adjust the other ingredients to balance the flavor. I call this “rebalancing the recipe.” If that unavoidable expense is a heavy hit to your budget, trim the “garnish”—those small, non-essential impulse buys—to ensure your core financial meal stays nutritious and on track.

Are there any specific "kitchen tools"—like certain apps or spreadsheets—that you recommend for spotting these sneaky leaks before they drain my bank account?

Think of these tools as your high-end kitchen gadgets—they don’t cook the meal for you, but they sure make the prep work easier! For a hands-on approach, a custom Google Sheet is my “chef’s knife”; it’s sharp, precise, and lets you customize every slice of data. If you prefer something more automated, apps like Rocket Money or YNAB act like a sous-chef, constantly prepping and flagging those sneaky subscription leaks before they ruin your feast.

Posted on

Morning Stretches to Wake Up Your Body and Mind

Person doing morning stretches for wellness.

I used to think that if I wasn’t rolling out a designer yoga mat and spending forty minutes in a silent, incense-filled studio, I wasn’t “doing” wellness correctly. Back when I was grinding through eighty-hour weeks on Wall Street, I viewed morning stretches as just another expensive luxury I didn’t have the capital—or the patience—to invest in. I was surrounded by the hype of high-priced wellness retreats and complex routines that felt more like a chore than a benefit. But let’s be real: you don’t need a premium subscription or a fancy studio to wake up your body; you just need a little bit of strategic preparation.

I’m not here to sell you on a lifestyle overhaul that requires a massive budget and an unrealistic amount of time. Instead, I want to treat your morning routine like the essential mise en place of a professional kitchen—the small, organized steps that ensure everything runs smoothly once the heat is on. I’m going to share my no-nonsense, high-yield approach to morning stretches that will help you prime your body for the day without draining your bank account or your sanity. Let’s get your physical assets in order so you can tackle your career and your kitchen with total precision.

Table of Contents

Full Body Morning Mobility for a Balanced Start

Full Body Morning Mobility for a Balanced Start

Think of your body like a kitchen that’s been sitting idle overnight; the burners are cold, and the ingredients are a bit stiff. You wouldn’t try to whip up a complex reduction without first prepping your station, right? That’s exactly why full body morning mobility is the essential “mise en place” for your physical well-being. Instead of jumping straight into high-intensity tasks—or high-stakes spreadsheets—start with slow, deliberate movements that signal to your nervous system that it’s time to wake up.

I like to focus on movements that flow seamlessly, almost like gentle yoga for beginners, to ensure I’m not overextending before my coffee has even kicked in. We’re looking for fluidity over force here. By incorporating a few sweeping arm circles and gentle torso twists, you aren’t just waking up your muscles; you’re essentially “preheating” your system. This approach is fantastic for improving circulation with morning movement, ensuring that oxygenated blood reaches your brain so you can tackle your first meeting with the same clarity and zest you’d use to balance a delicate vinaigrette.

Stretching to Reduce Morning Stiffness With Precision

Stretching to Reduce Morning Stiffness With Precision

Think of your body like a high-end cast iron skillet that’s been sitting in a cold kitchen overnight. You wouldn’t just crank the heat to max the second you turn it on; you’d let it warm up gradually to avoid warping the metal. That’s exactly how we need to approach our muscles. Stretching to reduce morning stiffness isn’t about forcing a deep split right out of bed; it’s about that slow, steady heat that allows your joints to glide smoothly again.

If you wake up feeling like you’ve been folded into a tight storage container, don’t panic. I like to view these tight spots as “unallocated expenses” in my daily budget—they’re draining your energy before you’ve even had your first cup of coffee. By incorporating a few movements focused on improving circulation with morning movement, you’re essentially reinvesting that lost energy back into your physical “capital.” It’s about moving with intention, ensuring every reach and twist serves to loosen those tight connections, much like how a well-prepared mise en place ensures a kitchen runs without a single hitch.

The Morning Mise en Place: 5 Pro-Tips for a Smoothly Executed Routine

  • Treat your stretches like mise en place. You wouldn’t start a complex reduction without having your aromatics chopped and ready, right? Don’t dive into a deep stretch without a few minutes of gentle movement first to warm up the “ingredients” of your muscles.
  • Watch your intensity like you’d watch a delicate emulsion. If you push too hard and too fast, you’ll “break” your progress just like a broken hollandaise. Aim for a gentle pull, not a painful snap; consistency beats intensity every single time.
  • Invest in your equipment, but don’t overspend on the garnish. You don’t need a gold-plated yoga mat to see results, just like you don’t need truffle oil on every dish to make it gourmet. A simple, comfortable space is your best foundation.
  • Budget your time with discipline. Think of your morning routine as a fixed cost in your daily budget. If you don’t allocate fifteen minutes for your stretches now, you’ll end up paying the “interest” later in the form of sluggishness and back pain.
  • Listen to your body’s feedback loop. In finance, we look at market signals; in cooking, we taste for seasoning; and in stretching, we feel for tension. If a movement feels off, adjust your technique immediately rather than forcing a bad trade.

The Secret Sauce: Bringing It All Together

Think of your morning stretches as your daily mise en place; by prepping your body with intention, you’re ensuring you have the structural stability to handle whatever high-pressure “dinner rushes” your workday throws at you.

Consistency is your most valuable asset, much like compound interest in a high-yield savings account—small, daily investments in your mobility pay massive dividends in long-term physical health and energy.

Don’t overcomplicate the recipe; you don’t need a complex, hour-long routine to see results, just as you don’t need a massive capital outlay to start a smart investment strategy—start small, stay disciplined, and watch your vitality grow.

The Mise en Place of Your Body

“Think of your morning stretches as the ultimate mise en place for your physical well-being; just as you wouldn’t dream of starting a high-stakes service without your ingredients prepped and ready, you shouldn’t expect your body to perform at its peak without that essential morning prep work.”

Madeline Thompson

The Secret Sauce to a Successful Day

The Secret Sauce to a Successful Day.

At the end of the day, implementing a morning stretch routine isn’t just about flexibility; it’s about the meticulous preparation of your most valuable asset—yourself. We’ve covered everything from full-body mobility to targeted movements designed to melt away that stubborn morning stiffness. Think of these stretches as your daily mise en place. Just as you wouldn’t dream of starting a complex reduction without having your aromatics chopped and ready, you shouldn’t expect your brain and body to perform at peak capacity without first prepping your physical foundation. By taking these few intentional minutes, you are essentially auditing your body’s energy reserves and ensuring you have the liquidity to handle whatever market volatility—or life’s unexpected chaos—comes your way.

I want you to remember that consistency is the most important ingredient in any recipe for success, whether you’re building a diversified portfolio or a sustainable wellness habit. You don’t need to be a gymnast to see a massive return on this investment; you just need to show up for yourself every single morning. Treat your body with the same respect and precision you would give to a high-stakes financial plan or a gourmet recipe. Start small, stay consistent, and watch how these tiny, daily deposits into your physical well-being lead to compounding benefits that transform your entire outlook. You’ve got this, and I can’t wait to see you thrive!

Frequently Asked Questions

If I'm feeling particularly sluggish or "low on capital" one morning, can I get away with a shorter, five-minute version of these stretches without losing the benefits?

Think of this like a “quick-service” menu option. When you’re low on energy—or “capital”—you can’t always afford a full-course meal, but you definitely shouldn’t skip the meal entirely. A five-minute high-intensity stretch session is like a concentrated reduction sauce; it’s smaller, but it packs a massive punch. Focus on your biggest “assets”—the hips and spine—to get the highest ROI on your time. It’s better to invest five minutes than to go bankrupt on productivity!

Should I be performing these stretches while my body is still "cold," or is it better to wait until I've had my coffee and a little bit of movement to avoid any physical "deficits"?

Think of your body like a cast-iron skillet—you wouldn’t want to toss high-heat ingredients into a freezing pan and expect a perfect sear, right? Attempting deep stretches while “cold” is a recipe for injury. I recommend a little “pre-heat” first. Grab your coffee, do a few light laps around the kitchen, or even just some gentle movement to get the blood flowing. Once you’ve warmed up the base, you’re ready to execute your stretching routine with precision.

How do I know if I'm pushing too hard—is there a way to tell the difference between a productive, high-yield stretch and one that's actually causing damage to my "assets"?

Think of your body like a high-end kitchen budget: you want to invest in growth, not burn through your capital. A productive stretch should feel like a “good” tension—a steady, controlled pull that signals progress. But if you feel sharp, stabbing pain, that’s a red flag, like a sudden market crash. Stop immediately. If you’re pushing through pain, you aren’t building assets; you’re just incurring massive debt that your physical health will have to pay back later.

Posted on

How to Choose the Right Phone Without Overpaying

Guide on how to choose the right phone.

Have you ever walked into a tech store and felt like you were being served a menu where every single item was “premium” and overpriced, regardless of whether you actually wanted it? It’s incredibly frustrating how the industry tries to convince us that a thousand-dollar device is the only way to stay connected, treating tech specs like they’re some kind of exotic, unattainable luxury. Honestly, learning how to choose the right phone shouldn’t feel like you’re trying to decipher a complex hedge fund prospectus or a Michelin-star tasting menu just to get the basics right. We’ve been conditioned to believe that more megapixels and faster processors automatically equal a better life, but that’s often just expensive marketing fluff designed to drain your savings.

I’m here to cut through that noise and give you the straight talk you actually need. Think of this guide as your personal kitchen prep—we’re going to strip away the unnecessary garnishes and focus on the core ingredients that actually matter for your lifestyle and your budget. I promise to provide honest, experience-based advice that treats your hard-earned money with respect, ensuring you find a device that fits your daily routine as perfectly as a well-seasoned cast iron skillet.

Table of Contents

A Smartphone Operating System Comparison for Every Palate

A Smartphone Operating System Comparison for Every Palate

Now, let’s talk about the “base” of your digital meal: the operating system. Think of this like choosing between a classic, reliable sourdough starter or a complex, experimental fermented dough. On one hand, you have iOS, which is like a high-end, pre-measured meal kit. It’s seamless, intuitive, and everything works together beautifully, though you might find the options a bit limited if you like to “tweak the seasoning” yourself. On the other hand, Android is your open-concept kitchen. It offers endless customization and variety, allowing you to adjust every single setting to your specific taste, but it requires a bit more active management to keep things running smoothly.

When performing a smartphone operating system comparison, you aren’t just choosing a look; you’re choosing your daily workflow. If you’re someone who thrives on a streamlined, “set it and forget it” lifestyle, the Apple ecosystem is hard to beat. However, if you crave the freedom to mix and match different hardware and apps—much like a fusion chef blending unexpected flavors—Android is your playground. Just remember, much like a recipe, the user experience is what ultimately determines if you’ll enjoy the final result every single day.

Budget vs Flagship Phones Finding Your Sweet Spot

Budget vs Flagship Phones Finding Your Sweet Spot

Now, let’s talk about the elephant in the kitchen: the price tag. When you’re weighing budget vs flagship phones, it’s easy to feel like you’re choosing between a quick, frozen microwave meal and a slow-cooked, Michelin-star feast. Flagship models are those high-end ingredients—the truffles and saffron of the tech world. You’re paying a premium for top-tier mobile processor performance and professional-grade lenses. If you’re a content creator or a power user who never wants to see a loading screen, that investment is your secret sauce for success.

However, just because a dish is expensive doesn’t mean it’s what you need for Tuesday night dinner. For most of us, a mid-range device offers incredible value, providing a solid foundation without breaking your monthly budget. You might sacrifice a bit of camera quality vs price, but you’ll likely find that the everyday essentials—like browsing, texting, and social media—work just as smoothly. Think of it as finding that perfect, reliable cast-iron skillet: it might not be flashy, but it gets the job done perfectly every single time.

Five Ingredients for Your Perfect Tech Recipe

  • Audit your “pantry” before shopping. Before you go running to the store, take a hard look at your current phone’s performance. Are you actually running out of storage, or is your battery just hitting its expiration date? Knowing exactly what’s missing prevents you from overspending on “premium ingredients” you don’t actually need for your daily life.
  • Don’t let “flavor profiles” distract you from the specs. It’s easy to get blinded by a flashy new camera or a gorgeous screen, much like a beautifully plated dish that tastes like nothing. Make sure the core functionality—battery life and processing speed—matches your actual lifestyle before you fall in love with the aesthetics.
  • Watch your “hidden costs” like a seasoned chef watches a reduction. The sticker price of the phone is just the base cost. Remember to budget for the “seasoning”—the protective case, the high-speed charger, and maybe even a cloud storage subscription. If you don’t account for these, your tech budget will boil over way faster than expected.
  • Shop with a “seasonal” mindset regarding releases. In the tech world, new models drop like seasonal menus. If you aren’t someone who needs the absolute latest trend, waiting six months after a major launch can often land you a “discounted vintage” model that performs just as well for a fraction of the price.
  • Test the “mouthfeel” in person. You wouldn’t buy a mystery ingredient without knowing how it feels, so don’t buy a phone based solely on online reviews. Head to a store and actually hold it. Is it too bulky for your pocket? Does the interface feel intuitive? That tactile connection is the difference between a satisfied customer and buyer’s remorse.

The Secret Sauce to Your Perfect Tech Match

Don’t overpay for “gourmet” features you’ll never actually use; just like a menu, focus on the ingredients—like battery life and camera quality—that actually satisfy your daily cravings.

Treat your smartphone choice like a long-term investment in a high-yield fund; choosing a reliable OS and brand now prevents the “hidden costs” of constant troubleshooting and expensive repairs later.

Balance your tech budget with your lifestyle needs, ensuring you have enough left over in your “financial pantry” to actually enjoy the life your phone is supposed to be helping you live.

## Don't Overpay for Ingredients You Won't Use

“Choosing a phone is a lot like prepping for a big dinner party: you don’t need the most expensive, gold-leafed ingredients if you’re just making a cozy weeknight pasta. Don’t let flashy specs inflate your budget like a souffle that’s bound to fall; focus on the features that actually feed your daily lifestyle.”

Madeline Thompson

The Final Tasting

The Final Tasting of smartphone options.

At the end of the day, picking a new phone is a lot like planning a multi-course tasting menu; you have to balance the high-end ingredients with what actually serves your needs. We’ve looked at how the operating system sets the flavor profile, how the flagship models offer that decadent, five-star experience, and how budget-friendly options can provide a surprisingly satisfying meal without breaking your bank account. Remember, you don’t need the most expensive device on the market to have a premium experience. It’s all about finding that perfect equilibrium between the specs you crave and the budget you’ve set aside, ensuring you aren’t overpaying for “garnishes” you’ll never actually use.

As you step away from the screen and prepare to make your purchase, I want you to remember that this is just one small investment in your daily workflow and connection to the world. Whether you’re choosing a powerhouse for your side hustle or a reliable tool for capturing family memories, treat this decision with the same intentionality and care you would use when selecting a recipe for a special occasion. Master your tools, manage your resources wisely, and don’t be afraid to savor the process. You’ve got the recipe for success right in your hands—now go out there and make it delicious!

Frequently Asked Questions

Should I invest in a high-end model now, or is it smarter to wait for a seasonal sale to protect my savings?

Think of this like deciding whether to buy premium saffron today or waiting for a seasonal market clearance. If your current phone is “spoiled”—meaning it’s glitchy or dying—investing in a high-end model now is a necessary expense to keep your life running smoothly. But if your current device is still serving you well, patience is your best ingredient. Waiting for a sale is like letting a slow cooker do the work; it protects your capital and lets your savings grow.

How much do storage upgrades actually cost in the long run compared to just buying a model with more space upfront?

Think of storage like buying bulk ingredients. Paying that extra $100–$200 upfront for a higher-capacity model is like investing in a high-quality pantry; it’s a one-time cost that prevents “emergency grocery runs” later. Relying on cloud subscriptions is like buying pre-cut veggies—it’s convenient, but those monthly fees add up to a much higher “grocery bill” over three years. Buy the capacity you need now to avoid the subscription tax later!

Is it worth paying for the premium insurance plans, or should I just set aside a "tech emergency fund" instead?

Think of premium insurance like a pre-made gourmet sauce: it’s convenient and saves you from a kitchen disaster, but you’re paying a premium for that ease. Personally, I’m a fan of the “tech emergency fund” approach. By setting aside a little extra each month, you’re essentially building your own pantry of savings. It gives you more flexibility and keeps those monthly subscription costs from eating into your long-term financial recipe!

Posted on

How to Hang a Picture Perfectly Every Time

Guide on how to hang a picture.

I was standing in my living room last Tuesday, staring at a massive, framed landscape print and a handful of nails, feeling exactly like I did during my first week on Wall Street: completely overwhelmed by the lack of a clear strategy. Most people think that learning how to hang a picture is just about driving a nail into a wall and hoping for the best, but that’s a recipe for a disaster that’ll leave your drywall looking like a Swiss cheese board. In reality, hanging art is much more like balancing a high-stakes budget; if you don’t account for the weight and the structural foundation first, the whole thing is going to crash and burn before you even get to enjoy the view.

I’m not here to give you some overly complicated DIY lecture that requires a degree in engineering. Instead, I’m going to walk you through the practical, no-nonsense steps of how to hang a picture so that your home looks curated rather than cluttered. We’ll cover everything from measuring with precision to choosing the right hardware for your specific wall type, ensuring your investment is secure and perfectly leveled. Let’s get to work and turn that blank wall into a masterpiece.

Table of Contents

Guide Overview

Total Time: 15-30 minutes
Estimated Cost: $5-20
Difficulty: Beginner

Tools & Supplies

  • Hammer for driving nails or hooks
  • Pencil for marking the spot
  • Measuring tape for accuracy
  • Level to ensure the frame is straight
  • Picture hanging hardware (nails, hooks, or anchors) 1 pack
  • Picture frame 1 unit

Step-by-Step Instructions

  • 1. First, you need to audit your supplies like you’re checking your inventory before a lunch rush. You can’t start a recipe without the right tools, and you certainly shouldn’t start hanging art without a level, a measuring tape, a pencil, and the appropriate hardware for your specific wall type. Trying to wing it with a random nail is like trying to bake a soufflé without preheating the oven—you’re just asking for a total collapse.
  • 2. Next, let’s talk about placement, which is essentially the “plating” phase of this project. Before you even touch a hammer, use a pencil to lightly mark where you think the center of the piece should go. I always tell my friends to think of this as setting your budget—if you don’t establish your boundaries early on, you’ll end up overspending your space and leaving the room feeling cluttered and unbalanced.
  • 3. Now, it’s time to measure the “drop,” or the distance from the top of the frame to the actual hanging hardware on the back. This is the most crucial step, much like balancing acidity in a sauce; if your measurements are off by even a fraction, the whole visual composition will feel sour. Mark that exact spot on your wall so you aren’t left guessing once the nail is already in the drywall.
  • 4. Once you have your marks, select your hardware based on the “weight” of your investment. A heavy, ornate gold frame is like a high-yield bond—it requires sturdier support like a heavy-duty screw or a toggle bolt. On the other hand, a light, minimalist print is more like a quick snack; a simple finishing nail will do the trick without breaking the bank (or your wall).
  • 5. Before you commit to the final strike, grab that level and hold it against the top of your frame or the mark you’ve made. You want to ensure everything is perfectly horizontal, because a crooked picture is like a mismanaged spreadsheet—it’s a tiny error that eventually becomes a massive distraction. If the bubble isn’t centered, adjust your mark and try again.
  • 6. Finally, once the hardware is secure, carefully hang the piece and step back to view the “final presentation.” Don’t be afraid to make small adjustments; sometimes you need to pivot your strategy just like you’d tweak a seasoning to get that perfect flavor profile. Once it looks right, you can officially consider this project a successful ROI for your home decor!
Curating Your Gallery Wall Layout Ideas With Precision

Think of your gallery wall like a complex fusion dish; you can’t just toss every ingredient into the pan and hope for the best. If you want a cohesive look, you need to consider the “flavor profile” of your collection. When exploring different gallery wall layout ideas, start by grouping pieces with similar color palettes or themes to create a sense of harmony. I like to treat the largest piece as my “main course”—the anchor that dictates the flow—and then arrange the smaller frames around it like delicate garnishes.

Before you start driving nails into your drywall, I highly recommend a “dry run” on the floor. Lay out your frames exactly how you want them to appear, adjusting the spacing until it feels just right. This is your chance to audit your composition without the stress of making mistakes. Once you’re happy with the arrangement, use painter’s tape to mark the spots. This helps in avoiding wall damage, saving you from the financial headache of expensive repairs later. Remember, a little bit of prep work now ensures your final presentation is nothing short of Michelin-star quality.

Selecting Essential Picture Hanging Tools for a Flawless Finish

Selecting Essential Picture Hanging Tools for a Flawless Finish.

Before you start driving nails into your drywall, you need to prep your workstation. Think of gathering your picture hanging tools like mise en place in a professional kitchen; if you’re missing a whisk or a pinch of salt mid-recipe, the whole dish suffers. You don’t want to be halfway through a beautiful installation only to realize you’re missing a spirit level or the right screwdriver. I always keep a dedicated “decor kit” tucked away, containing a measuring tape, a pencil, and a sturdy level to ensure I’m not fighting against gravity later on.

Choosing the right wall mounting hardware is where most people—and even some seasoned pros—make a costly mistake. It’s a bit like choosing between a delicate reduction and a heavy-duty roux; you have to match the strength of your tools to the weight of your art. If you’re hanging heavy frames, don’t skimp on the quality of your anchors. Using flimsy hooks for a massive, ornate piece is a recipe for a financial and emotional disaster (and a very messy floor). Investing a few extra dollars in premium hardware is much cheaper than repairing a hole in your drywall!

The Secret Sauce: 5 Pro-Tips for a Picture-Perfect Finish

  • Don’t wing it—measure twice and drill once. Just like you wouldn’t eyeball the amount of salt in a delicate reduction, you can’t eyeball the distance between your studs. Use a level to ensure your art isn’t leaning like a poorly balanced budget.
  • Mind the eye level. A common mistake is hanging art too high, which creates a visual “inflation” that feels disconnected from the room. Aim for the center of the piece to be about 57 to 60 inches from the floor—that’s the sweet spot for a comfortable viewing experience.
  • Consider the “weight” of your frame. Think of this as your overhead costs. A heavy, ornate gold frame requires more substantial hardware than a light, minimalist wooden one. Don’t try to hang a heavy asset on a flimsy foundation, or the whole thing will crash.

  • Use painter’s tape for a dry run. Before you commit to a single hole in your drywall, tape out the dimensions of the frame on the wall. It’s like a recipe test—it lets you see how the “flavors” of your decor interact with the space without any permanent consequences.
  • Account for lighting. A beautiful piece of art can be ruined by a harsh glare, much like a great business plan can be ruined by poor presentation. Position your art so the light hits it beautifully, rather than bouncing off the glass and blinding your guests.

The Secret Sauce to a Flawless Display

Treat your tools like high-quality kitchen equipment; investing in the right level and measuring tape upfront prevents the “salty” frustration of crooked frames and wasted holes later.

Think of your layout as a recipe—measure your ingredients (your frames) and prep your workspace (the wall) before you ever start the actual cooking (the hanging).

Don’t over-season your walls; just like a heavy hand with garlic can ruin a delicate sauce, overcrowding your space can make a beautiful gallery feel cluttered rather than curated.

The Golden Ratio of Decor

“Hanging a picture is a lot like balancing a budget: if you rush the placement without measuring your foundation first, you’re going to end up with a mess that’s both visually off-balance and a total waste of your resources.”

Madeline Thompson

The Final Presentation

The Final Presentation of a gallery wall.

At the end of the day, hanging a picture is a lot like executing a complex recipe; you can’t just toss ingredients into a pan and hope for the best. You need the right tools, a solid plan for your layout, and the patience to ensure every piece is perfectly balanced. By selecting your hardware with intention and treating your gallery wall like a carefully curated menu, you avoid the “soggy” mistakes of crooked frames or wasted wall space. Remember, whether you are investing in high-quality hooks or spending extra time measuring your spacing, the attention to detail is what separates a cluttered room from a professional-grade space.

Just as I learned during my years on Wall Street, the most rewarding results come from the small, disciplined steps we take toward a larger vision. Don’t let the fear of making a tiny hole in the drywall stop you from transforming your house into a home. Think of every nail as a small investment in your personal environment—one that pays dividends in joy and comfort every time you walk through the door. Go ahead and take that leap, hang that masterpiece, and start enjoying the beautiful atmosphere you’ve worked so hard to build from the ground up.

Frequently Asked Questions

How do I hang a picture on a wall without leaving those annoying little holes behind, especially if I'm renting?

Think of this like minimizing food waste—you want the maximum visual impact with the absolute minimum leftover mess. If you’re renting, skip the heavy-duty nails and go for Command Strips. They’re like the “sous-vide” of hanging: precise, controlled, and they won’t ruin your foundation. Just make sure to clean the wall first so the adhesive really sticks. It’s a low-risk, high-reward investment that keeps your security deposit perfectly intact!

What's the secret to finding the perfect eye-level height so my art doesn't look like it's floating away or sinking to the floor?

Think of eye-level height like balancing the acidity in a sauce—it’s all about that sweet spot where everything feels intentional. The gold standard is 57 inches from the floor to the center of the piece. It sounds technical, but it’s just like following a recipe: if you go too high, the art feels detached, like a meal served on a plate that’s too large. Keep it centered, and your room will finally feel “seasoned.”

If I'm trying to hang something heavy, like a large framed mirror, how do I make sure it doesn't end up crashing down like a poorly timed soufflé?

Listen, when you’re dealing with a heavy mirror, you can’t just “wing it” like a garnish. You need a solid foundation. Think of it like building a budget: if your base is weak, the whole thing collapses. Skip the tiny nails and opt for heavy-duty anchors or wall studs. It’s all about structural integrity. Don’t risk a catastrophic crash—invest in the right hardware now so your decor stays as stable as a well-managed savings account.

Posted on

How to Caulk Like a Pro (without the Mess)

Guide on how to caulk professionally.

I was standing in my tiny kitchen last Tuesday, staring at a jagged, peeling gap between my backsplash and the countertop, feeling exactly like I did during my first week on Wall Street: completely out of my depth and watching my hard-earned resources leak away. Most people think that learning how to caulk is some high-level construction skill reserved for the pros, but honestly? That’s a total myth. It’s not about having a heavy-duty toolkit; it’s about precision and preparation. If you treat a messy bead of silicone like a poorly balanced budget, you’re just going to end up with a chaotic mess that costs you double to fix later.

In this guide, I’m stripping away the jargon to give you the straight truth on getting a professional finish without the professional price tag. I’ll walk you through everything from choosing the right “ingredients” for your specific project to the exact hand movements you need to master that perfect, smooth line. By the time we’re done, you’ll know how to caulk with the same confidence and finesse I use when plating a signature dish. Let’s get to work and seal those gaps for good!

Table of Contents

Guide Overview

Total Time: 1-2 hours
Estimated Cost: $20-50
Difficulty: Beginner

Tools & Supplies

  • Caulking gun for applying sealant
  • Caulk removal tool or utility knife for cleaning old residue
  • Wet rag for smoothing and cleaning excess material
  • Caulk tube (silicone or acrylic depending on surface)
  • Painter's tape for clean edges (optional)

Step-by-Step Instructions

  • 1. Before you even touch the caulk gun, you have to handle the prep work—think of this as mise en place. You wouldn’t throw ingredients into a pan without chopping them first, right? Use a putty knife or a scraper to strip away every single bit of the old, crusty sealant. If you leave even a tiny bit of the old stuff behind, your new layer won’t bond, and that’s basically like trying to build a portfolio on bad data. You want a clean, dry, and smooth surface before we move to the next step.
  • 2. Once the area is clear, give it a deep clean with a little rubbing alcohol to remove any lingering oils or dust. In the financial world, we call this auditing your accounts to make sure everything is accurate. If there’s grease or grime in that crack, the caulk will just peel off in a week. Make sure the area is completely bone-dry before proceeding, because moisture is the ultimate enemy of a good seal.
  • 3. Now, let’s talk about your tools. Grab your caulk gun and your preferred nozzle, and here’s a pro tip: cut the tip of the tube at a 45-degree angle. You want the opening to be small and controlled, not a gaping maw. It’s exactly like controlling the flow of expensive truffle oil; if you open the valve too wide, you’re going to end up with a messy, expensive disaster that’s impossible to manage.
  • 4. When you’re ready to apply, hold the gun at that same 45-degree angle and pull it toward you in one steady, continuous motion. Don’t push the caulk into the gap; draw it along the line. Aim for a consistent bead size—think of it like maintaining a steady interest rate. You want it to be smooth and predictable, not a rollercoaster of thick and thin sections that look amateurish.
  • 5. Once you’ve laid down your bead, it’s time for the “smoothing” phase, which is honestly my favorite part. Dip your finger in a little bit of soapy water—this prevents the caulk from sticking to your skin—and lightly run it along the seam to press the material into the crack. You’re looking for that perfectly leveled finish. If you go too heavy, you’re wasting product (and we don’t like unnecessary overhead), so keep it light and elegant.
  • 6. Finally, step back and let it cure. This is the hardest part for me because I love instant gratification, but you can’t rush a good reduction sauce, and you certainly can’t rush chemical drying times. Check the tube for the specific curing window—some take hours, others take days. Avoid touching it or letting water hit it until it’s fully set, or you’ll be reinvesting your time into fixing a mistake you could have avoided with a little patience.

Sourcing Your Ingredients Choosing Silicone vs Acrylic Caulk

Before you even pick up a tool, you need to head to the hardware store and select your “base ingredients.” In the culinary world, you wouldn’t use a heavy cream where a light vinaigrette is required, and the same logic applies here. When deciding between silicone vs acrylic caulk, you have to look at the “environment” of your project. If you’re tackling high-moisture areas like caulking bathtub seams, you absolutely want silicone. It’s the heavy-duty, waterproof superstar that won’t crack when things get steamy. It’s much like a high-quality fat in a sauce—it provides that essential, long-lasting barrier that keeps everything together.

On the other hand, acrylic caulk is more like a light garnish; it’s much easier to work with and can be painted over, making it perfect for caulking window frames or interior trim where moisture isn’t the primary enemy. Just keep in mind that acrylic lacks that same waterproof “oomph” that silicone offers. Choosing the wrong one is like using salt instead of sugar in a dessert—it might look fine at first, but the end result is going to be a total disaster once the real test begins!

The Mise en Place Removing Old Caulk for a Fresh Start

The Mise en Place Removing Old Caulk for a Fresh Start.

Before you even think about reaching for that new tube, we need to talk about the cleanup. In the culinary world, you wouldn’t dream of starting a new reduction in a pan still coated with burnt garlic and old oil, right? The same logic applies here. Removing old caulk is the most critical step in the entire process. If you try to layer fresh sealant over a crumbling, moldy mess, your new bead will have zero structural integrity—it’ll be like trying to build a gourmet souffle on a foundation of sand. You need a clean, dry surface to ensure that your new application actually sticks and stays put.

I like to treat this phase like the heavy prep work before a dinner rush. Grab a sharp utility knife or a specialized caulk removal tool and meticulously scrape away every last bit of the old residue. When you’re caulking bathtub seams, this part is especially vital because moisture loves to hide in those old cracks. Take your time and be thorough; it’s much better to spend an extra ten minutes scrubbing the area clean now than to deal with a peeling, unsightly mess next month. Once the surface is smooth and bare, you’re finally ready to cook.

The Secret Sauce: 5 Pro Tips for a Flawless Finish

The Secret Sauce: 5 Pro Tips for a Flawless Finish
  • Master your bead consistency. Think of it like tempering chocolate; if you rush the process or apply too much pressure, you’ll end up with a mess. Aim for a steady, even flow to avoid those unsightly globs that look more like spilled gravy than a professional seal.
  • Don’t skimp on the smoothing tool. Trying to smooth caulk with just your finger is like trying to plate a delicate reduction with a sledgehammer. Use a dedicated smoothing tool or a damp sponge to get that sleek, professional line that makes your bathroom look like a five-star hotel.
  • Prep is your prep work. Just as you wouldn’t start sautéing before your onions are diced, don’t start caulking until the surface is bone-dry and dust-free. Any moisture left behind is like adding water to a reduction—it’ll just thin out your results and ruin the structural integrity.
  • Watch your “burn time.” Every caulk has a different drying window, much like how different proteins require different resting periods. Once you apply it, you need to smooth it quickly before it starts to “skin over.” If you wait too long, you’ll be fighting the material instead of shaping it.
  • Budget for the cleanup. In my old life on Wall Street, we always accounted for the “hidden costs,” and in DIY, the cleanup is your hidden cost. Keep a bucket of warm, soapy water and plenty of paper towels nearby. It’s much easier to wipe up a spill immediately than to try and scrape dried caulk off your tiles later.

The Secret Sauce: My Top Three Pro-Tips for a Flawless Finish

Don’t skimp on your ingredients; just like you wouldn’t use cheap oil for a high-end sear, choosing the right caulk (silicone for wet areas, acrylic for paintable spots) is the difference between a lasting result and a total kitchen disaster.

Respect the prep work; think of removing the old caulk as cleaning your workstation—if you try to layer new “seasoning” over old, crusty residue, the whole project is going to flake and fail.

Precision is everything; treat your caulking gun like a delicate reduction sauce—steady hands and a consistent pace ensure a smooth, professional finish without the messy overflow.

The Secret Ingredient to a Seamless Finish

“Think of caulking like reducing a sauce: you can’t rush the process or skip the prep, because if your foundation isn’t smooth and your application isn’t precise, the whole project will eventually crack under pressure.”

Madeline Thompson

The Final Garnish: Sealing the Deal

The Final Garnish: Sealing the Deal.

Just like finishing a complex reduction sauce, the final application of caulk is where all your hard work truly comes together. We’ve covered the essential prep work—from choosing between the flexibility of silicone and the paintability of acrylic to the meticulous “mise en place” of scraping away that old, crusty residue. Remember, if your surface isn’t clean and your selection isn’t right, even the best technique won’t save the final result. Think of this step as your financial audit; it’s about ensuring there are no leaks in your foundation so that everything stays watertight and secure for the long haul.

At the end of the day, tackling a home maintenance project like this might feel a little daunting, much like staring down a complex quarterly budget. But just as I learned on Wall Street, success isn’t about avoiding the difficult tasks—it’s about having the right tools and the patience to execute them properly. Once that bead is smooth and the surface is sealed, you’ll feel that same incredible sense of accomplishment I get from serving a perfectly plated meal. You’ve taken control of your space, and that is a huge win for your personal independence. Now, go enjoy the peace of mind that comes with a job well done.

Frequently Asked Questions

I've messed up a few batches of sauce before—how do I know if I've applied too much caulk and how do I smooth it out without making a huge mess?

Think of it like deglazing a pan; if you pour in too much liquid, you lose control of the reduction. If you see a massive bead oozing everywhere, you’ve definitely over-poured. Don’t panic! Just grab a damp rag or a smoothing tool to “skim” the excess, much like cleaning the edges of a plate. Keep your movements steady and light to smooth it out—too much pressure and you’ll ruin the whole presentation!

Is there a "shelf life" for caulk, or can I use those half-empty tubes I've had sitting in my kitchen drawer for a year?

Think of old caulk like an open jar of pesto left in the back of the fridge—it might look okay, but the quality has definitely plummeted. Most tubes have a shelf life of about six to twelve months once opened. If your tube is rock hard or won’t squeeze out smoothly, it’s gone bad. Don’t risk a “spoiled” application; using expired caulk is like using rancid oil—it’ll ruin your finish and won’t seal properly.

Once the "prep work" is done and the caulk is applied, how long do I actually have to wait before I can get it wet, or is it like a slow-cooker recipe where I can't touch it for hours?

Think of this like letting a delicate reduction simmer; patience is your best ingredient here. While most caulks feel dry to the touch quickly, they aren’t “set” yet. If you’re using acrylic, you can usually get it wet in about 24 hours. Silicone is a bit more temperamental—treat it like a slow-cooker recipe and give it a full 24 to 48 hours before introducing moisture. Don’t rush the process, or you’ll end up with a messy finish!

Posted on

How to Back Up Your Data So You Never Lose It

Guide on how to back up your data.

I still remember the cold sweat that broke out on my forehead back in my Wall Street days when a sudden hard drive crash wiped out an entire month of meticulously organized financial spreadsheets. It felt exactly like realizing you’ve forgotten the salt in a high-stakes, multi-course dinner right as the guests are sitting down—total, unmitigated panic. Most tech gurus will try to sell you on expensive, over-engineered enterprise software that costs more than a decent bottle of Cabernet, but honestly, learning how to back up your data shouldn’t require a PhD or a massive hole in your budget.

I’m not here to drown you in technical jargon or push products you don’t need. Instead, I’m going to give you my personal, no-nonsense blueprint for securing your digital life, treating it with the same strategic precision I use to manage my food truck’s overhead. We’re going to break down the most efficient, cost-effective ways to protect your precious files so you can stop worrying about “what if” and start focusing on what actually matters. Consider this your essential prep work for digital peace of mind.

Table of Contents

Savoring the 3 2 1 Backup Strategy for Perfect Results

Savoring the 3 2 1 Backup Strategy for Perfect Results

If you’ve ever tried to cook a complex five-course meal without prepping your mise en place, you know the chaos that ensues when you realize you’re missing a key ingredient halfway through. Digital security is exactly the same. To ensure you never face a “kitchen nightmare” of lost files, I swear by the 3-2-1 backup strategy. It’s the gold standard for anyone serious about protecting their digital assets. Think of it as your recipe for ultimate resilience: you need three total copies of your data, stored on two different types of media, with one of those copies kept in a completely different location.

When you’re deciding between an external hard drive vs cloud storage, don’t view it as an “either-or” situation. In my world, a balanced budget needs both liquid cash and long-term investments; similarly, your data needs both. Use a physical drive for quick, local access, but lean on the cloud for that essential off-site protection. By setting up automated data protection, you’re essentially letting a sous-chef handle the repetitive prep work while you focus on the big picture. It’s the smartest way to ensure your digital life stays delicious and disaster-free.

Choosing Your Ingredients External Hard Drive vs Cloud Storage

Now that we’ve got our strategy set, it’s time to talk about the actual ingredients. When it comes to the classic debate of external hard drive vs cloud storage, I like to think of it as choosing between a reliable cast-iron skillet and a high-end sous vide machine. An external hard drive is your trusty kitchen staple; it’s a one-time investment that gives you instant, physical access to your files without needing an internet connection. It’s great for heavy lifting, but much like a single burner on a stove, it’s a single point of failure if something goes wrong physically.

On the other hand, cloud storage is like having a professional sous chef on standby 24/7. It offers automated data protection, meaning your files are whisked away to a secure location without you having to lift a finger. While you’ll pay a monthly “subscription fee” (think of it as a recurring grocery bill), the peace of mind you get from having your files accessible from anywhere is hard to beat. For a truly robust kitchen—or digital life—I find that a blend of both provides the most delicious layer of security.

The Secret Sauce: 5 Pro-Tips for a Disaster-Proof Digital Pantry

The Secret Sauce: 5 Pro-Tips for a Disaster-Proof Digital Pantry
  • Set an automated schedule so you aren’t scrambling like a chef during a dinner rush. Just like you wouldn’t wait until the restaurant is full to prep your onions, don’t wait for a hard drive crash to realize you haven’t backed up your files in months. Set it and forget it!
  • Test your backups regularly to make sure they actually work. There is nothing more heartbreaking than opening a fresh container of spices only to find it’s just sawdust. Periodically try to restore a file to ensure your backup isn’t just a hollow shell of what it’s supposed to be.
  • Keep your “specialty ingredients” separate from your main kitchen. If you keep your backup drive plugged into your laptop 24/7, a single power surge or a nasty piece of ransomware could spoil both your original files and your backup at the same time. Give your backup some breathing room!
  • Organize your files with a clear labeling system. Think of this as your mise en place. If your digital folders are a chaotic mess of “Document1” and “Final_Final_v2,” finding what you need during an emergency will be a total kitchen nightmare. A little organization now saves a massive headache later.
  • Don’t skimp on the quality of your storage. You wouldn’t use a cheap, flimsy pan for a high-stakes steak sear, so don’t trust your most precious memories and career documents to a bottom-of-the-barrel, unbranded thumb drive. Invest in reliable hardware—it’s a small cost for huge peace of mind.

The Secret Sauce: Your Digital Prep List

Treat your data like high-end ingredients; don’t wait until the “kitchen fire” of a hard drive crash to realize you haven’t prepped your backups.

Diversify your storage just like a balanced menu—use a mix of local hardware and cloud services so you aren’t putting all your financial eggs in one basket.

Consistency is the key to a perfect reduction; set up automated backups so your digital security runs on autopilot while you focus on the good stuff.

The Ultimate Safety Net

“Think of backing up your data like prepping your mise en place; you wouldn’t dream of starting a complex service without having your ingredients organized and ready, so don’t wait for a digital kitchen fire to realize you forgot to secure your most valuable assets.”

Madeline Thompson

The Final Course: Serving Up Digital Peace of Mind

The Final Course: Serving Up Digital Peace of Mind

At the end of the day, securing your data is a lot like managing your kitchen pantry or balancing your monthly budget—it’s all about having the right supplies on hand before you actually need them. We’ve walked through the essential 3-2-1 strategy, ensuring you have multiple layers of protection, and we’ve weighed the pros and cons of using external hard drives versus the convenience of the cloud. Whether you choose a physical drive for that tactile control or a cloud subscription for seamless accessibility, the most important thing is that you don’t leave your digital life to chance. Just like you wouldn’t walk into a high-stakes dinner service without a prep list, you shouldn’t navigate your digital world without a solid backup plan in place.

I know that setting up these systems can feel like a chore, much like doing the dishes after a massive holiday feast, but I promise the payoff is worth every second of effort. There is no feeling quite like the calm confidence that comes from knowing your precious memories and hard-earned work are tucked away safely. Think of this as an investment in your future self—one that pays dividends in the form of zero stress when life inevitably throws a curveball. So, go ahead and prep those digital ingredients today; you deserve the peace of mind that comes with a perfectly managed life.

Frequently Asked Questions

If I'm using a cloud service, how do I know I'm not just throwing my money into a black hole with monthly subscription fees that never end?

Think of cloud subscriptions like those “convenience” grocery delivery fees—they add up fast if you aren’t watching the receipts. To avoid a financial sinkhole, treat your cloud storage like a pantry audit. Compare the long-term cost of monthly tiers against a one-time hardware purchase. Also, check for “hidden ingredients” like egress fees—the cost to get your data out. If the subscription doesn’t offer scalability or peace of mind, it’s just overpriced seasoning.

Is there a way to automate my backups so I don't have to treat them like a tedious chore on my to-do list every single week?

Think of automation like a slow cooker: you do a little prep work upfront so you can walk away while the magic happens. You don’t want to be manually “stirring” your backups every week—that’s a recipe for burnout! Most cloud services and even modern external drives have “set it and forget it” settings. Just schedule your syncs once, and let the software handle the heavy lifting while you focus on more delicious things.

How often should I actually be "tasting" my backups to make sure they're still fresh and working correctly before a real crisis hits?

Think of this like tasting your sauce as it simmers; you wouldn’t wait until the dinner party is over to realize you forgot the salt! I recommend a “tasting” session once a month. Pick one random file from your backup and try to open it. It only takes five minutes, but it ensures your data hasn’t “spoiled.” Consistency is the secret ingredient to avoiding a total digital kitchen nightmare when you actually need those files.