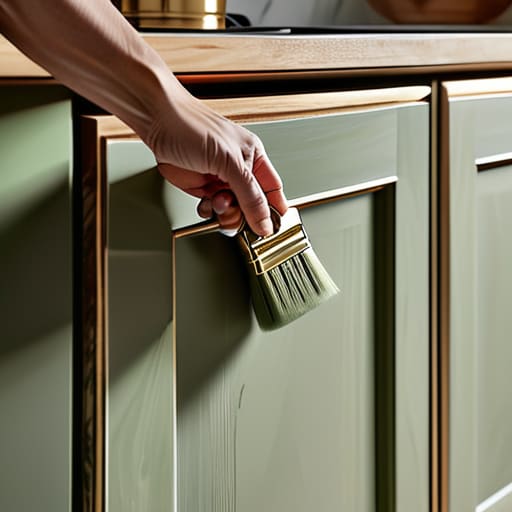
I was standing in my food truck kitchen last Tuesday, staring at my dated, honey-oak cabinets, and I felt that familiar pit in my stomach—the one you get when a quarterly budget doesn’t balance. Most people will tell you that a kitchen remodel requires a massive capital injection, but I’m here to tell you that’s a total myth. You don’t need a high-interest loan to get a high-end look; you just need a solid strategy for how to paint kitchen cabinets without it turning into a financial or aesthetic disaster. Think of it like a complex reduction sauce: if you rush the heat or skip the prep, you’re going to end up with something bitter and ruined.
In this guide, I’m stripping away the fluff and giving you the exact blueprint I use to transform spaces on a budget. We aren’t just slapping color onto wood here; we are going to master the “mise en place” of DIY, from the essential degreasing to the final protective coat. I’ll show you how to avoid the common pitfalls that lead to peeling paint and wasted money, ensuring your kitchen looks like a million bucks for a fraction of the cost.
Table of Contents
- Step-by-Step Instructions
- Sourcing Your Ingredients a Must Have Cabinet Painting Supplies List
- Mastering the Prep How to Prep Cabinets for Painting Perfection
- The Secret Sauce: 5 Pro Tips for a Flawless Finish
- The Recipe for Success: My Top 3 Golden Rules
- The ROI of a Good Prep
- The Final Garnish: Bringing Your Vision to Life
- Frequently Asked Questions
Guide Overview
Tools & Supplies
- Screwdriver or drill to remove hardware
- Sandpaper (120-220 grit) for surface preparation
- High-quality brush and microfiber roller for smooth finish
- Drop cloths to protect countertops and floors
- Cabinet degreaser or TSP for cleaning
- Primer (1-2 gallons depending on size)
- Cabinet-grade paint (1-2 gallons)
- Painter's tape for masking edges
Step-by-Step Instructions
- 1. Before you even touch a paintbrush, you need to master your mise en place. In the culinary world, this means having every ingredient prepped and ready to go; in cabinet painting, it means stripping everything down. Remove all doors, drawer fronts, and hardware. I know, it feels like a massive undertaking, but trying to paint around handles is like trying to garnish a plate while the sauce is still boiling—it’s just asking for a mess.
- 2. Now, we get into the deep cleaning phase. Kitchen cabinets are magnets for grease and old cooking oils, and if you don’t get that grime off, your paint will peel faster than a cheap vinaigrette. Use a heavy-duty degreaser to scrub every inch of the surfaces. You want them squeaky clean before you move on, because any lingering oil will act like a barrier between your prep work and your final result.
- 3. Sanding is where most people try to cut corners, but don’t let your budget—or your patience—fail you here. You aren’t trying to sand the wood down to nothing; you’re just creating a “tooth” for the paint to grab onto. Think of it like lightly scoring a steak to let the marinade sink in deeper. Use a fine-grit sandpaper to scuff up the surface until it feels smooth but slightly matte.
- 4. Once you’ve sanded, you absolutely cannot skip the priming step. If you skip primer, you’re essentially trying to build a soufflé without any eggs—it just won’t have the structural integrity it needs. Use a high-quality, stain-blocking primer to seal the wood. This ensures that any tannins or old stains don’t bleed through your beautiful new color, keeping your “investment” looking professional.
- 5. Now for the fun part: applying the paint. I highly recommend using a high-quality cabinet enamel rather than standard wall paint. You want something that dries hard to withstand the daily “wear and tear” of a busy kitchen. Apply your first coat in thin, even layers. It’s much better to do three thin coats than one thick, gloopy one that leaves you with unsightly drips.
- 6. While that first coat is drying, take a moment to inspect your work. Just like tasting a sauce as you go, you need to catch any imperfections early. If you see a stray hair or a tiny bubble, lightly sand it down once it’s dry before applying the next layer. This attention to detail is what separates a DIY disaster from a high-end kitchen renovation.
- 7. Finally, once your topcoats are completely cured—and I mean truly cured, not just “dry to the touch”—it’s time to reassemble. Clean your hardware until it shines, and carefully hinge your doors back into place. Take a second to admire your work; you’ve just successfully managed a major home “expense” without the massive overhead of a full remodel!
Sourcing Your Ingredients a Must Have Cabinet Painting Supplies List
Before you even think about cracking open a can of paint, we need to talk about your pantry. In the culinary world, you wouldn’t try to whip up a complex reduction with subpar stock, and the same logic applies here. To avoid a total kitchen catastrophe, you need a solid cabinet painting supplies list that prioritizes quality over convenience. I’m talking about high-grade sandpaper, tack cloths to remove every speck of dust, and most importantly, the right tools to ensure a smooth application. Think of your tools as your mise en place; having everything organized and high-quality upfront prevents a mid-project meltdown.
When it comes to the actual chemistry of the job, don’t skimp on the liquids. Choosing the best paint for kitchen cabinets is less about the color and more about the durability and finish. You aren’t just decorating; you’re building a protective barrier against grease and spills. I always recommend investing in a high-quality cabinet primer and topcoat combo. It’s a bit like choosing between cheap margarine and real grass-fed butter—the initial investment is higher, but the end result is infinitely more satisfying and lasts much longer.
Mastering the Prep How to Prep Cabinets for Painting Perfection
Now, if there’s one thing my years on Wall Street taught me, it’s that you can’t expect a high return on investment if you skip the due diligence. In the kitchen, that due diligence is your prep work. Think of how to prep cabinets for painting as your mise en place; if you don’t have your station perfectly organized and your surfaces spotless, the final result will be a total deficit. You aren’t just cleaning; you are creating the foundation for your entire financial—and culinary—success.
Start by degreasing every inch of those surfaces. Even if they look clean, invisible layers of cooking oils act like a bad debt, dragging down your adhesion and causing your beautiful new finish to peel later. Once they are squeaky clean, sanding is your most important “investment.” You don’t need to strip them to the bare wood, but you must scuff the surface to give the cabinet primer and topcoat something to grip onto. Skipping this step is like trying to build a business on a shaky loan—it might look okay for a week, but eventually, the whole thing is going to crumble.
The Secret Sauce: 5 Pro Tips for a Flawless Finish
- Don’t skimp on the quality of your “ingredients.” Just like you wouldn’t use cheap, watered-down stock for a reduction, don’t buy the bargain-bin paint. Investing in a high-quality cabinet enamel is like buying premium Wagyu—it makes a world of difference in the final texture and durability.
- Embrace the power of “Mise en Place.” Before you even touch a brush, organize your workspace. Lay out your sandpaper, painters tape, and drop cloths in an orderly fashion. If your station is a chaotic mess, your application will be too, and you’ll end up with more stress than a dinner rush at a busy bistro.
- Patience is your most important kitchen tool. It is incredibly tempting to rush through the drying stages, but painting is a marathon, not a sprint. If you apply a second coat before the first has fully set, you’re essentially overcooking your meal—you’ll end up with a gummy, uneven mess that’s impossible to fix.
- Watch your “margins” by mastering the brushwork. To avoid those dreaded drip marks (the culinary equivalent of an accidental salt overdose), use thin, even layers. It’s much better to apply three light, controlled coats than to try and “bulk up” the coverage with one heavy, sloppy layer.
- Always do a “taste test” with a small, inconspicuous area first. Before you commit to the entire kitchen, test your paint and technique on the inside of a cabinet door. It’s better to catch a mistake on a tiny sample than to realize you’ve ruined your entire “investment” after the whole kitchen is done.
The Recipe for Success: My Top 3 Golden Rules
Don’t skimp on your “ingredients”—just like you wouldn’t use cheap oil for a high-end stir-fry, investing in quality primer and paint is the difference between a professional finish and a financial (and aesthetic) disaster.
Respect the prep work; if you try to rush the sanding and cleaning phases, you’re essentially trying to bake a cake without mixing the batter, and you’ll end up with a sticky, uneven mess.
Patience is your most valuable asset—think of it like letting a complex reduction simmer to perfection; applying thin, multiple coats instead of one thick layer ensures your “investment” lasts for years rather than peeling in a month.
The ROI of a Good Prep
“Think of your cabinet prep like managing your investment portfolio: if you try to cut corners on the foundational work just to save a little time upfront, you’re going to pay a much higher price in interest—or in this case, a peeling, patchy finish—down the road.”
Madeline Thompson
The Final Garnish: Bringing Your Vision to Life
Now that we’ve walked through the heavy lifting, it’s time to look at the big picture. Just like a complex risotto, the success of your kitchen transformation depends entirely on the quality of your prep and the patience you show during the drying phases. We’ve covered everything from sourcing the right high-quality supplies to the meticulous cleaning and sanding required to create a smooth canvas. Remember, skipping a step in the priming process is like trying to build a business on a shaky budget—it might look okay on day one, but the structural integrity will eventually fail you. By sticking to this methodical approach, you’ve ensured that your new finish isn’t just a temporary facelift, but a long-term investment in your home’s value.
At the end of the day, painting your cabinets is about more than just a fresh coat of color; it’s about taking ownership of your space and your resources. Whether you’re navigating a career pivot or a DIY home renovation, the principle remains the same: small, disciplined actions lead to massive, rewarding results. I know it can feel overwhelming when you’re staring at a pile of sandpaper and half-empty paint cans, but I promise the payoff is worth every bit of effort. So, take a deep breath, trust your process, and get ready to savor the satisfaction of a kitchen that finally looks as good as your hard work feels. You’ve totally got this!
Frequently Asked Questions
How do I know if my current cabinet finish is too glossy to paint without it peeling later?
Think of it like trying to deglaze a pan with too much oil—if the surface is too slick, nothing is going to stick. If your cabinets have a high-shine, factory-smooth finish, they’re essentially “waterproofed” against new paint. The best test? Try to scratch a tiny, inconspicuous spot with your fingernail or a coin. If it feels incredibly slick and resists any grip, you’ll need to sand it down to create the “tooth” your paint needs to bond.
Is it actually worth the investment to buy professional-grade sprayer equipment, or can I get away with just brushes and rollers?
Think of it like choosing between a basic whisk and a high-end stand mixer. If you’re just making a quick batch of eggs, a whisk is fine. But if you’re aiming for a flawless, professional finish on your entire kitchen, a sprayer is a game-changer. It minimizes brush marks and saves massive amounts of time. If your budget allows for the capital expenditure, go for the sprayer—the ROI on that smooth, factory-like finish is unbeatable.
How long do I really need to wait before I can start using my kitchen again without risking smudges or sticking?
I know the feeling—you’ve poured your heart (and your savings!) into this project and you’re dying to cook something delicious. But patience is your most important ingredient here. While the cabinets might feel dry to the touch in a few hours, they aren’t truly “cured.” I’d recommend waiting at least 48 to 72 hours before heavy use. Think of it like letting a complex sauce simmer; rushing the process is a recipe for a sticky disaster!
