I was standing in the middle of my first tiny apartment, staring at a window that looked more like a gaping hole in my budget than a design feature, clutching a pair of scissors and a bolt of fabric I’d bought on a whim. I realized then that most people think diy curtains are either a high-stakes sewing project that requires a professional studio or a cheap, flimsy hack that ruins the room’s aesthetic. But here’s the secret: making your own window treatments isn’t about having a master tailor’s skill; it’s about resource management and precision. Just like balancing a complex reduction sauce, if you have the right ingredients and a solid plan, you can achieve a high-end look without the designer price tag.
In this guide, I’m stripping away the intimidation factor and giving you a straight-shot blueprint for success. I won’t bore you with overly technical jargon, but I will show you how to select fabrics that hold their value and techniques that ensure your finished product looks expensive, not homemade. We are going to walk through everything from measuring your “margins” to the final hem, ensuring you get a professional result that maximizes both your style and your savings.
Table of Contents
- Step-by-Step Instructions
- Sourcing Premium Ingredients Fabric Selection for Window Treatments
- Precision Plating Mastering Custom Window Drapery Techniques
- The Secret Sauce: 5 Pro-Tips for a Flawless Finish
- The Final Reduction: Your Recipe for Window Success
- The ROI of a Custom Touch
- The Final Garnish: Bringing Your Vision to Life
- Frequently Asked Questions
Guide Overview
Tools & Supplies
- Fabric scissors for precise cutting
- Sewing machine for stitching hems
- Measuring tape for window dimensions
- Pins or clips to hold fabric in place
- Fabric (2-3 yards depending on window size)
- Thread (1 spool matching fabric color)
- Iron (to press hems flat)
- Curtain tape or header tape (optional for rod pockets)
Step-by-Step Instructions
- 1. First things first, we need to gather our mise en place. Just like you wouldn’t start a complex reduction without having your shallots minced and your stock simmering, you shouldn’t tackle curtains without the right tools. You’ll need your chosen fabric, a measuring tape, fabric scissors, pins, an iron, and either a sewing machine or a needle and thread. Think of this as auditing your resources before you commit to the project; you don’t want to realize halfway through that you’re short on supplies and end up having to pay premium “emergency” prices at the local craft store.
- 2. Next, let’s talk measurements—the foundation of any successful recipe or budget. Measure your window width and height, then add a “buffer” for the hems. I always recommend adding about 6 to 8 inches to the length and 4 to 6 inches to the width to account for the folds and the bottom hem. If you under-calculate here, it’s like skimping on the seasoning—you might finish the task, but the end result will feel fundamentally lacking and won’t look nearly as professional.
- 3. Once you have your numbers, it’s time to cut the fabric. Lay your material out flat on a large surface, ensuring there are no wrinkles, much like smoothing out a messy spreadsheet. Use your measurements to mark the fabric with tailor’s chalk or a pencil, and then cut carefully. Remember, you can always trim more away, but you can’t add fabric back once the scissors have done their work, so precision is your best friend here.
- 4. Now, we move into the prep work: creating the hems. Fold the edges of your fabric inward to create a clean, crisp line. For the top, you’ll want to create a “rod pocket” by folding the fabric over itself twice. For the sides and bottom, a standard double-fold hem works wonders. Pin everything into place securely. This stage is all about attention to detail; if your pins are uneven now, your curtains will hang crookedly, and nobody wants a window treatment that looks like it’s sliding off its tracks.
- 5. It’s time to bring the heat and start sewing. If you’re using a sewing machine, run your stitches along the pinned edges you just created. If you’re doing this by hand, keep your stitches small and consistent. I like to think of the sewing machine as my high-speed blender—it does the heavy lifting, but you still need to guide it with a steady hand to ensure an even texture. Aim for a straight, sturdy seam that will hold up even when the fabric is heavy.
- 6. Once the sewing is complete, grab your iron. This is the most underrated step in the entire process, but it’s absolutely non-negotiable. Press your hems flat and crisp. A well-pressed curtain looks like it cost a fortune at a high-end boutique, whereas an unpressed one looks like a rushed, low-budget experiment. Think of ironing as the final plating of your dish; it’s what transforms something functional into something truly beautiful and polished.
- 7. Finally, it’s time for the grand reveal! Slide your new creations onto the curtain rod and adjust them until they hang perfectly. Take a moment to step back and admire what you’ve built. You’ve just taken raw materials and, through a bit of planning and execution, turned them into a high-value home asset. It’s a small win, but compounding these little victories is exactly how you build a life (and a home) that feels truly rich.
Sourcing Premium Ingredients Fabric Selection for Window Treatments
Think of your fabric choice like selecting the base for a reduction sauce; if the foundation is weak or low-quality, no amount of fancy stitching will save the final product. When it comes to fabric selection for window treatments, you really need to consider both the aesthetic “flavor” and the functional “nutrients” the material provides. If you’re looking to transform a bedroom into a sanctuary, I highly recommend investing in heavy linens or velvet for room darkening DIY curtains. These heavier weights act like a rich, savory sauce that anchors the entire room, providing privacy and light control that sheer fabrics just can’t match.
Don’t let the “DIY” label fool you into thinking you have to settle for scraps. Just as I wouldn’t use sub-par ingredients in my food truck, I wouldn’t dream of using flimsy polyester for a statement window. Look for natural fibers like cotton or linen that offer a beautiful drape and longevity. If you’re working with a tighter budget, treat it like a smart investment strategy: allocate more of your “capital” toward the main panels and save on the accents. Mastering these custom window drapery techniques starts with knowing that the quality of your textile dictates the ROI of your entire home makeover.
Precision Plating Mastering Custom Window Drapery Techniques
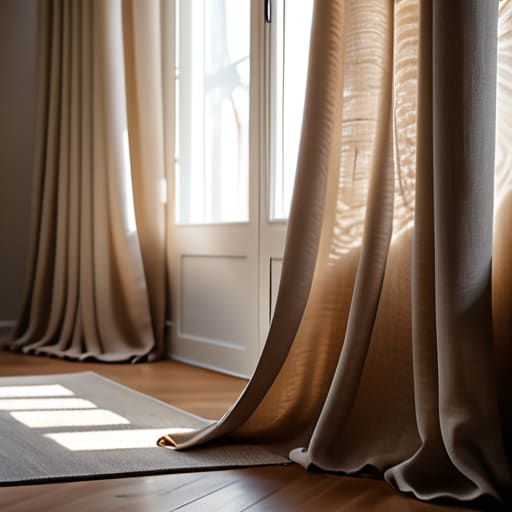
Think of this stage as the “plating” phase of your culinary masterpiece. You’ve prepped your ingredients and done the heavy lifting, but now it’s time to ensure the presentation is flawless. When applying custom window drapery techniques, precision is your best friend. Just like you wouldn’t serve a steak without a clean sear, you shouldn’t leave your curtains with uneven lines. I always recommend using a heavy-duty iron to press your hemmed curtain edges before they ever touch the rod. This ensures a crisp, professional finish that mimics high-end boutique finds rather than a last-minute kitchen experiment.
If you’re aiming for a more dramatic effect—perhaps for a bedroom where you need some serious sleep hygiene—you might want to focus on creating room darkening DIY curtains. This requires a bit more structural integrity, much like building a complex sauce that needs to hold its body. Pay close attention to the weight of your fabric; if it’s too light, your “plating” will look flimsy. A well-structured drape adds immediate value to your home, much like a well-diversified portfolio adds stability to your life.
The Secret Sauce: 5 Pro-Tips for a Flawless Finish
- Don’t skimp on the prep work; just like you wouldn’t throw unwashed veggies into a sauté pan, always pre-wash your fabric to account for shrinkage before you even touch those scissors.
- Think of your hem as your financial cushion—give yourself a little extra “buffer” room in your measurements so you aren’t caught short if a stitch goes rogue.
- Invest in high-quality tools, because trying to sew with dull shears is like trying to dice onions with a butter knife—it’s frustrating, messy, and it’s going to cost you more time in the long run.
- Mind your margins by using a seam ripper sparingly; in both budgeting and sewing, it’s much better to measure three times and cut once than to spend your afternoon fixing expensive mistakes.
- Presentation is everything, so don’t forget to steam your finished curtains; a crisp, professional look is the difference between a “homemade” look and a “designer” aesthetic.
The Final Reduction: Your Recipe for Window Success
Treat your fabric selection like your initial capital investment; spending a little more upfront on high-quality materials prevents a “budget blowout” later when your curtains fail to drape properly.
Don’t skip the prep work—measuring twice and ironing your fabric is just like mise en place; it ensures that when you actually start sewing, you aren’t scrambling to fix avoidable mistakes.
View DIY curtains as a long-term asset for your home’s value, where the small investment of your time yields a high return in personalized style and a much more sophisticated “atmosphere.”
The ROI of a Custom Touch
“Think of DIY curtains as the ultimate high-yield investment for your home; you’re trading a little bit of upfront labor for a massive return in aesthetic value, proving that you don’t need a massive budget to create a space that feels truly premium.”
Madeline Thompson
The Final Garnish: Bringing Your Vision to Life
At the end of the day, crafting your own window treatments is a lot like balancing a complex recipe; it requires the right ingredients, a bit of technical precision, and the patience to let everything set. We’ve walked through the essential steps, from selecting high-quality fabrics that act as your premium base ingredients to mastering those intricate drapery techniques that ensure a professional finish. Just like managing a tight budget or perfecting a signature sauce, the magic happens in the details. By investing your time into sourcing the right materials and executing your measurements with care, you aren’t just decorating a room—you are building equity in your home’s aesthetic through your own hard work and creativity.
I know that stepping away from the sewing machine can feel a little daunting, especially when you’re staring at a pile of fabric and a long to-do list. But remember, whether you are managing a high-stakes portfolio or stitching a hem, the most important ingredient is confidence in your process. Don’t be afraid to make a few mistakes; even a burnt roux can be salvaged with a little bit of wisdom and a new approach. Once those curtains are finally hung, take a moment to step back, grab a glass of wine, and savor the incredible feeling of having invested in yourself. You didn’t just make curtains; you mastered a new skill, and that is a win worth celebrating!
Frequently Asked Questions
If I'm working with a tighter budget, are there certain "budget-friendly" fabrics that won't look cheap once they're hanging?
Think of this like working with a budget-friendly protein—you can still make a five-star meal if you pick the right ingredients! If silk is out of your price range, don’t sweat it. Opt for heavy-weight cotton or linen blends; they have a beautiful, natural drape that screams “expensive” without the designer price tag. Avoid anything overly shiny or synthetic-looking, as that’s where the “cheap” vibe creeps in. Focus on texture, and you’ll win every time.
How do I calculate exactly how much fabric to buy so I don't end up with a deficit like a poorly managed quarterly budget?
Think of fabric yardage like calculating the ingredients for a high-stakes dinner party—if you under-order, you’re left with hungry guests and a ruined reputation. To avoid that “budget deficit” feeling, measure your window width and multiply by two (or even 2.5) for that lush, professional fullness. Add your desired length plus extra for hems. Always buy an extra half-yard as a “contingency fund” for those inevitable cutting mishaps!
What’s the best way to handle the "finishing touches"—like adding weights or trim—to make sure my DIY curtains don't look amateur?
Think of these finishing touches as the final seasoning on a reduction sauce—it’s what separates a home cook from a pro. To avoid that “amateur” look, don’t skimp on the details. Adding drapery weights to the bottom hem ensures your fabric hangs with that expensive, structured drape rather than fluttering awkwardly. If you want some flair, a subtle trim or fringe acts like a garnish, elevating the entire aesthetic from basic to bespoke.
