I was standing in my living room last Tuesday, staring at a massive, framed landscape print and a handful of nails, feeling exactly like I did during my first week on Wall Street: completely overwhelmed by the lack of a clear strategy. Most people think that learning how to hang a picture is just about driving a nail into a wall and hoping for the best, but that’s a recipe for a disaster that’ll leave your drywall looking like a Swiss cheese board. In reality, hanging art is much more like balancing a high-stakes budget; if you don’t account for the weight and the structural foundation first, the whole thing is going to crash and burn before you even get to enjoy the view.
I’m not here to give you some overly complicated DIY lecture that requires a degree in engineering. Instead, I’m going to walk you through the practical, no-nonsense steps of how to hang a picture so that your home looks curated rather than cluttered. We’ll cover everything from measuring with precision to choosing the right hardware for your specific wall type, ensuring your investment is secure and perfectly leveled. Let’s get to work and turn that blank wall into a masterpiece.
Table of Contents
- Step-by-Step Instructions
- Curating Your Gallery Wall Layout Ideas With Precision
- Selecting Essential Picture Hanging Tools for a Flawless Finish
- The Secret Sauce: 5 Pro-Tips for a Picture-Perfect Finish
- The Secret Sauce to a Flawless Display
- The Golden Ratio of Decor
- The Final Presentation
- Frequently Asked Questions
Guide Overview
Tools & Supplies
- Hammer for driving nails or hooks
- Pencil for marking the spot
- Measuring tape for accuracy
- Level to ensure the frame is straight
- Picture hanging hardware (nails, hooks, or anchors) 1 pack
- Picture frame 1 unit
Step-by-Step Instructions
- 1. First, you need to audit your supplies like you’re checking your inventory before a lunch rush. You can’t start a recipe without the right tools, and you certainly shouldn’t start hanging art without a level, a measuring tape, a pencil, and the appropriate hardware for your specific wall type. Trying to wing it with a random nail is like trying to bake a soufflé without preheating the oven—you’re just asking for a total collapse.
- 2. Next, let’s talk about placement, which is essentially the “plating” phase of this project. Before you even touch a hammer, use a pencil to lightly mark where you think the center of the piece should go. I always tell my friends to think of this as setting your budget—if you don’t establish your boundaries early on, you’ll end up overspending your space and leaving the room feeling cluttered and unbalanced.
- 3. Now, it’s time to measure the “drop,” or the distance from the top of the frame to the actual hanging hardware on the back. This is the most crucial step, much like balancing acidity in a sauce; if your measurements are off by even a fraction, the whole visual composition will feel sour. Mark that exact spot on your wall so you aren’t left guessing once the nail is already in the drywall.
- 4. Once you have your marks, select your hardware based on the “weight” of your investment. A heavy, ornate gold frame is like a high-yield bond—it requires sturdier support like a heavy-duty screw or a toggle bolt. On the other hand, a light, minimalist print is more like a quick snack; a simple finishing nail will do the trick without breaking the bank (or your wall).
- 5. Before you commit to the final strike, grab that level and hold it against the top of your frame or the mark you’ve made. You want to ensure everything is perfectly horizontal, because a crooked picture is like a mismanaged spreadsheet—it’s a tiny error that eventually becomes a massive distraction. If the bubble isn’t centered, adjust your mark and try again.
- 6. Finally, once the hardware is secure, carefully hang the piece and step back to view the “final presentation.” Don’t be afraid to make small adjustments; sometimes you need to pivot your strategy just like you’d tweak a seasoning to get that perfect flavor profile. Once it looks right, you can officially consider this project a successful ROI for your home decor!
Curating Your Gallery Wall Layout Ideas With Precision

Think of your gallery wall like a complex fusion dish; you can’t just toss every ingredient into the pan and hope for the best. If you want a cohesive look, you need to consider the “flavor profile” of your collection. When exploring different gallery wall layout ideas, start by grouping pieces with similar color palettes or themes to create a sense of harmony. I like to treat the largest piece as my “main course”—the anchor that dictates the flow—and then arrange the smaller frames around it like delicate garnishes.
Before you start driving nails into your drywall, I highly recommend a “dry run” on the floor. Lay out your frames exactly how you want them to appear, adjusting the spacing until it feels just right. This is your chance to audit your composition without the stress of making mistakes. Once you’re happy with the arrangement, use painter’s tape to mark the spots. This helps in avoiding wall damage, saving you from the financial headache of expensive repairs later. Remember, a little bit of prep work now ensures your final presentation is nothing short of Michelin-star quality.
Selecting Essential Picture Hanging Tools for a Flawless Finish
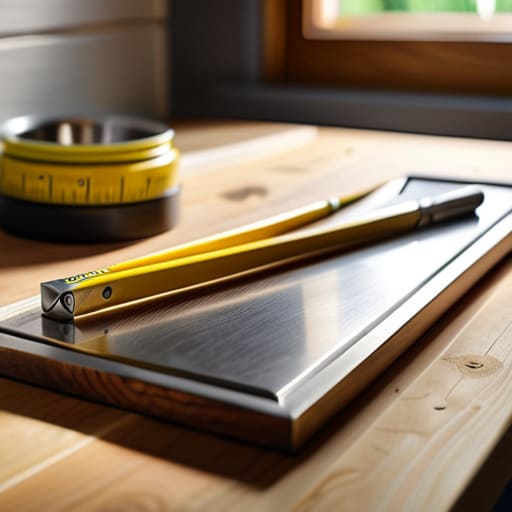
Before you start driving nails into your drywall, you need to prep your workstation. Think of gathering your picture hanging tools like mise en place in a professional kitchen; if you’re missing a whisk or a pinch of salt mid-recipe, the whole dish suffers. You don’t want to be halfway through a beautiful installation only to realize you’re missing a spirit level or the right screwdriver. I always keep a dedicated “decor kit” tucked away, containing a measuring tape, a pencil, and a sturdy level to ensure I’m not fighting against gravity later on.
Choosing the right wall mounting hardware is where most people—and even some seasoned pros—make a costly mistake. It’s a bit like choosing between a delicate reduction and a heavy-duty roux; you have to match the strength of your tools to the weight of your art. If you’re hanging heavy frames, don’t skimp on the quality of your anchors. Using flimsy hooks for a massive, ornate piece is a recipe for a financial and emotional disaster (and a very messy floor). Investing a few extra dollars in premium hardware is much cheaper than repairing a hole in your drywall!
The Secret Sauce: 5 Pro-Tips for a Picture-Perfect Finish
- Don’t wing it—measure twice and drill once. Just like you wouldn’t eyeball the amount of salt in a delicate reduction, you can’t eyeball the distance between your studs. Use a level to ensure your art isn’t leaning like a poorly balanced budget.
- Mind the eye level. A common mistake is hanging art too high, which creates a visual “inflation” that feels disconnected from the room. Aim for the center of the piece to be about 57 to 60 inches from the floor—that’s the sweet spot for a comfortable viewing experience.
- Consider the “weight” of your frame. Think of this as your overhead costs. A heavy, ornate gold frame requires more substantial hardware than a light, minimalist wooden one. Don’t try to hang a heavy asset on a flimsy foundation, or the whole thing will crash.
- Use painter’s tape for a dry run. Before you commit to a single hole in your drywall, tape out the dimensions of the frame on the wall. It’s like a recipe test—it lets you see how the “flavors” of your decor interact with the space without any permanent consequences.
- Account for lighting. A beautiful piece of art can be ruined by a harsh glare, much like a great business plan can be ruined by poor presentation. Position your art so the light hits it beautifully, rather than bouncing off the glass and blinding your guests.
The Secret Sauce to a Flawless Display
Treat your tools like high-quality kitchen equipment; investing in the right level and measuring tape upfront prevents the “salty” frustration of crooked frames and wasted holes later.
Think of your layout as a recipe—measure your ingredients (your frames) and prep your workspace (the wall) before you ever start the actual cooking (the hanging).
Don’t over-season your walls; just like a heavy hand with garlic can ruin a delicate sauce, overcrowding your space can make a beautiful gallery feel cluttered rather than curated.
The Golden Ratio of Decor
“Hanging a picture is a lot like balancing a budget: if you rush the placement without measuring your foundation first, you’re going to end up with a mess that’s both visually off-balance and a total waste of your resources.”
Madeline Thompson
The Final Presentation
At the end of the day, hanging a picture is a lot like executing a complex recipe; you can’t just toss ingredients into a pan and hope for the best. You need the right tools, a solid plan for your layout, and the patience to ensure every piece is perfectly balanced. By selecting your hardware with intention and treating your gallery wall like a carefully curated menu, you avoid the “soggy” mistakes of crooked frames or wasted wall space. Remember, whether you are investing in high-quality hooks or spending extra time measuring your spacing, the attention to detail is what separates a cluttered room from a professional-grade space.
Just as I learned during my years on Wall Street, the most rewarding results come from the small, disciplined steps we take toward a larger vision. Don’t let the fear of making a tiny hole in the drywall stop you from transforming your house into a home. Think of every nail as a small investment in your personal environment—one that pays dividends in joy and comfort every time you walk through the door. Go ahead and take that leap, hang that masterpiece, and start enjoying the beautiful atmosphere you’ve worked so hard to build from the ground up.
Frequently Asked Questions
How do I hang a picture on a wall without leaving those annoying little holes behind, especially if I'm renting?
Think of this like minimizing food waste—you want the maximum visual impact with the absolute minimum leftover mess. If you’re renting, skip the heavy-duty nails and go for Command Strips. They’re like the “sous-vide” of hanging: precise, controlled, and they won’t ruin your foundation. Just make sure to clean the wall first so the adhesive really sticks. It’s a low-risk, high-reward investment that keeps your security deposit perfectly intact!
What's the secret to finding the perfect eye-level height so my art doesn't look like it's floating away or sinking to the floor?
Think of eye-level height like balancing the acidity in a sauce—it’s all about that sweet spot where everything feels intentional. The gold standard is 57 inches from the floor to the center of the piece. It sounds technical, but it’s just like following a recipe: if you go too high, the art feels detached, like a meal served on a plate that’s too large. Keep it centered, and your room will finally feel “seasoned.”
If I'm trying to hang something heavy, like a large framed mirror, how do I make sure it doesn't end up crashing down like a poorly timed soufflé?
Listen, when you’re dealing with a heavy mirror, you can’t just “wing it” like a garnish. You need a solid foundation. Think of it like building a budget: if your base is weak, the whole thing collapses. Skip the tiny nails and opt for heavy-duty anchors or wall studs. It’s all about structural integrity. Don’t risk a catastrophic crash—invest in the right hardware now so your decor stays as stable as a well-managed savings account.
