
I was halfway through plating a delicate truffle risotto last Tuesday when that piercing, high-pitched screech echoed from the hallway again. It was my kitchen door, acting like a loud, uninvited guest at my dinner party. Most people think that solving a noisy hinge requires an expensive handyman or a specialized toolkit, but honestly? That’s just bad budgeting. Learning how to fix a squeaky door is a lot like perfecting a basic vinaigrette—you don’t need a chemistry degree or a massive investment; you just need to understand the right ingredients and a little bit of patience.
In this guide, I’m stripping away the fluff to give you the direct, no-nonsense approach to silencing those annoying hinges for good. I’ll show you how to identify the root cause of the friction and walk you through the most effective, cost-efficient methods to get things moving smoothly again. Whether you want to use a household staple from your pantry or a quick fix from your toolbox, I promise these steps will save you money and restore the peace to your home. Let’s get to work!
Table of Contents
- Step-by-Step Instructions
- Selecting Your Secret Sauce Wd 40 vs Silicone Spray for Doors
- Kitchen Pantry Hacks Household Items to Stop Door Squeaks
- Pro-Tips for a Smooth Finish: Avoiding the "Kitchen Nightmares" of Door Maintenance
- The Recipe for a Smooth-Running Home
- The ROI of a Quiet Home
- Serving Up a Smooth Finish
- Frequently Asked Questions
Guide Overview
Tools & Supplies
- Screwdriver (to tighten loose hinge screws)
- Microfiber cloth (to wipe away excess lubricant)
- Lubricant (1 can of silicone spray or WD-40)
- Petroleum jelly (1 small jar as an alternative)
Step-by-Step Instructions
- 1. First things first, we need to identify the source of the noise, just like you’d taste-test a sauce to find out if it’s missing salt or acid. Gently swing the door back and forth to pinpoint exactly which hinge is acting up. Once you’ve found the culprit, grab a clean cloth to wipe away any old, crusty buildup of dust or grime. Think of this as clearing your workspace before you start a big recipe; you can’t get a clean finish if your station is a mess.
- 2. Now, let’s get into the heavy lifting: pulling the pin. You’ll need a small hammer and a nail or a punch tool for this part. Place the nail against the top of the hinge pin and gently tap it upward. It might take a few tries, but don’t force it—you wouldn’t want to crack an egg by being too aggressive. Once the pin starts to slide out, just pull it the rest of the way with your fingers.
- 3. Once that pin is out, it’s time for the “seasoning” phase. Take a piece of fine-grit sandpaper and lightly buff the pin to remove any oxidation or rough spots. This is just like prepping your ingredients to ensure they blend perfectly into the final dish. If the pin looks particularly worn down, this is your chance to see if it needs a complete replacement, though usually, a little bit of smoothing does the trick.
- 4. Now comes the most important part: the lubricant. You have a few options here, but I always recommend using a high-quality silicone spray or even a bit of white lithium grease. Avoid using that old cooking oil from your pantry—I know, I’m a food person, but using vegetable oil is a recipe for disaster because it will eventually go rancid and get sticky. You want something that provides a long-lasting, smooth glide without creating a mess.
- 5. Apply a very thin, even layer of your chosen lubricant to the pin. You don’t need to drench it; think of it like adding truffle oil to a dish—a little goes a long way, and too much actually ruins the experience. Once the pin is coated, slide it back into the hinge carefully. It’s a bit like reassembling a delicate pastry, so take your time to make sure everything is aligned correctly.
- 6. To make sure that the lubricant has truly integrated into the hinge, give the door a few test swings. If you still hear a tiny bit of friction, don’t panic! Just add one more tiny drop of lubricant and try again. It’s all about finding that perfect balance where the movement is seamless and silent.
- 7. Finally, take a clean rag and wipe away any excess grease that might have squeezed out of the hinge. You want to leave the area looking tidy and professional, much like how I strive to keep my food truck station spotless during a lunch rush. Once the excess is gone, you’re all set to enjoy a home that’s as quiet and well-managed as a perfectly balanced budget.
Selecting Your Secret Sauce Wd 40 vs Silicone Spray for Doors

Now, before you go grabbing whatever aerosol can is closest to your kitchen sink, let’s talk about choosing your “secret sauce.” In the culinary world, you wouldn’t use heavy cream when a light vinaigrette is called for, and the same logic applies to lubricating door hinges. Most people reach straight for a can of WD-40, thinking it’s the ultimate fix. While it’s a fantastic degreaser and great for loosening up a stuck bolt, it’s actually a bit of a “quick fix” rather than a long-term solution. It evaporates relatively quickly, meaning that annoying squeak might return before your next meal is even finished.
If you’re looking for a more sustainable investment in your home’s “infrastructure,” I highly recommend opting for a silicone spray. When comparing WD-40 vs silicone spray for doors, think of silicone as the high-quality olive oil of the hardware world—it creates a long-lasting, protective barrier that stays put. It’s much more effective for door hinge pin maintenance because it doesn’t attract as much dust and grime. If you want to avoid constant troubleshooting, invest in the silicone; your ears (and your peace of mind) will thank you.
Kitchen Pantry Hacks Household Items to Stop Door Squeaks

Now, if you’re anything like me, you might not always have a can of specialized lubricant sitting in your utility closet. In the culinary world, we call this “working with what’s in the pantry,” and honestly, the same logic applies to door hinge pin maintenance. If that screeching sound is driving you crazy and you aren’t ready to run to the hardware store, look toward your kitchen. A little bit of olive oil or even vegetable oil can act as a temporary fix. Just like adding a splash of oil to a hot pan to prevent sticking, a few drops on the hinge can provide enough slip to quiet the noise immediately.
However, a word of caution from someone who hates a messy workspace: don’t go overboard! Using too much cooking oil can attract dust and grime, much like how a sugary glaze can get tacky if not handled correctly. If you want a cleaner, long-term solution using household items to stop door squeaks, a bit of petroleum jelly (Vaseline) is a fantastic alternative. It’s thicker and stays put better than liquid oils, making it a much more stable “ingredient” for your home maintenance recipe.
Pro-Tips for a Smooth Finish: Avoiding the "Kitchen Nightmares" of Door Maintenance
- Don’t over-season your hinges. Just like adding too much truffle oil can ruin a delicate risotto, spraying way too much lubricant can lead to a messy drip that attracts dust and grime. A little goes a long way!
- Clean your “prep station” first. Before you apply any lubricant, take a damp cloth and wipe away the old, crusty buildup around the hinge. You wouldn’t try to cook a gourmet meal in a dirty pan, right?
- Check your “budget” for parts. If a quick spray doesn’t do the trick, you might be looking at a hardware replacement. Think of it as an unexpected capital expenditure—better to budget for a new hinge now than to let the friction wear down the entire door frame.
- Timing is everything. Try to lubricate your hinges during a time when you aren’t in a rush. Rushing through maintenance is how you end up with oil stains on your carpet, much like rushing a sauce and ending up with a burnt mess.
- Perform a regular “audit.” Once a season, give your doors a quick check. It’s much easier (and cheaper!) to maintain a smooth-running home than it is to fix a major mechanical headache down the road.
The Recipe for a Smooth-Running Home
Don’t let a small squeak turn into a major overhead cost; addressing minor maintenance early is just like managing your daily expenses—it prevents a massive “financial leak” later on.
Choose your lubricant based on the job at hand, whether it’s a heavy-duty silicone spray for long-term results or a quick pantry hack for a temporary fix, much like choosing between a slow-cooker or a quick sauté.
Consistency is your best friend, so keep a small toolkit of maintenance supplies on hand to ensure your home (and your budget) stays as smooth and well-oiled as a professional kitchen.
The ROI of a Quiet Home
“Think of fixing a squeaky door like managing your overhead costs: ignoring a small, irritating friction today might seem easy, but if you don’t apply a little ‘lubricant’ to the problem now, you’ll end up paying a much higher price in stress and wear-and-tear down the line.”
Madeline Thompson
Serving Up a Smooth Finish
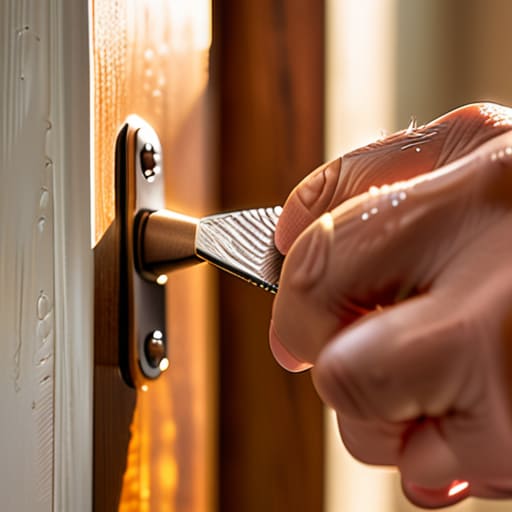
At the end of the day, silencing that annoying squeak is all about having the right tools in your kitchen drawer—or your toolbox. Whether you decided to go with the heavy-hitting power of a specialized silicone spray or opted for a clever pantry hack like olive oil or petroleum jelly, you’ve successfully tackled a small but irritating friction point in your home. Just like managing a budget, the key is being proactive rather than waiting for the noise to become a total headache. Remember, whether you are choosing between WD-40 and a household substitute, the goal is to apply just enough to get the job done without creating a messy cleanup later.
I like to think of these little home maintenance wins as the “compound interest” of adulthood. Fixing a squeaky door might seem like a minor task, but it’s part of a larger pattern of taking ownership of your environment and your assets. When you take care of the small, nagging details, you prevent them from turning into expensive, large-scale problems down the road. So, take a moment to celebrate this victory! You’ve mastered a new skill, saved a few bucks, and restored the peace and quiet of your sanctuary. Now, go enjoy that silence with a well-deserved glass of wine or a perfectly cooked meal.
Frequently Asked Questions
I fixed the squeak, but now my door hinge feels a bit sticky—did I use too much "seasoning"?
Think of it like deglazing a pan—sometimes you just overdo the liquid! If your hinge feels sticky, you’ve likely applied a bit too much “seasoning.” Just like an over-reduced sauce, excess lubricant can create a tacky residue that attracts dust. To fix it, grab a clean microfiber cloth and wipe away the surplus. You want just enough to coat the mechanism, not a heavy pour that turns your hinge into a sticky mess.
Is it worth investing in a professional handyman, or is this something I can definitely manage on my own budget?
Think of this like deciding whether to cook a five-course meal at home or order from a Michelin-star restaurant. If it’s just a squeak, DIY it—it’s a low-cost “appetizer” that saves you serious capital. But, if your door is sagging or the frame is warped, that’s a structural heavy hitter. In that case, hire a pro. Don’t waste your “food budget” on a repair that requires expert precision to avoid costly mistakes later!
How often should I "re-oil" my hinges to prevent the noise from coming back and ruining my morning peace?
Think of hinge maintenance like deglazing a pan—you don’t want to wait until everything is burnt and stuck to take action. If your doors are high-traffic, like a kitchen door or a main entryway, I’d recommend a “seasonal seasoning” every six months. However, if you hear even a tiny hint of a squeak, don’t wait! Address it immediately. Staying proactive keeps your “financial” and household peace intact without any unexpected, noisy overhead.
