Posted on

Free Design Tools Anyone Can Use

Best free design tools for everyone.

Ever feel like you’re staring at a blank plate, knowing you have the vision for a five-star meal but realizing your pantry is completely empty? That’s exactly how I felt when I first tried to brand my food truck; I had the passion, but my budget was strictly limited to the essentials. Many of us think that launching a professional brand or a side hustle requires a massive capital investment, but that’s a recipe for financial burnout. The truth is, you don’t need a massive bankroll to create something visually stunning; you just need to know where to find the best free design tools to get your ideas simmering.

In this post, I’m pulling back the curtain on my personal toolkit to show you that high-end aesthetics don’t have to come with a high-end price tag. I’ve curated a list of five essential resources that will help you whip up professional visuals without breaking your budget. Whether you’re designing a logo for a new business venture or just polishing your social media presence, these tools will ensure your brand looks as delicious as a perfectly plated reduction. Let’s dive in and start building your creative empire!

Table of Contents

Canva: The All-In-One Pantry of Design

Canva: The All-In-One Pantry of Design.

Think of Canva as that perfectly stocked pantry where you can find everything from salt to saffron without having to visit five different specialty shops. It’s the ultimate tool for those of us who need to whip up a professional-looking social media post or a presentation on a shoestring budget. You don’t need to be a master chef—or a professional graphic designer—to create something that looks like it cost a fortune.

Figma: Precision Cutting for Digital Architects

Figma: Precision Cutting for Digital Architects

If Canva is your pantry, Figma is your high-end set of Japanese chef knives. It’s a bit more technical, but once you learn how to handle it, the precision you can achieve is absolutely unmatched. It’s primarily used for UI/UX design, which is a fancy way of saying it helps you build the digital “plating” for apps and websites, ensuring every pixel is exactly where it needs to be.

GIMP: The Heavy-Duty Kitchen Appliance

GIMP: The Heavy-Duty Kitchen Appliance.

Every kitchen needs a heavy-duty stand mixer or a professional-grade food processor, and in the world of free design, GIMP is that powerhouse. It’s an open-source alternative to Photoshop that offers a staggering amount of control over photo manipulation and image creation. It isn’t always as “user-friendly” as a microwave meal, but the depth of customization is incredible if you’re willing to put in the work.

CapCut: Sizzling Visuals for the Social Age

We all know that sometimes a dish needs a little extra sizzle to really grab someone’s attention, and in the digital space, that sizzle comes from video. CapCut is like the high-heat sauté pan of the design world—it’s fast, it’s efficient, and it delivers instant gratification. It makes video editing feel less like a grueling twelve-hour shift and more like a fun, creative experiment in your kitchen.

Adobe Express: The Gourmet Quick-Fix

Sometimes, life gets a little too hectic, and you don’t have time to prepare a seven-course meal from scratch; you need something high-quality that’s ready in a flash. Adobe Express is that reliable, high-quality meal kit that delivers professional results with minimal effort. It bridges the gap between the simplicity of Canva and the heavy-duty power of professional Adobe software.

The Secret Sauce to Your Creative Success

Think of these free tools as your pantry staples; you don’t need a massive budget to cook up something spectacular, just the right ingredients and a little bit of technique.

Just like managing a budget or perfecting a recipe, mastering these tools takes practice, so don’t be afraid to experiment and make a bit of a mess while you learn.

Investing time into learning these digital skills is the ultimate high-yield investment for your career, giving you a much higher ROI than any expensive software subscription ever could.

The Secret Ingredient to Your Creative Success

“Think of these free design tools as the high-quality, pantry-staple ingredients in your kitchen; you don’t need a massive budget to create a Michelin-star visual, you just need the right tools and a little bit of flavor to make your brand truly pop.”

Madeline Thompson

Plating Your Creative Masterpiece

Think of these tools as the essential pantry staples in your creative kitchen. Just as you wouldn’t try to whip up a complex reduction without a reliable whisk or a sharp knife, you shouldn’t try to launch a brand or a side hustle without the right digital equipment. We’ve walked through everything from intuitive layout builders to powerful photo editors that let you refine your visual flavor without breaking the bank. Whether you’re using these apps to polish a professional presentation or to design a menu for a pop-up event, remember that the most expensive tools aren’t always the ones that produce the best results. It’s all about how you season your ideas and execute your vision.

At the end of the day, whether you are managing a high-yield investment portfolio or perfecting a fusion taco recipe, success comes down to one thing: the willingness to experiment. Don’t let the fear of a “messy kitchen” or a bad design stop you from starting. Use these free resources to practice your craft, fail fast, and learn even faster. Think of your career and your creativity as a long-term investment; every little bit of skill you build today is compounding interest for your future self. Now, grab your digital spatula, dive in, and start creating something absolutely delicious!

Frequently Asked Questions

If I'm just starting out, will these free tools actually be enough to build a professional brand, or am I going to hit a "paywall" the moment things get serious?

Think of these free tools like a starter spice kit. They’re perfect for getting your flavor profile established without breaking the bank! You can absolutely build a polished, professional brand with them. However, just like moving from a home kitchen to a commercial one, you’ll eventually hit a “paywall” when you need heavy-duty scaling or advanced automation. Don’t sweat it, though—invest in the premium versions only when your “revenue” justifies the upgrade!

How much time should I realistically budget to learn these tools before I can start using them to actually grow my business or side hustle?

Think of this like learning to master a new mother sauce; you don’t need to be a Michelin-star chef to start cooking, but you do need a solid foundation. I’d budget about 5 to 10 hours of focused “prep work” per tool. Don’t aim for perfection—that’s a recipe for burnout. Once you grasp the basics, start applying them to your business immediately. Real growth happens in the kitchen, not just in the cookbook!

Is there a way to mix and match these different free apps without them clashing, or will I end up with a messy "kitchen" of incompatible software?

Think of it like a fusion kitchen: if you don’t have a recipe, you might end up with a chaotic mess. But with a little “mise en place”—or organization—you can absolutely blend these tools. The secret is choosing apps that play well together, like using Canva for your quick layouts and then bringing those assets into a video editor. Just keep your visual “ingredients” consistent, and your digital workflow will be as seamless as a well-reduced sauce.


Posted on

How to Cut Subscription Costs You Forgot You Had

Tips on how to save on subscriptions.

Have you ever sat down with your bank statement and felt that sudden, sinking sensation in your stomach—the same one I used to get when a recipe went horribly wrong? It’s that moment you realize you’re paying for three different streaming services, a premium fitness app you haven’t opened since January, and a gourmet coffee delivery you barely touch. Most “experts” will tell you that managing these leaks is some complex mathematical equation, but honestly, that’s total nonsense. Learning how to save on subscriptions isn’t about becoming a hermit or cutting out everything you love; it’s really just about trimming the fat so you can afford the high-quality ingredients in your life.

I’m not here to give you a generic checklist of apps to download or some complicated spreadsheet that takes hours to maintain. Instead, I’m going to share the exact, no-nonsense audit I used to transition from the high-stress world of Wall Street to running my own food truck. We are going to treat your monthly expenses like a pantry cleanup: we’ll toss the expired, useless stuff and make sure every dollar you spend is actually nourishing your lifestyle.

Table of Contents

Conducting a Delicious Unused Streaming Services Audit

Conducting a Delicious Unused Streaming Services Audit.

First, let’s get into the kitchen and start with an unused streaming services audit. Think of this like checking your fridge for that jar of artisanal pesto you bought six months ago and completely forgot about; it’s taking up prime real estate and costing you money every time you open the door. Grab your laptop and pull up your bank statements from the last three months. I want you to list every single digital service that pulls from your account. We’re looking for those “ghost” subscriptions—the ones you signed up for to binge one specific show and then let linger in the background like stale crackers.

Once you have your list, it’s time to decide what stays on the menu and what gets tossed. If you haven’t clicked “play” on a platform in over thirty days, it’s time to cut it loose. This is one of the most effective subscription fatigue solutions because it stops the slow leak of your hard-earned cash. By reducing monthly overhead through this quick purge, you aren’t just saving pennies; you’re clearing the clutter so you can actually afford the high-quality experiences—and better ingredients—that truly matter to you.

Managing Recurring Monthly Payments Like a Pro Chef

Managing Recurring Monthly Payments Like a Pro Chef

Once you’ve finished that deep clean of your digital pantry, it’s time to look at the kitchen workflow itself. Think of managing recurring monthly payments as setting up your mise en place; if your ingredients are disorganized and scattered, your entire service is going to be a chaotic mess. When I was on Wall Street, I looked at cash flow like a recipe’s timing—if too many small costs hit your account at once, you’re going to experience a massive bottleneck that leaves your bank balance feeling completely drained.

To avoid that feeling of “subscription fatigue,” I highly recommend setting up a system that works for you. You don’t have to do this manually every single month; instead, lean on subscription management apps to act as your sous-chef, alerting you before a trial period ends or a price hikes. By automating the oversight, you’re essentially reducing monthly overhead without having to stand over the stove every single day. It’s all about creating a streamlined process so you can spend less time worrying about the bills and more time enjoying the feast you’ve worked so hard to build.

Five Secret Ingredients to a Leaner, Tastier Budget

  • Practice the “Seasonal Rotation” Method: Just like you wouldn’t cook a heavy beef stew in the middle of a July heatwave, don’t keep every streaming service active at once. Pick one platform for your binge-watching month, cancel the rest, and rotate them as new seasons drop. It keeps your viewing fresh and your bank account from feeling overheated.
  • Hunt Down the “Ghost Ingredients” in Your Apps: We’ve all been there—you signed up for a fitness app or a premium news site for a one-time project and forgot it existed. Audit your digital pantry every quarter to find those sneaky, recurring charges that are adding zero flavor to your life. If you aren’t using it, toss it!
  • Look for the “Family Style” Discounts: In the culinary world, buying in bulk saves a fortune, and the same goes for subscriptions. Check if your services offer family or multi-user plans. Splitting a premium account with roommates or family members is like sharing a large platter of tapas—it’s much more cost-effective than ordering everyone their own individual entree.
  • Negotiate Your “Service Fees” Like a Pro: Before you hit that cancel button, try a little culinary finesse by chatting with customer service. Often, they’ll offer you a “loyalty discount” or a few months at a reduced rate just to keep you at the table. It’s the digital equivalent of asking for a little extra sauce on the side—sometimes you get exactly what you want for less.
  • Set an “Expiration Date” on Free Trials: Free trials are like complimentary appetizers; they’re great, but if you aren’t careful, you’ll end up paying for a full five-course meal you never intended to order. The second you sign up, set a calendar alert for two days before the trial ends. This way, you can decide if you actually loved the dish or if you were just hungry for something new.

The Secret Sauce to Subscription Success

Treat your bank statement like a kitchen inventory; if you haven’t “tasted” a service in thirty days, it’s time to clear it out of your budget.

Just like prepping ingredients ahead of time saves you stress during dinner rush, scheduling a monthly “subscription check-in” prevents those sneaky, small charges from bloating your finances.

Don’t be afraid to swap out high-cost ingredients for more affordable alternatives—canceling a premium service you barely use isn’t a loss, it’s just freeing up capital for a meal that actually nourishes your lifestyle.

The Secret Ingredient to a Lean Budget

“Think of your monthly subscriptions like a pantry full of spices; if you’re paying for twenty different seasonings but only ever use salt and pepper, you aren’t building flavor—you’re just wasting ingredients. Trim the excess so you have more capital to invest in the high-quality stuff that actually makes your life delicious.”

Madeline Thompson

The Final Course: Serving Yourself Success

The Final Course: Serving Yourself Success.

At the end of the day, trimming your subscriptions isn’t about deprivation; it’s about intentionality. We’ve gone through the process of auditing those digital pantries, tossing out the stale streaming services you haven’t touched in months, and organizing your recurring payments so they don’t catch you off guard like a sudden kitchen fire. By treating your monthly expenses with the same precision a chef uses to balance flavors, you stop the “budget bleed” and start reclaiming your hard-earned cash. Remember, every dollar you save from a forgotten app is a dollar you can reinvest into your passions, whether that’s a high-quality cast iron skillet or your next big career move.

Taking control of your finances might feel a bit daunting at first—kind of like trying to master a complex soufflé on your first attempt—but I promise the payoff is incredibly sweet. As you start to see those extra funds sitting in your savings account, you’ll realize that financial freedom is a dish best served with confidence and clarity. Don’t let your money evaporate into a cloud of unused digital nonsense; instead, curate a lifestyle that truly nourishes your goals. You have the recipe for success right in your hands, so let’s get cooking and make every cent count!

Frequently Asked Questions

Is it worth paying for a premium subscription if I only use the service once a month, or should I just stick to the basic tier?

Think of it like choosing between a premium truffle oil and a basic olive oil. If you’re only drizzling that truffle oil over a single dish once a month, you’re essentially letting your hard-earned cash expire on the shelf. Unless those premium features are absolutely vital to the “flavor” of your experience, stick to the basic tier. Don’t pay for a five-course tasting menu when a simple, delicious snack does the trick!

How do I keep track of all these different billing dates so I don't get hit with an unexpected "surprise ingredient" on my bank statement?

Think of your billing dates like a mise en place; you wouldn’t start a complex reduction without having all your prep work organized first. I swear by a simple digital calendar with alerts set three days before any “charge” hits. If you want to get fancy, a shared spreadsheet acts like a master recipe book for your cash flow. Getting ahead of those dates ensures your bank account never tastes a bitter surprise!

Are there any sneaky ways to negotiate a lower rate with my current providers, or am I stuck with the menu price they give me?

Don’t let them charge you the “tourist price” when you’re a loyal regular! Think of it like bargaining at a farmer’s market. Call your internet or insurance provider and ask for the “retention department.” Tell them you’re looking at cheaper menus elsewhere. Often, they have “secret ingredients”—special discounts or promotional rates—just to keep you from leaving. It’s not being cheap; it’s just ensuring you aren’t overpaying for the same recipe!

Posted on

How to Organize Your Entryway So Mornings Are Easier

Tips on how to organize your entryway.

Ever walk through your front door after a grueling ten-hour shift, only to be greeted by a chaotic mountain of discarded shoes, tangled leashes, and mail that looks like a failed hedge fund merger? We’ve all been there, staring at that pile of clutter and feeling our stress levels spike before we’ve even reached the kitchen. Most “home decor” influencers will tell you that you need a $500 custom built-in console or a designer marble tray to fix the problem, but honestly? That’s just expensive fluff that doesn’t solve the root issue. Learning how to organize your entryway isn’t about buying more stuff; it’s about creating a high-functioning system that works for your real, messy life.

Think of this guide as your personal mise en place for your home. Just like I wouldn’t dream of starting a complex reduction without prepping my ingredients first, you shouldn’t try to manage your household chaos without a solid foundation. I’m going to skip the Pinterest-perfect illusions and give you the straight-up, budget-friendly strategies I used to transition from a cluttered Wall Street apartment to a streamlined food truck lifestyle. We are going to build a system that is as efficient and satisfying as a perfectly balanced recipe.

Table of Contents

Small Entryway Organization Tips for a Seamless Welcome

Small Entryway Organization Tips for a Seamless Welcome

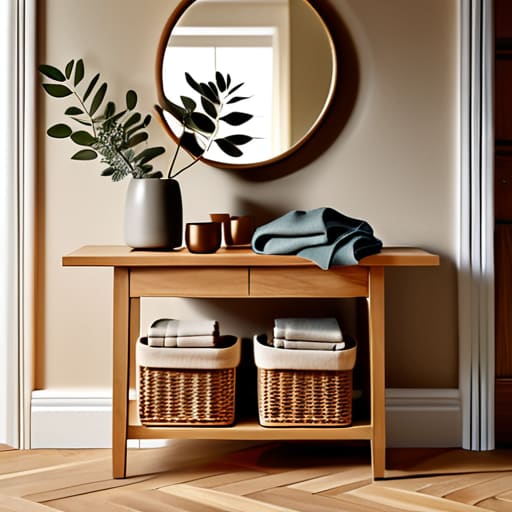
If you’re working with a footprint as tight as a crowded kitchen during the dinner rush, don’t panic. You don’t need a sprawling foyer to make a statement; you just need to be strategic with your “ingredients.” When looking for entryway furniture for small spaces, think vertically. Instead of a bulky console table that eats up your floor real estate, try a slim wall-mounted shelf or a narrow pedestal. It’s all about maximizing your square footage without creating a bottleneck, much like how I’d optimize a tiny food truck galley to ensure every movement is efficient.

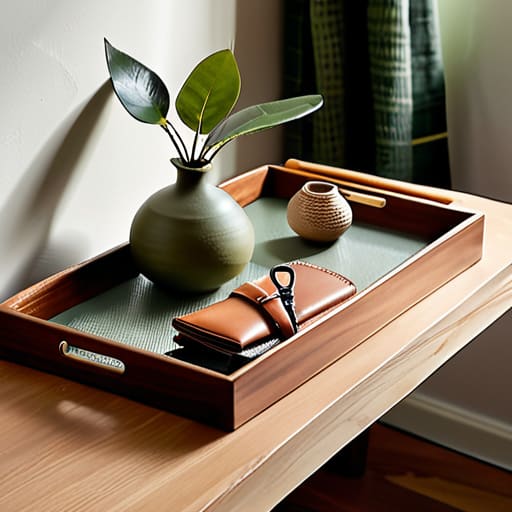
To keep the chaos from boiling over, you need to implement some serious shoe storage solutions for foyers. Nothing kills a first impression faster than a pile of sneakers looking like a disorganized pantry. I love using decorative baskets or a sleek, tiered rack to tuck footwear out of sight. If you want to level up, consider creating a mini command center with a small tray for keys and mail. By treating your entryway with the same precision as a well-prepped mise en place, you ensure your home’s first impression is always polished and ready to serve.

Selecting Entryway Furniture for Small Spaces With Intent

Selecting Entryway Furniture for Small Spaces With Intent

When you’re working with limited square footage, choosing furniture is a lot like managing a tight food budget: every single cent—or in this case, every single inch—needs to pull its weight. You can’t afford “empty calories” in your decor. Instead of a bulky, traditional console table that eats up your floor plan, look for slim-profile pieces or even a floating shelf. This approach keeps the visual weight light while providing a landing pad for your keys. I always tell my clients that selecting entryway furniture for small spaces is all about maximizing ROI; you want pieces that offer high utility without a massive spatial cost.

If you can find a bench that doubles as discreet shoe storage solutions for foyers, you’ve essentially hit the jackpot. It’s the culinary equivalent of a multi-purpose kitchen tool like a Dutch oven—it serves several functions while saving precious real estate. I’m also a huge advocate for incorporating a small wall-mounted organizer to serve as your personal command center organization ideas hub. By keeping your mail, keys, and charging cables in one designated spot, you’re preventing that dreaded “clutter creep” before it even starts.

The Mise en Place of Your Home: 5 Pro-Tips for a High-Yield Entryway

  • Establish a “Command Center” for your daily essentials. Just like a chef needs their knife roll in one specific spot, you need a designated zone for keys, wallets, and sunglasses. If you’re hunting for your keys every morning, you’re essentially wasting “mental capital” that could be better spent on your morning coffee or planning your next big career move.
  • Implement a “One-In, One-Out” policy for footwear. Think of your entryway like a tight restaurant budget; you can’t keep adding new expenses without cutting something else. If a new pair of statement boots enters the house, an old, beat-up pair needs to be donated or retired. This keeps your “inventory” manageable and prevents that cluttered, overdrawn feeling.
  • Utilize Vertical Real Estate to maximize your ROI. When floor space is at a premium, look up! Floating shelves or wall-mounted hooks are the high-growth stocks of entryway organization. They provide massive utility without the heavy “overhead” of bulky floor furniture, keeping your walkway clear and your aesthetic streamlined.
  • Create a “Landing Strip” for mail and paperwork. Unsorted mail is the financial equivalent of a messy kitchen counter—it creates chaos and hides the important stuff. Use a sleek wall organizer to sort incoming mail immediately. This prevents “clutter inflation” from turning your entryway into a mountain of junk mail and unpaid bills.
  • Invest in a “Seasonal Rotation” strategy. Don’t let your heavy winter coats and muddy boots crowd your space during the summer months. Just as you’d adjust your menu based on seasonal ingredients, rotate your entryway gear. Storing off-season items in bins keeps your entryway lean, mean, and ready for whatever the current “market” throws at you.

The Secret Sauce to a Stress-Free Entryway

Treat your entryway like a kitchen’s mise en place; by assigning a specific “station” for keys, mail, and shoes, you prevent the chaos of a cluttered life from spilling into your living space.

Invest in high-quality, multi-functional pieces rather than cheap fillers, much like choosing a reliable chef’s knife over a dull set—it’s better to have one purposeful item that does the job right than a dozen things that just create visual noise.

Maintain your organization with a regular “audit,” just as you’d check your food costs or pantry inventory, to ensure that clutter isn’t accumulating and eating away at your home’s mental ROI.

The Mise en Place of Your Home

“Think of your entryway as the ‘mise en place’ for your entire life; if you don’t prep your space to handle the chaos of keys, coats, and mail right at the door, you’re essentially trying to cook a five-course meal in a cluttered kitchen—it’s messy, stressful, and you’re bound to burn something along the way.”

Madeline Thompson

Serving Up a Seamless Transition

Serving Up a Seamless Transition entryway.

At the end of the day, organizing your entryway is a lot like managing your monthly budget; it’s all about intentionality and placement. We’ve talked about the importance of small-scale solutions and selecting furniture that works hard without overcrowding your floor plan. Whether you’re utilizing vertical storage to maximize every square inch or investing in pieces that serve a dual purpose, you are essentially setting your financial and physical mise en place. When your keys, shoes, and bags have a designated “account” to live in, you eliminate the chaotic mental overhead that comes with a cluttered home. You aren’t just tidying a room; you are streamlining your daily workflow to ensure your transition from the outside world to your sanctuary is as smooth as a well-emulsified sauce.

Remember, your home is the foundation upon which your entire life is built, much like a solid capital reserve supports your wildest entrepreneurial dreams. Don’t feel like you have to overhaul the entire space overnight. Start with one small “investment”—perhaps a sleek tray for your mail or a sturdy bench—and watch how that single, smart decision ripples outward. You deserve a home that feels as organized and rewarding as a perfectly balanced spreadsheet. So, take a deep breath, grab your organizational tools, and start cooking up a life that feels as good as it looks!

Frequently Asked Questions

How do I balance keeping my entryway functional without it looking like a cluttered storage unit for my daily life?

Think of it like managing your kitchen’s prep station: you need everything within reach, but you don’t want the counter covered in half-chopped onions. To keep that balance, implement a “one-in, one-out” rule for clutter and invest in “hidden” storage—like an ottoman with a lid or a sleek console with drawers. If you tuck the daily chaos behind closed doors, your entryway stays functional for your life without sacrificing that beautiful, high-end aesthetic.

What are some budget-friendly DIY hacks to make a small entryway feel more high-end and intentional?

Think of your entryway like a signature sauce; it’s all about the finishing touches that add depth. You don’t need a Wall Street budget to achieve a high-end feel. Try upgrading your hardware—swapping basic knobs for brushed brass ones is like adding truffle oil to a dish; it instantly elevates the whole experience. Also, grab some thrifted frames, paint them a cohesive matte black, and create a curated gallery wall. It’s high-impact, low-cost, and totally intentional.

How can I implement a "system" for my family's shoes and coats so the clutter doesn't just migrate back to the floor by Tuesday?

Think of your entryway like a busy kitchen during dinner rush; without a strict mise en place, chaos takes over. To stop the Tuesday clutter creep, you need a “one-in, one-out” policy and designated stations. Assign specific hooks for every family member—it’s like assigning prep tasks to your sous-chefs. If everyone has a literal “home” for their gear, you’re not just cleaning; you’re managing your household’s inventory with precision.

Posted on

How to Build Floating Shelves That Hold Real Weight

Sturdy floating shelves diy tutorial guide.

I was standing in my kitchen last Tuesday, staring at a pile of expensive artisanal spices and a stack of mismatched cookbooks, feeling that familiar sting of a wasted investment. I had the “ingredients” for a beautiful home, but my pantry looked more like a cluttered junk drawer than a curated culinary workspace. I realized then that most people think floating shelves diy projects require a master carpenter’s license and a massive construction budget, but that’s a total myth. In reality, much like balancing a complex reduction sauce, it’s all about the precision of your prep work and having the right tools to ensure everything stays stable when the heat is on.

In this guide, I’m stripping away the fluff to give you a blueprint that actually works. We aren’t just slapping wood on a wall; we are building a foundation for your space that is as structurally sound as a well-managed retirement fund. I’ll walk you through the essential hardware, the math behind the mounting, and how to avoid those costly mistakes that turn a weekend project into a financial and aesthetic headache. Let’s get to work and turn that empty wall into something truly delicious.

Table of Contents

Guide Overview

Total Time: 3-5 hours
Estimated Cost: $40-80
Difficulty: Beginner

Tools & Supplies

  • Drill/Driver for mounting hardware
  • Level to ensure evenness
  • Stud finder to locate wall supports
  • Saw for cutting wood to size
  • Measuring tape for precision
  • Wood planks (2-3 boards)
  • Floating shelf brackets/hardware (1 set)
  • Wood screws (1 box)
  • Sandpaper (various grits)
  • Wood stain or paint (1 can)

Step-by-Step Instructions

  • 1. First, we need to gather our “mise en place.” Just like you wouldn’t start a complex reduction without having your shallots minced and your stock simmering, you shouldn’t start a DIY project without the right tools. You’ll need a drill, a level, a stud finder, a measuring tape, and of course, your shelf brackets and wood. Think of this as auditing your pantry before you commit to a new recipe; you don’t want to get halfway through the process only to realize you’re missing a crucial ingredient.
  • 2. Now, it’s time to locate your studs. This is the most critical part of the “financial planning” phase of our project. If you try to hang a heavy shelf on just drywall, it’s going to crash down faster than a badly managed hedge fund. Use your stud finder to find the wooden beams behind your wall and mark them clearly with a pencil. This ensures your shelf has a solid foundation to lean on, much like a well-diversified portfolio.
  • 3. Once you know where your studs are, it’s time to measure and mark your mounting points. Grab that measuring tape and decide exactly where you want your shelves to live. Use your level to draw a light pencil line across the wall; if your line is crooked, your shelves will look like a sloping market trend, and nobody wants that. Accuracy here is everything—it’s the difference between a professional finish and a DIY disaster.
  • 4. Next, we move into the “heavy lifting” phase: drilling the pilot holes. Using your drill, carefully create holes where your brackets will go, making sure to stay centered on those stud marks you made earlier. You want to be precise and intentional with your movements here. If you drill too deep or off-center, you might compromise the structural integrity of your “investment,” so take your time and keep it steady.
  • 5. Now, let’s secure the brackets to the wall. Align your brackets with the pilot holes and drive in your screws. I like to think of this step as locking in your gains; once those brackets are firmly attached to the studs, the hardest part of the labor is behind you. Give them a little tug to make sure they aren’t budging—you want these to be as sturdy as a high-yield savings account.
  • 6. Finally, it’s time for the “plating”—sliding your wooden shelves onto the brackets. Carefully lower the wood onto the supports, ensuring it sits flush against the wall. If everything was measured correctly, it should slide on with the smoothness of a perfect hollandaise. Once they are in place, take one last look with your level to ensure everything is perfectly balanced and ready to hold your beautiful decor.

Selecting Premium Woodworking Tools for Shelving Perfection

Selecting Premium Woodworking Tools for Shelving Perfection.

Think of gathering your equipment like prepping a high-end kitchen before a dinner rush; if your knives are dull, your mise en place is going to be a disaster. When it comes to woodworking tools for shelving, you don’t need a professional workshop, but you do need precision. A high-quality level is non-negotiable—nothing ruins the “flavor” of a room faster than a shelf that looks like it’s sliding off the wall. I always tell my team that investing in a solid drill and a sharp saw is like buying premium organic ingredients: it might cost a little more upfront, but the final result is exponentially better.

Once you have your basics, don’t overlook the hardware that keeps everything structurally sound. To achieve that sleek, modern floating shelf design, you’ll likely be working with hidden shelf brackets that require exact measurements to ensure they stay tucked away. Just like balancing acidity in a sauce, you have to balance the weight of your decor with the strength of your mounting. Always double-check your placement for mounting shelves to studs to ensure your investment stays exactly where you intended it to be.

Mastering Modern Floating Shelf Design and Hidden Shelf Brackets

Mastering Modern Floating Shelf Design and Hidden Shelf Brackets

Now, let’s talk about the “secret sauce” that separates a mediocre DIY project from a professional-grade masterpiece: the hardware. If you want that sleek, high-end look, you have to move away from bulky L-brackets and embrace hidden shelf brackets. Think of these like the spices in a reduction sauce; you know they’re there, providing all the essential structure, but they shouldn’t be the first thing you notice. Using internal rods allows the wood to appear as if it’s magically hovering against the wall, which is the hallmark of a truly sophisticated modern floating shelf design.

However, just like a delicate soufflé, a beautiful shelf is useless if it collapses under pressure. You can have the most stunning reclaimed oak in the world, but if you aren’t mounting shelves to studs with precision, you’re essentially building a house of cards. I always tell my clients that stability is your primary capital. Before you start decorating, always calculate your shelf weight capacity tips by checking the load-bearing limits of your specific bracket and stud placement. It’s much better to invest a little extra effort in the foundation now than to face a total structural bankruptcy later!

The Secret Sauce: 5 Pro-Tips for Shelving Success

  • Don’t skim on the studs—think of your wall studs as your financial foundation; if you try to build a heavy shelf on just drywall, your whole project is going to crash like a bad investment.
  • Measure twice, cut once, and audit your math a third time; in both cooking and carpentry, a tiny miscalculation in your prep work can lead to a messy, expensive mistake later on.
  • Sanding is your mise en place; you can’t just rush to the finish line, so take the time to smooth out those wood grains now so your final “presentation” looks high-end and professional.
  • Balance your visual budget by mixing textures; don’t clutter your shelves with too much “overhead,” but instead, curate a mix of heavy books and light decor to keep the aesthetic from feeling too heavy.
  • Treat your finish like a slow-simmered sauce; whether it’s oil or stain, applying thin, even layers will give you a much more sophisticated result than trying to rush the process with one thick, gloppy coat.

The Secret Sauce to Shelving Success

Treat your tool selection like choosing high-quality ingredients; investing in premium, reliable gear upfront prevents “flavor imbalances” and costly mistakes during the assembly process.

Precision is your most important seasoning—measure twice and double-check your bracket placement to ensure your shelves are as structurally sound as a well-balanced budget.

Think of design as your plating technique; even the sturdiest shelf needs a bit of aesthetic finesse to ensure it enhances your space rather than just cluttering it up.

The ROI of a Handcrafted Home

“Think of DIY floating shelves as the ultimate high-yield investment: you’re putting in a little sweat equity and the right ingredients today to reap a lifetime of aesthetic dividends and organized bliss.”

Madeline Thompson

The Final Garnish: Bringing Your Vision to Life

The Final Garnish: Bringing Your Vision to Life

At the end of the day, building your own floating shelves is a lot like executing a complex reduction sauce—it requires patience, the right tools, and a keen eye for detail. We’ve walked through everything from sourcing those premium woodworking tools to the technical precision of installing hidden brackets. By focusing on the quality of your materials and the accuracy of your measurements, you aren’t just hanging wood on a wall; you are investing in your home’s equity and creating a customized aesthetic that store-bought options simply can’t match. Just like a well-balanced budget, these shelves provide the structural support your space needs to truly flourish.

As you step back to admire your handiwork, I want you to remember that DIY projects are about much more than just home decor. They are a testament to your ability to take a raw concept and turn it into something tangible and beautiful. Whether you’re displaying heirloom spices or your favorite finance books, you’ve proven that you can master the art of intentional living. So, take a moment to savor this win, grab a glass of something delicious, and start planning your next big project. You’ve got the skills, the vision, and the recipe for success!

Frequently Asked Questions

How do I know if my wall can actually handle the weight of these shelves without causing a total financial—and structural—collapse?

Think of your wall like a budget: if you overextend without a solid foundation, everything comes crashing down. Before you load up those shelves with heavy cookbooks, you’ve got to audit your structure. Use a stud finder to locate the wooden studs—that’s your “high-yield savings account” for stability. If you’re mounting into just drywall, you’re essentially gambling with high-interest debt; you’ll need heavy-duty anchors to prevent a total structural bankruptcy!

Is it worth investing in high-end hardwoods like walnut, or can I get a professional look on a budget by staining cheaper pine?

Think of this like choosing between Wagyu beef and a solid, reliable ribeye. If your budget allows, investing in walnut is like buying a blue-chip stock; the natural grain is stunning, and the value holds over time. However, if you’re watching your overhead, don’t sweat it! You can absolutely “garnish” a budget-friendly pine board with a high-quality dark stain to mimic a premium look. It’s all about the execution!

What’s the best way to ensure my shelves are perfectly level so my decor doesn't end up looking as lopsided as a poorly balanced budget?

Think of leveling your shelves like balancing a complex recipe—if one ingredient is off, the whole dish falls apart. To avoid that “lopsided budget” look, don’t rely on your eyes; trust a high-quality spirit level. Once you mark your bracket holes, double-check the horizontal plane before you ever touch a drill. A little extra precision now prevents a massive headache later, ensuring your decor sits as steady as a well-diversified portfolio.

Posted on

How to Set Healthy Boundaries Without Feeling Bad

Learning how to set healthy boundaries.

I remember sitting in my tiny apartment during my final year on Wall Street, staring at a mountain of spreadsheets while my phone buzzed incessantly with “urgent” requests from colleagues who didn’t respect my downtime. I was trying to be the perfect employee, the perfect friend, and the perfect person, but I was essentially running a kitchen with zero prep work and a broken stove. I thought being “available” was a badge of honor, but in reality, I was just bankrupting my own mental energy. Learning how to set healthy boundaries isn’t some fluffy, self-help luxury; it’s the essential ingredient that keeps you from burning out before the main course of your life even arrives.

I’m not here to give you those vague, “just say no” platitudes that sound good on a greeting card but fail miserably in a real boardroom or a heated family dinner. Instead, I’m going to share the practical, no-nonsense strategies I’ve used to protect my time and my sanity, treating your personal limits with the same precision I use to balance a budget or perfect a reduction sauce. We are going to learn how to plate your limits firmly and gracefully, ensuring you stay profitable in your relationships without sacrificing your peace.

Table of Contents

Identifying Boundary Violations Spotting the Bitter Aftertaste

Identifying Boundary Violations Spotting the Bitter Aftertaste

Ever had that moment where you finish a meal, but instead of feeling satisfied, you’re left with a lingering, unpleasant bitterness in the back of your throat? That’s exactly how a boundary violation feels in your life. You might not notice it immediately while you’re “eating”—or in this case, interacting—but the resentment starts to simmer long after the conversation ends. Identifying boundary violations often starts with your gut; if you feel a sudden sense of dread before a phone call or a heavy weight in your chest after a family dinner, your internal alarm system is ringing.

Think of these red flags as the “spoiled ingredients” of your social life. Maybe it’s a coworker who consistently dumps their workload on your desk, or a friend who only calls when they need a financial bailout. These are classic emotional boundary examples that signal someone is overstepping your personal kitchen counters. If you find yourself constantly overextending your resources—whether that’s your time, your energy, or your actual bank account—you aren’t just being “nice.” You’re likely letting someone else dictate your menu, and that’s a recipe for total burnout.

Emotional Boundary Examples Perfecting Your Personal Recipe

Emotional Boundary Examples Perfecting Your Personal Recipe

Now, let’s get into the heart of the kitchen: your emotions. Just like you wouldn’t dump an entire gallon of hot sauce into a delicate cream sauce, you can’t let everyone else’s emotional turbulence spill into your own headspace. When we talk about emotional boundary examples, we’re really talking about protecting your internal “flavor profile.” This might look like realizing you don’t have the capacity to act as a 24/7 unpaid therapist for a friend who constantly vents without ever asking how you are. If you find yourself feeling drained or “salty” after every interaction, it’s a sign your emotional pantry is running low.

Learning how to say no without guilt is the secret ingredient here. It’s not about being rude; it’s about managing your emotional inventory. For instance, if a family member constantly makes passive-aggressive comments about your career choices, setting a limit isn’t an act of war—it’s simply refusing to let their negativity spoil your meal. By establishing these internal guardrails, you aren’t just protecting your peace; you’re ensuring you have enough emotional capital left to invest in the people and projects that actually nourish you.

The Secret Sauce: 5 Pro-Tips for Plating Your Boundaries Perfectly

  • Treat your time like a high-end ingredient. You wouldn’t toss your most expensive saffron into a massive pot of cheap stew where it gets lost, so don’t throw your precious energy into every low-priority request that comes your way. Audit your “time budget” just like you’d audit a quarterly expense report to ensure you’re investing in what actually matters.
  • Communicate with clarity, not spice. When you’re setting a limit, you don’t need to drown the conversation in unnecessary drama or “extra seasoning” to make it palatable. Be direct and transparent—think of it like a clean, sharp knife cut. “I can’t take on this extra project right now” is much more effective than a long-winded apology that leaves room for negotiation.
  • Build in a “buffer period” before committing. In finance, we never make a massive trade without analyzing the risk; in life, don’t say “yes” the second a request hits your inbox. Give yourself a cooling period—a little kitchen prep time—to check your capacity and see if adding this new commitment will cause your personal “overhead” to skyrocket.
  • Practice “incremental seasoning.” If you’re someone who tends to be a people-pleaser, jumping straight into hard boundaries can feel overwhelming. Start small. Set a minor boundary, like declining one social invite or turning off notifications after 7 PM, and see how it tastes. It’s much easier to build a robust boundary system if you don’t try to overhaul your entire “menu” in one day.
  • Expect some initial friction, but don’t let it sour the batch. When you change the recipe of a relationship by introducing boundaries, some people might not like the new flavor. That’s okay. Just like a volatile market, people react to change, but staying consistent with your new standards is the only way to ensure long-term stability and a much healthier “bottom line” for your mental well-being.

The Secret Sauce: My Top 3 Tips for Keeping Your Boundaries Fresh

Think of your boundaries as your kitchen prep; if you don’t set them early, you’ll end up overwhelmed and burnt out when the dinner rush hits.

Don’t be afraid to adjust the seasoning; if a boundary isn’t working or feels too restrictive, tweak it until it tastes just right for your lifestyle.

Protect your mental capital like you would your most precious ingredient—investing in your own peace is the only way to ensure you have enough energy to serve others later.

## The Secret Ingredient to Success

“Think of your boundaries like a well-managed budget: if you don’t decide where your resources go, everyone else will spend them for you, leaving you with nothing left for your own main course.”

Madeline Thompson

The Final Course: Tasting the Rewards of Your Hard Work

The Final Course: Tasting the Rewards of Your Hard Work

At the end of the day, setting boundaries isn’t about building walls to keep people out; it’s about creating a recipe for a life that actually tastes good. We’ve talked about spotting those bitter aftertastes of boundary violations and how to carefully prep your emotional ingredients so you don’t end up burnt out. Just like managing a high-stakes investment portfolio or balancing a complex reduction sauce, protecting your time and energy requires consistent, intentional effort. You can’t expect a five-star life if you’re letting everyone else raid your pantry and use up your most precious resources without asking.

I know it can feel a little intimidating to say “no” or to step back when the pressure is on, but remember that you are the executive chef of your own life. If you don’t set the terms for how you are treated, you’re essentially letting someone else write your menu, and they probably won’t include anything you actually enjoy. Treat your boundaries like your most valuable capital—invest them wisely, protect them fiercely, and don’t be afraid to adjust the seasoning as you grow. You deserve a life that is as rich, balanced, and fulfilling as the perfect gourmet meal. Now, go out there and start plating something amazing!

Frequently Asked Questions

What do I do if setting a boundary feels like I'm "ruining the recipe" or causing conflict with someone I love?

Listen, I get it. Setting a boundary can feel like you’re accidentally dropping salt into a delicate soufflé—suddenly, everything feels tense and ruined. But here’s the truth: a recipe without structure is just a mess. If you don’t set limits, you’ll eventually burn out, and that’s when the real “conflict” happens. Think of boundaries as the seasoning that actually preserves the relationship’s flavor long-term, rather than letting it spoil from resentment.

How can I tell the difference between a healthy boundary and just being emotionally unavailable or stingy with my time?

Think of it like seasoning: a boundary is a pinch of salt that enhances the dish, while being emotionally unavailable is like refusing to even turn on the stove. A healthy boundary protects your energy so you can show up fully later; it’s a strategic pause for replenishment. Being stingy or unavailable, however, is just leaving your guests hungry. If your “limit” prevents any genuine connection or growth, you aren’t setting a boundary—you’re just closing the kitchen.

Is there a way to communicate these limits at work without looking like I'm not a "team player" or losing my professional momentum?

Think of it like managing a kitchen during a rush: you don’t stop cooking, you just refine the workflow. To stay a “team player,” frame your boundaries as resource management. Instead of saying “I can’t do this,” try, “I want to ensure this project gets the high-quality attention it deserves; if I take this on now, my current priorities will suffer.” You’re not refusing the work; you’re protecting the quality of the final dish.

Posted on

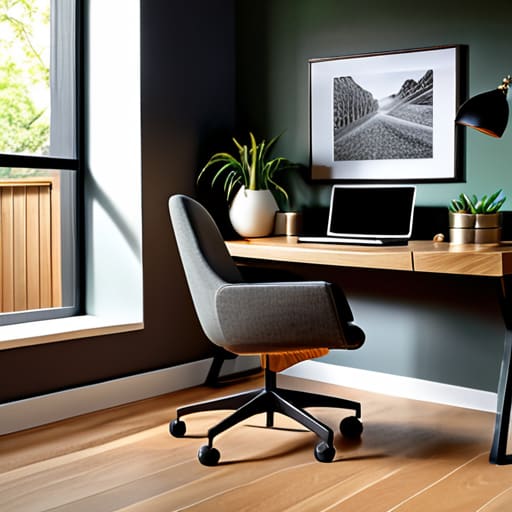
How to Set Up a Home Office You’ll Love Working in

Creative home office setup ideas.

I used to think that a high-performance career required a desk that looked like it belonged in a Silicon Valley tech mogul’s penthouse—all sleek glass, expensive ergonomic chairs, and minimalist decor that cost more than my first car. But let’s be real: most of those Pinterest-perfect home office setup ideas are just expensive fluff that won’t actually help you hit your quarterly targets. I learned that the hard way during my transition from Wall Street to the food truck life; I spent way too much time chasing the aesthetic of productivity instead of building a workspace that actually functioned for my brain and my budget.

I’m not here to sell you on a thousand-dollar lamp or a designer chair that’s more style than substance. Instead, I want to help you build a workspace that works as hard as you do, treating your environment like a well-balanced recipe where every element serves a specific purpose. I’m going to share my no-nonsense, experience-based guide to crafting a setup that maximizes your focus and protects your bottom line. We’re going to prioritize function over fashion so you can stop fighting your furniture and start crushing your career goals.

Table of Contents

Small Space Home Office Solutions for Tiny Kitchen Style Nooks

Small Space Home Office Solutions for Tiny Kitchen Style Nooks

If you’re working out of a corner of your studio apartment or that awkward sliver of space between your pantry and the living room, don’t panic. Think of it like a tiny, high-end bistro kitchen: you don’t need massive square footage to produce five-star results; you just need to maximize your mise en place. When you’re dealing with limited real estate, small space home office solutions are all about verticality and intentionality. Instead of a bulky executive desk that eats up your floor plan like a heavy roux, try a wall-mounted floating desk or a slim console table. It keeps your footprint light and your “kitchen” floor clear for movement.

To keep your focus from boiling over, you’ll want to invest in minimalist desk organization to prevent clutter from stealing your mental bandwidth. A single, well-placed tray for your pens and a sleek cable management box can make a cramped nook feel like a curated workspace rather than a junk drawer. Just remember, even in a tight spot, don’t skimp on the basics—a decent chair is the foundation of your entire setup, much like a high-quality chef’s knife is to a professional kitchen.

Savoring Comfort With Ergonomic Desk Chair Benefits

Savoring Comfort With Ergonomic Desk Chair Benefits

Think of your desk chair as the foundation of your entire professional kitchen. You wouldn’t try to prep a five-course meal standing on a wobbly, uneven stool, right? The same logic applies to your workday. Investing in the ergonomic desk chair benefits isn’t just about luxury; it’s about protecting your most valuable asset—yourself. When your chair provides proper lumbar support and adjusts to your body, you aren’t just sitting; you’re setting the stage for long-term sustainability.

If you’re feeling that mid-afternoon slump, it might not be a lack of caffeine, but rather a lack of physical alignment. A poorly designed seat is like a recipe with too much salt—it ruins the entire experience. By prioritizing an ergonomic setup, you’re essentially investing in your body’s long-term dividends. It keeps the physical “overhead” of back pain low, allowing you to focus entirely on your output. Just like a high-quality chef’s knife makes prep work seamless, a great chair ensures that your focus remains on the task at hand rather than the discomfort in your lower back.

The Secret Sauce: 5 Ingredients for a High-Yield Workspace

  • Lighting is your mise en place; just like you wouldn’t try to prep a delicate souffle in a dark kitchen, you can’t crush a spreadsheet in a dim room. Layer your light with a mix of natural sun and a warm desk lamp to prevent that mid-afternoon mental burnout.
  • Invest in cable management like you would a high-quality chef’s knife—it’s a tool that keeps everything organized and prevents a tangled mess from ruining your flow. Use clips or sleeves to keep those cords from looking like a spilled bowl of spaghetti.
  • Don’t forget the “side dishes” of productivity, which are your desktop accessories. A dedicated tray for pens or a stylish coaster for your coffee keeps your primary workspace clear, much like how a clean workstation allows a chef to work with precision and speed.
  • Treat your digital workspace like a pantry audit; if your computer desktop is cluttered with random files, your mental bandwidth is being wasted on “searching for ingredients.” Organize your folders and clear your desktop daily to ensure you can find exactly what you need when the pressure is on.
  • Personalize your space with “flavorful” accents that boost your mood, whether it’s a small succulent or a framed photo. Just as a pinch of salt enhances a dish, these small, intentional details add depth to your environment and make the “grind” feel a lot more like a passion project.

The Secret Sauce for Your Workspace Success

Think of your office setup as your primary overhead; investing in quality ergonomic tools isn’t just a luxury, it’s a way to prevent the “physical debt” of back pain and burnout later on.

Just like a cluttered pantry makes cooking a nightmare, a disorganized desk drains your mental capital—keep your essentials close and your clutter out to maintain a high ROI on your focus.

Treat your workspace like a balanced recipe where lighting, comfort, and organization are the key ingredients; when they’re in harmony, your productivity will taste a whole lot sweeter.

Investing in Your Workspace Infrastructure

“Think of your home office setup like a high-end kitchen: you wouldn’t try to prep a five-course meal on a cluttered, broken countertop, so don’t expect to produce your best professional work in a space that lacks the right tools and flow.”

Madeline Thompson

The Final Course: Serving Up Your Best Work

The Final Course: Serving Up Your Best Work

At the end of the day, building your perfect home office is a lot like prepping a complex reduction sauce; it requires patience, the right tools, and a bit of fine-tuning to get that perfect consistency. We’ve talked about maximizing those tiny kitchen-style nooks so you aren’t working in a cramped corner, and we’ve emphasized why investing in a high-quality ergonomic chair is the essential foundation for your physical well-being. Just as you wouldn’t dream of cooking a five-star meal on a broken stove, you shouldn’t expect top-tier professional output from a workspace that doesn’t support your needs. When you align your environment with your goals, you’re essentially investing in your own human capital, ensuring that every hour spent at your desk is as efficient as it is comfortable.

As you start implementing these changes, remember that your workspace is a living project that can evolve alongside your career. Don’t feel like you have to buy everything at once—treat it like a gradual recipe development rather than a single, overwhelming order. Start with the basics, master your flow, and then add those extra “seasonings” like better lighting or decor as your budget allows. You deserve a space that fuels your ambition and makes your daily grind feel less like a chore and more like a delightful feast for your productivity. Now, go forth and build a setup that tastes—and works—absolutely incredible!

Frequently Asked Questions

How can I balance my budget when upgrading my setup without sacrificing the quality of my ergonomic gear?

Think of this like upgrading your kitchen equipment: you don’t buy the professional-grade stand mixer if you’re only making toast, but you do invest in a good chef’s knife. Apply that same logic here. Don’t skimp on the “staples”—your chair and desk—but save money on the “garnish,” like fancy decor or high-end lighting. Buy refurbished high-quality gear or look for sales. It’s all about prioritizing the ingredients that impact your long-term health.

What are some budget-friendly ways to add "flavor" and personality to my workspace so it doesn't feel like a sterile corporate cubicle?

Think of your desk like a signature dish—it needs those little pops of seasoning to really stand out! You don’t need a massive capital investment to ditch that sterile cubicle vibe. Start with “low-cost garnishes”: a vibrant succulent, a colorful mug for your morning brew, or even a framed photo that sparks joy. These small, high-yield additions provide a massive return on your emotional well-being without breaking your budget.

If I'm working from a multi-purpose space, how can I "clean up" my office setup at the end of the day to mentally switch from work mode to relaxation mode?

Think of your workspace like a busy kitchen line: you wouldn’t dream of leaving a mess for the next shift, right? To “close the kitchen” on your workday, implement a strict closing ritual. Tuck your laptop away, clear the scattered notes, and wipe down your desk. By physically removing the “ingredients” of work from your sight, you’re signaling to your brain that the shift is over and it’s time to savor the evening.

Posted on

Why Spending Time in Nature Is So Good for You

Understanding the benefits of time in nature.

I remember sitting in my cubicle on Wall Street, staring at a spreadsheet that felt like it was bleeding red ink, feeling my brain turn into absolute mush. I was trying to “optimize” my productivity with expensive ergonomic chairs and high-end caffeine, but my mental capital was completely bankrupt. It wasn’t until I took a weekend trip to a tiny cabin in the Midwest—no Wi-Fi, just the scent of pine and damp earth—that I realized I’d been overlooking the most cost-effective wellness hack available. We often treat self-care like a luxury line item we can’t afford, but the true benefits of time in nature don’t require a premium subscription or a fancy retreat; they just require you to step outside.

I’m not here to sell you on some mystical, “woo-woo” idea that a walk in the park will solve all your life problems. Instead, I want to treat your mental clarity like a well-managed portfolio. In this post, I’m going to break down how reconnecting with the outdoors acts as a vital reinvestment in your focus and emotional resilience. I’ll give you the no-nonsense, experience-based truth on how to use the natural world to recharge your internal reserves without breaking the bank.

Table of Contents

Nature Therapy for Stress Relief a Recipe for Calm

Nature Therapy for Stress Relief a Recipe for Calm

Think of your stress levels like a pot of sauce that’s been left on high heat for way too long—it’s thickening, it’s sticking to the bottom, and if you don’t turn down the flame, you’re going to have a mess on your hands. In the high-stakes world of finance, I used to treat my brain like a pressure cooker, thinking that constant grinding was the only way to produce results. But I quickly learned that you can’t create anything high-quality when your internal resources are completely depleted. This is where nature therapy for stress relief comes into play; it acts like a gentle simmer, allowing your nervous system to settle without the risk of burning out.

Stepping into a park or a dense forest isn’t just a way to kill time; it’s a strategic reinvestment in your most valuable asset: your peace of mind. There is actual science behind the mental health benefits of forest bathing, suggesting that immersing yourself in greenery can significantly lower your physiological “debt.” By simply being present among the trees, you’re effectively reducing cortisol through outdoor activities, which is much more efficient than trying to “buy” relaxation through expensive spa days. It’s about finding that perfect balance between high performance and essential recovery.

Reducing Cortisol Through Outdoor Activities for Better Balance

Reducing Cortisol Through Outdoor Activities for Better Balance

Think of your cortisol levels like an overactive kitchen timer that won’t stop ringing; if you don’t address it, eventually, something is going to burn. When we’re stuck in a high-pressure cycle of deadlines and digital noise, our bodies stay in a constant state of “high heat.” However, research shows that reducing cortisol through outdoor activities acts like a natural pressure release valve. Whether it’s a brisk walk through a park or just sitting under a canopy of trees, stepping away from the screen allows your physiological “burn rate” to stabilize, bringing your internal economy back into a healthy surplus.

I’ve found that leaning into the mental health benefits of forest bathing is much like diversifying a portfolio—it spreads the risk of burnout. Instead of putting all your emotional capital into a stressful workday, you’re investing in a biological reset. By immersing yourself in these green environments, you aren’t just taking a break; you are actively recalibrating your nervous system. It’s about finding that perfectly balanced recipe between high-octane productivity and the restorative stillness that only the great outdoors can provide.

Investing in Your Green Assets: 5 Ways to Diversify Your Wellness Portfolio

  • Treat your outdoor time like a high-yield savings account; even a fifteen-minute “deposit” of sunlight and fresh air during your lunch break can pay massive dividends in mental clarity by the afternoon.
  • Practice “Sensory Savoring” to prevent burnout; just like you wouldn’t rush a reduction sauce, don’t rush your walk. Slow down and actually taste the environment—the scent of pine or the sound of a stream—to maximize your emotional ROI.
  • Audit your digital distractions; think of your smartphone as an unnecessary additive that ruins the flavor of the moment. When you’re in nature, leave the notifications behind to ensure you’re getting the pure, unadulterated benefits of the scenery.
  • Schedule your nature breaks like non-negotiable board meetings; if you wait for “free time” to appear, you’ll find your schedule is already overleveraged. Put a hike or a park stroll on your calendar to ensure your mental capital stays solvent.
  • Use the “Micro-Dosing” technique for busy seasons; if you can’t make it to a national park, even a few minutes staring at a potted plant or a local garden can act as a quick liquidity injection for your depleted energy levels.

The Secret Sauce: My Top 3 Takeaways for Investing in Your Natural Capital

Treat nature like a high-yield savings account; even a small daily “deposit” of fresh air can compound into massive mental wellness over time.

Don’t wait for a total market crash (or a burnout meltdown) to seek refuge outdoors—regularly scheduled “green breaks” are the best way to hedge against stress.

Think of outdoor activity as the ultimate diversification strategy for your health; it balances your physical energy with the mental clarity you need to perform at your peak.

Investing in Your Mental Capital

“Think of a long walk through the woods like diversifying your portfolio; you’re stepping away from the volatile market of daily stress to reinvest your energy into a high-yield environment of peace and clarity.”

Madeline Thompson

The Final Course: Investing in Your Natural Capital

The Final Course: Investing in Your Natural Capital

At the end of the day, stepping outside isn’t just a way to kill time; it’s a strategic move for your mental and physical bottom line. We’ve looked at how nature acts as a natural stabilizer for your cortisol levels and serves as a much-needed recipe for stress relief. Just like you wouldn’t ignore a massive deficit in your quarterly budget, you shouldn’t ignore the growing debt of burnout that accumulates when you’re stuck behind a desk all day. By integrating even small doses of greenery into your routine, you are effectively diversifying your wellness portfolio and ensuring you have the emotional reserves to handle whatever life throws your way.

So, here is my challenge to you: don’t treat nature like a luxury ingredient you only use on special occasions. Instead, make it a staple in your daily life. Whether it’s a brisk walk through the local park or just sitting on your porch with a coffee, think of these moments as a high-yield investment in your own longevity and happiness. You wouldn’t skip the seasoning in a gourmet dish, so don’t skip the fresh air in your life. Go out there, breathe deep, and start reaping the dividends of a life lived in balance.

Frequently Asked Questions

If I’m short on time and can’t make it to a full hiking trip, what are some "micro-investments" in nature that can still yield a high mental return?

Think of these as your “micro-investments”—small, low-cost inputs that yield massive dividends for your mental capital. You don’t need a weekend trek to see a return. Try a “sensory snack”: five minutes of mindful breathing in your backyard or even just tending to a windowsill herb garden. Even a quick walk around the block without your phone acts like a high-yield savings account for your focus, replenishing your mental reserves when you’re short on time.

How can I balance my desire to be active outdoors with the need to actually decompress and avoid burnout?

Think of your energy like a kitchen budget: if you overspend on high-intensity “activities,” you’ll end up in a deficit. To avoid burnout, don’t treat every hike like a high-stakes Wall Street deadline. Mix in some “low-cost” outdoor time—like sitting in a park with a book—to decompress. It’s about diversifying your movement portfolio so you aren’t constantly overleveraged, ensuring your outdoor time nourishes you rather than just adding another chore to the list.

Is there a way to incorporate nature into my daily routine without it feeling like another chore on my overbooked professional calendar?

Think of nature like a garnish—you don’t need a five-course meal to feel the impact; sometimes a sprig of fresh basil changes everything. Don’t schedule “Nature Time” like a high-stakes board meeting. Instead, micro-dose it. Take your morning coffee on the porch, or swap one indoor call for a walking meeting in the park. It’s about small, low-cost investments of time that yield massive dividends for your mental headspace.

Posted on

How to Prepare Your Finances for Tough Times

How to prepare financially for hard times.

I still remember the smell of scorched garlic and the sudden, hollow pit in my stomach when my first major client pulled their funding right in the middle of a busy lunch rush. I was working my tail off, trying to balance the books while my kitchen felt like it was spiraling out of control, and I realized that no amount of “hustle” could fix a lack of preparation. Most gurus will tell you that you need a complex, high-yield investment strategy to survive a downturn, but honestly? That’s just expensive noise. When it comes to learning how to prepare financially for hard times, you don’t need a PhD in economics; you need a solid mise en place for your bank account.

I’m not here to sell you on some “get rich quick” scheme or a complicated spreadsheet that requires a math degree to navigate. Instead, I’m going to share the raw, no-nonsense tactics I used to transition from the high-stress world of Wall Street to the unpredictable life of a food entrepreneur. We are going to focus on building a financial safety net that actually holds weight, treating your budget like a well-stocked pantry so you’re never left hungry when the economy gets salty.

Table of Contents

Building a Financial Cushion With Emergency Fund Building Strategies

Building a Financial Cushion With Emergency Fund Building Strategies.

Think of building an emergency fund like prepping your mise en place; it’s the essential groundwork that lets you stay calm and composed when things get heated in the kitchen. You wouldn’t dream of starting a complex reduction without having your onions diced and your stock ready, so don’t try to navigate a recession without a dedicated stash of liquid cash. When it comes to emergency fund building strategies, the secret isn’t about one massive windfall; it’s about the consistent, small additions that eventually create a safety net.

I like to treat my savings goal like a slow-cooked stew—it takes time and patience, but the results are incredibly nourishing. Start by auditing your current spending to see where you can find extra “ingredients” for your fund. Often, reducing monthly expenses by trimming those forgotten subscription services is the easiest way to find extra capital without feeling the pinch. By automating a small transfer to a high-yield savings account every payday, you’re essentially setting your financial stove to a low simmer, steadily building a cushion that will protect you when the unexpected hunger pangs of life inevitably strike.

Savoring Savings by Reducing Monthly Expenses Like a Pro

Savoring Savings by Reducing Monthly Expenses Like a Pro

Now, let’s talk about trimming the fat. In the culinary world, if a sauce is too heavy or a dish is cluttered with unnecessary ingredients, it masks the true flavors. Your budget works the exact same way. Reducing monthly expenses isn’t about deprivation; it’s about auditing your “financial pantry” to ensure you aren’t paying for ingredients you never actually use. I’m talking about those ghost subscriptions that haunt your bank statement like a burnt roux—once you identify them, scrape them out!

Think of this process as refining your recipe for stability. When you audit your recurring costs—from streaming services to that premium gym membership you haven’t touched since New Year’s—you aren’t just saving pennies; you are reallocating your resources toward more meaningful goals. Every dollar you claw back from a mindless subscription is another dollar that can go directly into your building a financial cushion fund. It’s all about precision. By tightening up your monthly overhead now, you’re ensuring that when the economic heat rises, your personal kitchen remains calm, controlled, and most importantly, profitable.

The Secret Sauce: 5 Ingredients for a Recession-Proof Life

  • Diversify your income streams like a well-balanced spice rack. Relying on just one source of income is like making a stew with only salt—it’s risky and lacks depth. Whether it’s a side hustle, freelance consulting, or even renting out a spare room, having multiple “flavors” of income ensures that if one ingredient runs dry, your whole kitchen doesn’t shut down.
  • Audit your “financial pantry” by reviewing your debt. High-interest debt is like a kitchen fire; if you don’t tackle it immediately, it’ll spread and consume everything you’ve worked for. Focus on paying down those high-interest credit cards first to stop the “burning” of your monthly cash flow.
  • Upskill your professional toolkit to stay relevant. In the culinary world, if you don’t learn new techniques, you get left behind. The same goes for your career. Invest a little time (and maybe a bit of capital) into learning a new software, a certification, or a management skill. It makes you a much more “delicious” candidate if the job market starts getting a little salty.
  • Protect your most valuable assets with the right insurance. Think of insurance as your kitchen’s fire suppression system. You hope you never have to use it, but you’d be a fool not to have it installed. Making sure your health, disability, and even renters/homeowners insurance are up to date prevents a single unexpected accident from wiping out your entire savings.
  • Practice “Financial Mise en Place” by automating your decisions. In a busy kitchen, you don’t wait until the order hits the window to start chopping onions; you prep ahead of time. Set up automatic transfers to your savings or investment accounts the day you get paid. By automating your financial habits, you remove the temptation to “snack” on your capital before it can do its job.

The Secret Sauce: My Top 3 Tips for Financial Resilience

Treat your emergency fund like your mise en place; you wouldn’t start a high-stakes dinner service without your ingredients prepped and ready, so don’t try to navigate a recession without your cash cushion already sliced and diced.

Audit your monthly subscriptions like you’re checking your food costs; if a service isn’t adding flavor or value to your life, cut it out immediately to stop your hard-earned money from leaking out of the kitchen.

Focus on small, consistent wins rather than a massive overhaul; just like building a complex sauce requires patience and layering flavors, building wealth during tough times is about the steady, daily habits that compound over time.

## The Secret Ingredient to Financial Stability

“Think of your financial preparedness like a well-stocked pantry; you don’t wait until you’re starving to start grocery shopping. Building your reserves now ensures that when the economic heat turns up, you have all the ingredients you need to stay composed and keep cooking.”

Madeline Thompson

The Final Course: Serving Up Your Financial Future

The Final Course: Serving Up Your Financial Future.

At the end of the day, prepping for a financial storm isn’t about living a life of deprivation; it’s about strategic preparation. We’ve talked about building that essential emergency fund—your financial mise en place—and trimming those monthly expenses so you aren’t overspending on ingredients you don’t actually need. By tightening your budget and securing your savings now, you are essentially stocking your pantry with high-quality staples. This ensures that when the unexpected “kitchen fire” of an economic downturn hits, you aren’t left scrambling for scraps, but instead have the resources to stay composed and keep your household running smoothly.

I know that looking at your bank statements can sometimes feel as daunting as staring down a complex five-course tasting menu, but remember that every small step counts. You don’t have to master the entire culinary art of finance overnight; you just have to start cooking. Whether you’re saving your first hundred dollars or finally canceling that subscription you never use, you are taking the reins of your own life. Stay consistent, stay hungry for growth, and trust that you have the recipe for success right in your hands. Let’s turn these financial hurdles into your most delicious victory yet!

Frequently Asked Questions

I've managed to trim my monthly food budget, but how do I decide which "non-negotiable" expenses are actually safe to cut when things get really tight?

Think of your budget like a recipe: some ingredients are essential for the structure, while others are just garnish. To find your “non-negotiables,” I use the “Utility Test.” If cutting an expense compromises your ability to earn money (like your car or internet) or your basic health (like insurance), it’s a core ingredient. Everything else? That’s the truffle oil—delicious, but we can skip it when the kitchen gets hot.

If I'm already struggling to make ends meet, how can I realistically start building an emergency fund without feeling like I'm just throwing money into a void?

I totally hear you—it feels like trying to whip a soufflé when you’re already running low on eggs. When things are tight, don’t aim for a five-course feast; just focus on the garnishes. Start with “micro-savings.” Even $5 a week tucked into a separate account is progress. Think of it as prepping your mise en place; you’re just gathering small ingredients now so that when a real crisis hits, you aren’t starting from zero.

How do I balance prepping for a financial "storm" with still enjoying my life today—I don't want to live on bread and water just to see a higher number in my savings account!

Think of it like a balanced recipe: if you only use salt, the dish is ruined; if you use only sugar, it’s cloying. You need both. I call this the “Budgeting Mise en Place.” Set a fixed “joy fund” every month—a small, non-negotiable amount for that fancy latte or weekend outing. By automating your savings first, you’re prepping your ingredients so that when you do spend, you can actually savor the flavor without the bitter aftertaste of guilt.

Posted on

Diy Headboard Ideas for Every Style and Budget

Creative DIY headboard ideas for every style.

We’ve all been there: you’ve finally balanced your budget, your career is on an upward trajectory, and your savings account is looking healthier than a farm-to-table salad. But then you walk into your bedroom, stare at that plain, uninspired wall behind your bed, and realize your sanctuary is missing its centerpiece. Investing in high-end furniture can feel like a massive capital expenditure that drains your liquidity, but you don’t need a Wall Street budget to achieve a luxury aesthetic. Exploring diy headboard ideas is actually a lot like perfecting a complex reduction sauce; it requires the right ingredients, a bit of patience, and a strategic approach to ensure you get a high return on your creative investment.

In the following guide, I’m going to walk you through five distinct ways to upgrade your space without breaking the bank. We’ll be looking at projects that range from “quick-prep” snacks to more involved “slow-cooked” renovations, ensuring there is a style to fit your specific financial appetite. By the end of this list, you’ll have the blueprint to transform your bedroom into a high-value retreat that feels both professionally curated and deeply personal.

Table of Contents

The Upholstered Classic: Investing in Texture

The Upholstered Classic: Investing in Texture headboard.

Think of an upholstered headboard as the signature reduction of your bedroom decor. Just as a chef uses a rich, velvety sauce to elevate a simple protein, adding fabric to your headboard provides a layer of luxury that makes the entire room feel more expensive than it actually is. You can start with a simple wooden frame and use foam and a beautiful textile to create something that looks like it cost a fortune at a high-end boutique.

Reclaimed Wood: The Artisanal Sourdough Approach

Reclaimed Wood: The Artisanal Sourdough Approach.

There is something incredibly soul-satisfying about using reclaimed wood, much like the way a baker finds magic in a fermented, slow-rising sourdough starter. Using weathered planks or pallet wood gives your bed a rustic, organic character that you simply cannot buy off a shelf at a big-box retailer. It’s about taking something that might have been overlooked and transforming it into something valuable through a bit of patience and craftsmanship.

The Minimalist Slats: Streamlining Your Visual Budget

The Minimalist Slats: Streamlining Your Visual Budget.

If your personal style leans more toward a clean, modern aesthetic, then a simple wooden slat headboard is your best friend. Think of this as the mise en place of interior design—everything is organized, intentional, and stripped of all unnecessary clutter. It’s a way to add architectural interest to your room without overcomplicating the “recipe” of your space, keeping the focus on clean lines and calm vibes.

Painted Geometric Shapes: A Splash of Visual Capital

Sometimes, you don’t even need to build something physical to make a massive impact; you just need a little bit of color and some clever geometry. I like to think of a painted headboard as the seasoning of a dish—a little goes a long way, but if you use it correctly, it changes the entire flavor profile of the room. Using painter’s tape to create bold, geometric shapes directly on the wall behind your bed is a way to “fake” a headboard with incredible efficiency.

The Vintage Mirror Frame: Reflecting Your Best Assets

If you want to add a sense of depth and light to your room, consider repurposing an old, ornate mirror frame as a headboard. This is the interior design equivalent of a perfectly balanced fusion dish—it takes something from one tradition and gives it a completely new, unexpected purpose in your modern life. The glass or the empty frame adds a sense of grandeur and “old money” elegance that can make even a small room feel much more expansive.

The Final Course: Investing in Your Sanctuary

Treat your DIY headboard like a high-yield investment; by spending a little time and effort now, you’re adding long-term aesthetic value to your home without the massive “retail markup” cost.

Don’t overcomplicate the recipe—whether you’re using reclaimed wood or fabric, the best results come from choosing quality materials that fit your specific budget and style.

Think of your bedroom as your personal headquarters; investing in a space that feels curated and intentional is the ultimate way to recharge your mental capital for the work week ahead.

The ROI of a Restful Night

“Think of a DIY headboard like a well-diversified portfolio; you don’t need to spend a fortune to see a massive return. Whether you’re using reclaimed wood or elegant upholstery, you’re essentially investing in the ‘interest’ of your daily well-being—and trust me, the dividends of a beautiful, cozy bedroom are worth every penny of effort.”

Madeline Thompson

Serving Up Your Final Design

At the end of the day, choosing the right DIY headboard is a lot like balancing a complex recipe; you have to weigh the cost of your ingredients against the final flavor profile of your room. Whether you decided to go with the high-end feel of an upholstered fabric piece or the budget-friendly, rustic charm of reclaimed wood, you’ve successfully avoided the “inflation” of retail prices by investing your own time and creativity instead. Each of these five projects represents a different way to diversify your home decor portfolio, ensuring that your bedroom isn’t just a place to sleep, but a high-value asset that reflects your personal brand and style.

As you pick up your tools and start prepping your workspace, remember that the most important ingredient in any successful project is your own confidence. Just like managing a budget or perfecting a sourdough starter, the first attempt might feel a little messy, but that’s just part of the learning curve. Don’t be afraid to experiment and adjust your “seasoning” as you go. I truly believe that when you take control of your environment, you are mastering your personal economy one room at a time. Now, go out there and create something absolutely delicious for your home!

Frequently Asked Questions

How can I make sure my DIY headboard is sturdy enough so it doesn't feel like a "bad investment" when I lean against it?

Think of your headboard’s stability like the foundation of a solid business plan—if the base is shaky, the whole venture collapses. To avoid a “bad investment,” don’t skimp on the hardware. Use heavy-duty L-brackets to secure the frame to the wall and ensure you’re using high-quality wood screws, not cheap drywall ones. A sturdy build ensures long-term dividends of comfort, so you can lean back without worrying about a sudden market crash!

What are the most budget-friendly materials I can use to get a high-end, luxury look without breaking my savings?

Think of this like finding high-quality ingredients on a budget—you don’t need a truffle budget to create a five-star experience. For that luxury feel, I’m all about velvet or linen-look fabrics; they add instant texture and “richness” to a room. Pair those with some reclaimed wood or even high-quality plywood sanded smooth and painted, and you’ve got a designer look. It’s all about the prep work and choosing materials that offer the highest ROI for your aesthetic.

If I'm renting, are there any non-permanent DIY headboard ideas that won't cost me my security deposit?

Listen, I’ve been there—trying to spice up a rental without losing your security deposit is like trying to make a gourmet sauce without any salt; it feels restrictive! Think of it as “low-stakes investing.” Lean into lightweight options like peel-and-stick fabric panels or even a large, stunning tapestry. They’re high-impact, low-cost, and most importantly, they leave zero trace behind. It’s all about maximizing your aesthetic ROI without the permanent overhead!

Posted on

How to Keep Your Laptop From Overheating

Tips on how to keep your laptop cool.

I remember sitting in my old cubicle on Wall Street, staring at a spreadsheet that refused to load while my laptop fan started screaming like a pressure cooker about to blow. It wasn’t just the heat; it was the sheer anxiety of watching my expensive piece of tech struggle to survive a simple afternoon of work. Most people will tell you that you need to drop a hundred bucks on some fancy, glowing cooling pad or a specialized vacuum fan, but let me tell you, that’s just throwing good money after bad. Learning how to keep your laptop cool shouldn’t feel like you’re being forced to buy a luxury kitchen gadget just to boil water; it should be about smart, efficient management.

I’m not here to sell you on overpriced accessories that promise miracles but deliver nothing. Instead, I’m going to give you the no-nonsense blueprint for maintaining your hardware, treating it with the same care you’d give a delicate reduction on a stovetop. We’re going to dive into practical, budget-friendly habits that protect your investment and keep your productivity from melting away. Consider this your financial and technical recipe for a long-lasting, high-performing machine.

Table of Contents

Recognizing the Signs of Laptop Overheating Before They Spoil

Recognizing the Signs of Laptop Overheating Before They Spoil

You know how you can tell when a sauce is about to break just by the way it starts to separate or look a little “off”? Your laptop does the exact same thing. You shouldn’t wait for a total system meltdown to realize something is wrong. One of the most obvious signs of laptop overheating is a sudden, frustrating slowdown. If you’re in the middle of a high-stakes project and your computer starts lagging like it’s stuck in heavy traffic, you might be experiencing preventing laptop thermal throttling in real-time. Essentially, your computer is intentionally slowing itself down to avoid a literal meltdown—kind of like how I’ll slow down my prep work if the kitchen gets too chaotic to handle.

Keep an ear out, too. If your fan starts sounding like a jet engine taking off right next to your ear, that’s a major red flag. It’s the digital equivalent of a stovetop burner running way too high; it’s working overtime just to keep up. I also recommend a little bit of laptop CPU temperature monitoring if you want to be proactive. Catching these heat spikes early is much better than dealing with the “burnt” remains of a fried motherboard later!

Improving Laptop Airflow for a Smooth Delicious Performance

Improving Laptop Airflow for a Smooth Delicious Performance

Think of your laptop’s airflow like the ventilation in a busy professional kitchen; if the air isn’t circulating, things are going to get hot, messy, and potentially dangerous very quickly. One of the simplest ways to start improving laptop airflow is to stop using your device on soft surfaces like blankets or pillows. It might feel cozy, like a warm croissant, but those fabrics act like a heavy lid on a boiling pot, trapping heat and suffocating your vents. Instead, try to keep it on a hard, flat surface to ensure those intake vents can actually breathe.

If you’re a bit more serious about your tech’s “diet,” investing in some best laptop cooling pads can be a total game-changer. Much like using a sous-vide to maintain precise temperatures, a cooling pad provides a consistent, controlled environment that helps preventing laptop thermal throttling during heavy workloads. If you notice the heat is still an issue, it might be time to check your internal “ingredients.” A quick dusting can prevent a buildup of debris that acts like burnt grease on a stovetop, choking your system’s ability to stay chill.

Don't Let Your Tech Sizzle: 5 Pro-Tips to Keep Your Laptop From Overcooking

  • Watch your background processes like you’d watch a reduction on the stove; if you have too many heavy apps running at once, you’re essentially putting too much heat under the pan, so close those unnecessary tabs to lower the temperature.
  • Invest in a cooling pad, which acts just like a high-quality sous vide circulator—it provides a steady, controlled environment that keeps your hardware from hitting those dangerous, “burnt” thermal levels.
  • Clean out the dust from your vents regularly, because a clogged vent is like a greasy kitchen hood; if the air can’t circulate, the heat just sits there and simmers until something breaks.
  • Avoid using your laptop on soft surfaces like blankets or pillows, as that’s the digital equivalent of covering a pan without a lid—it traps all that heat inside instead of letting it escape.
  • Manage your battery settings with the same discipline you’d use for a strict monthly budget; switching to a “power saver” mode can actually reduce the workload on your processor, keeping things much cooler and more efficient.

The Quick Recipe for a Cool Laptop

Treat your airflow like a well-organized pantry; keep those vents clear of dust and clutter so your laptop can breathe easily without getting “congested.”

Monitor your device’s temperature like you would a simmering sauce—don’t wait for it to boil over or crash before you step in to adjust the heat.

Invest in a cooling pad just like you’d invest in high-quality kitchen tools; it’s a small upfront cost that prevents a much more expensive “kitchen disaster” down the road.

“Think of your laptop’s temperature like a reduction sauce on a high flame; if you don’t manage the heat, you’ll end up with something burnt and bitter instead of something smooth and successful. Keeping things cool isn’t just about maintenance—it’s about protecting your most valuable tools so they can keep performing when the pressure is on.”

Madeline Thompson

Serving Up a Cool Finish

Serving Up a Cool Finish for laptops.

At the end of the day, keeping your laptop from overheating is a lot like managing a busy kitchen during the dinner rush—it’s all about maintaining the right environment so nothing burns. We’ve talked about spotting those early warning signs, like the dreaded fan whirring or a sluggish system, and we’ve covered how to optimize your airflow to keep things breezy. Just like you wouldn’t crowd a pan when trying to sear a steak, you can’t crowd your laptop’s vents if you want it to perform its best. By investing just a little bit of preventative maintenance now, you’re essentially protecting your most valuable digital asset from a total meltdown.

Think of your tech like your personal finances; small, consistent habits today prevent massive, expensive headaches tomorrow. You wouldn’t let your savings account overheat with unnecessary spending, so don’t let your hardware suffer from neglect! Taking control of these little details is how you build a foundation for long-term success, whether you’re crushing a spreadsheet or perfecting a new recipe. Stay proactive, keep things cool, and remember that mastering the small stuff is exactly how you prepare for the big wins in life. Now, let’s get back to doing great things!

Frequently Asked Questions

Is it actually worth investing in a fancy cooling pad, or is that just like buying expensive truffle oil for a basic grilled cheese?

Honestly, it’s a bit of both. If you’re running a basic spreadsheet, a cooling pad is definitely that overpriced truffle oil—it looks fancy, but it won’t change the flavor much. However, if you’re doing heavy-duty video editing or gaming, it’s more like investing in a high-end convection oven. It provides the necessary infrastructure to keep your system from crashing under pressure. If your laptop is constantly sweating, the extra capital is a smart investment.

Can using my laptop on my bed or a soft blanket really cause that much long-term damage to the hardware?

Oh, honey, think of your laptop like a slow-cooked brisket; it needs constant, even heat circulation to stay perfect. When you nestle it into a soft blanket, you’re basically smothering it. Those fabrics act like insulation, trapping heat instead of letting it escape. Over time, that constant “overcooking” can fry your internal components. It’s not just a temporary glitch; you’re risking permanent hardware damage. Stick to a hard surface—think of it as a sturdy cutting board for your tech!

How often should I be "cleaning out the kitchen" by dusting my laptop fans to keep everything running smoothly?

Think of dusting your fans like cleaning your prep station: you wouldn’t wait for crumbs to pile up until the whole kitchen is a mess, right? I recommend a quick “deep clean” every three to six months. If you live in a dusty environment or use your laptop heavily for intense tasks, aim for every three months. Staying ahead of the buildup prevents thermal throttling, ensuring your hardware doesn’t go up in smoke!